Help Centre
Workflow & Approvals
Automate business processes, enforce governance controls, and maintain a complete audit trail with PlainSail's workflow engine.
Key points
- Workflows ensure processes follow the correct steps and are never lost
- Steps are assigned to individuals or groups and appear on the dashboard
- Multi-level approval can be enabled per module by a system administrator
- All user operations are recorded in the audit log
- Workflow steps should be completed promptly – do not let them accumulate
- Only Workflow Owners can approve cancellation requests
Overview
PlainSail's workflow engine is one of the platform's most powerful features. It replaces paper-based checklists with structured, auditable digital processes that can never be misplaced or forgotten. Each workflow has a defined start, a set of sequential or branching steps, and a logical conclusion.
As a workflow progresses it gathers information, documentation, and approvals from the required parties – Compliance, Directors, Finance, and others. The progression of every workflow is always visible to authorised personnel, and a complete audit trail is maintained.
Core Concepts
User steps vs. system steps
Every workflow step is either a user step (assigned to a person or group for manual action) or a system step (performed automatically by PlainSail in the background). System steps handle tasks such as document generation, data retrieval, risk calculations, and process routing.
Step assignment
User steps can be assigned to:
- A specific individual – only they are notified, though group members can also see it
- A user group – all group members see the step on their dashboard
- The workflow initiator – the person who launched the workflow
- A role on the entity – e.g. Client Director, Administrator, Manager, or Bookkeeper
- A user specified in a prior step – dynamic assignment based on collected data
Locking
When you open a step, it is locked exclusively to you. Other users will see a message indicating the step is in use. The lock is released when you close or complete the step.
Launching a Workflow
There are two ways to launch a workflow manually:
From an entity
Navigate to the entity and select Workflows from the top menu.
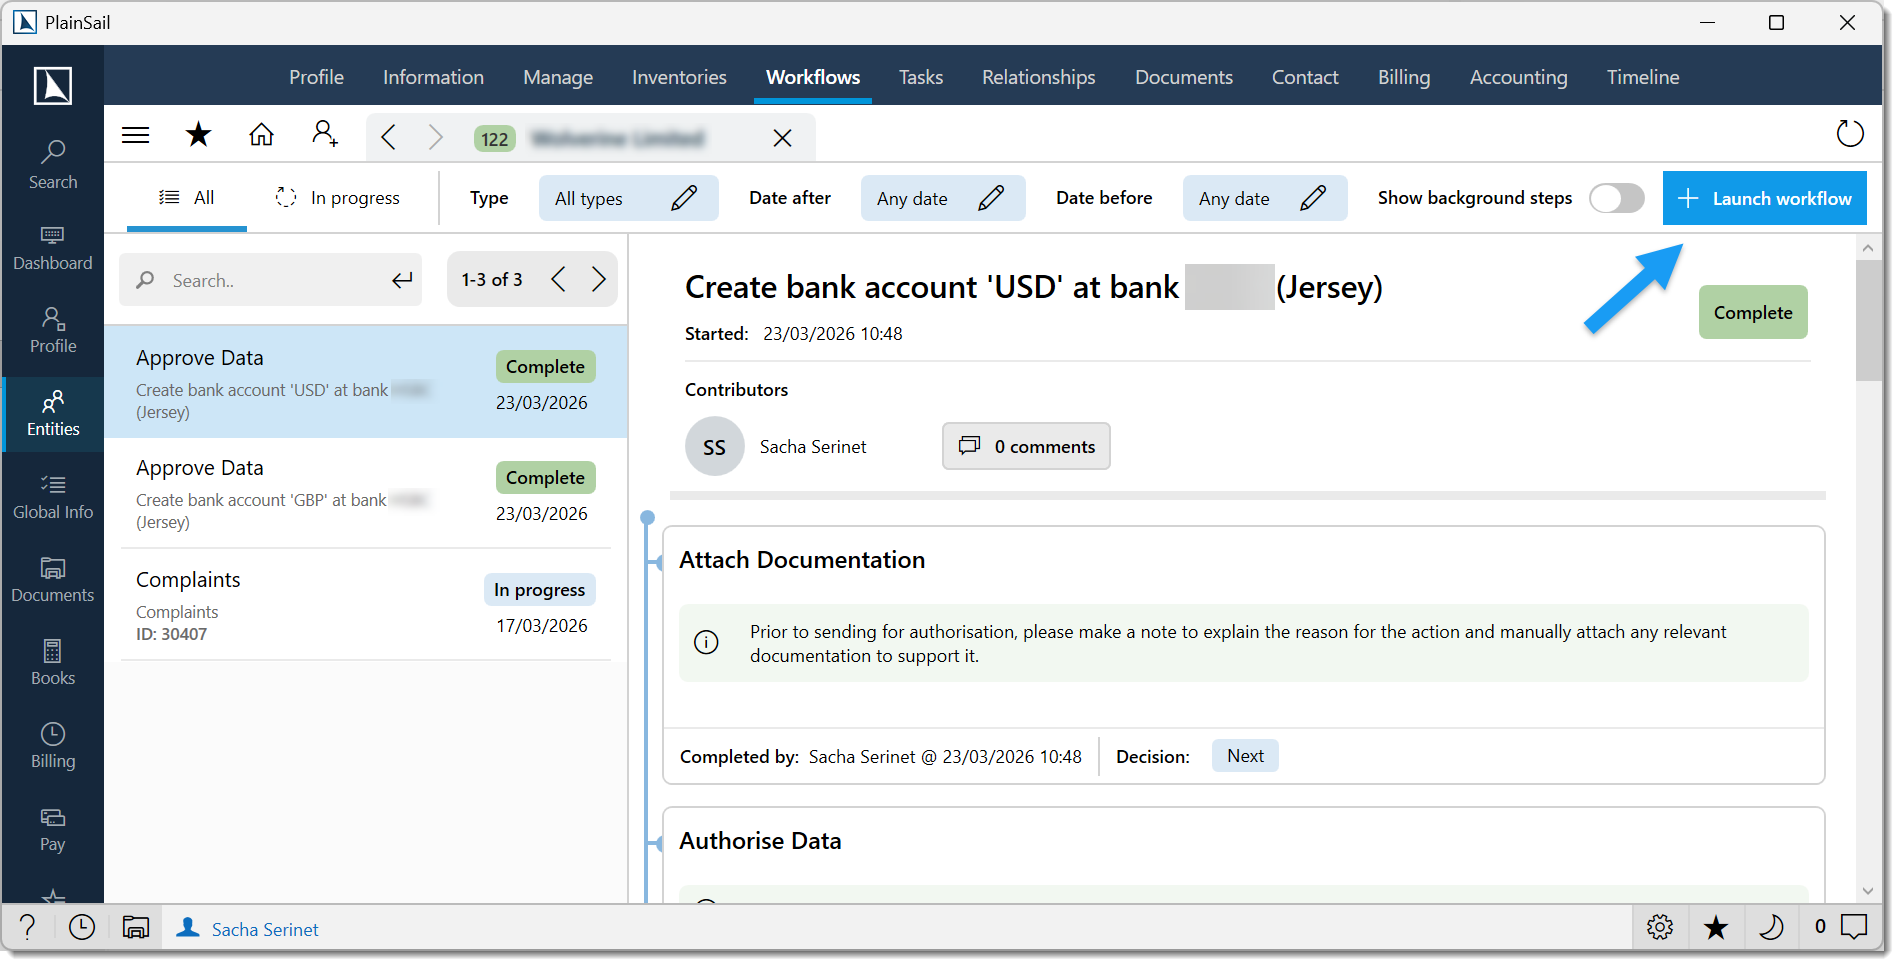
Click + Launch workflow and choose the workflow from the list.
The first step opens immediately – typically asking whether to perform the workflow yourself or assign it to another user.
From the dashboard
Click the + button on the Workflow widget.
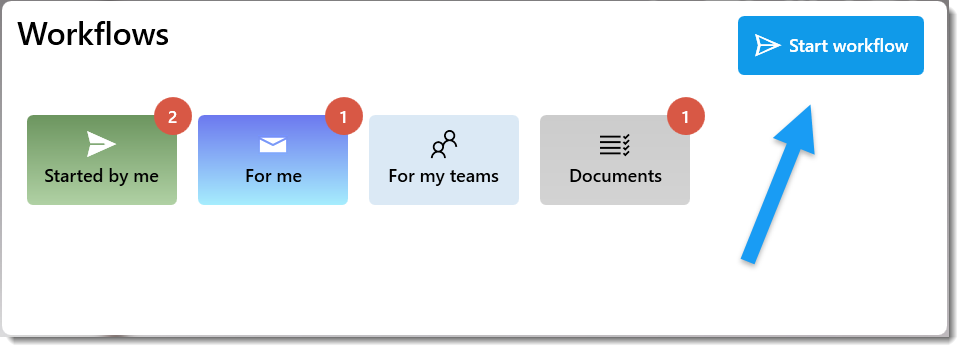
Select the subject entity and then the workflow to launch.
Anatomy of a User Step
Every user step screen contains the following sections:
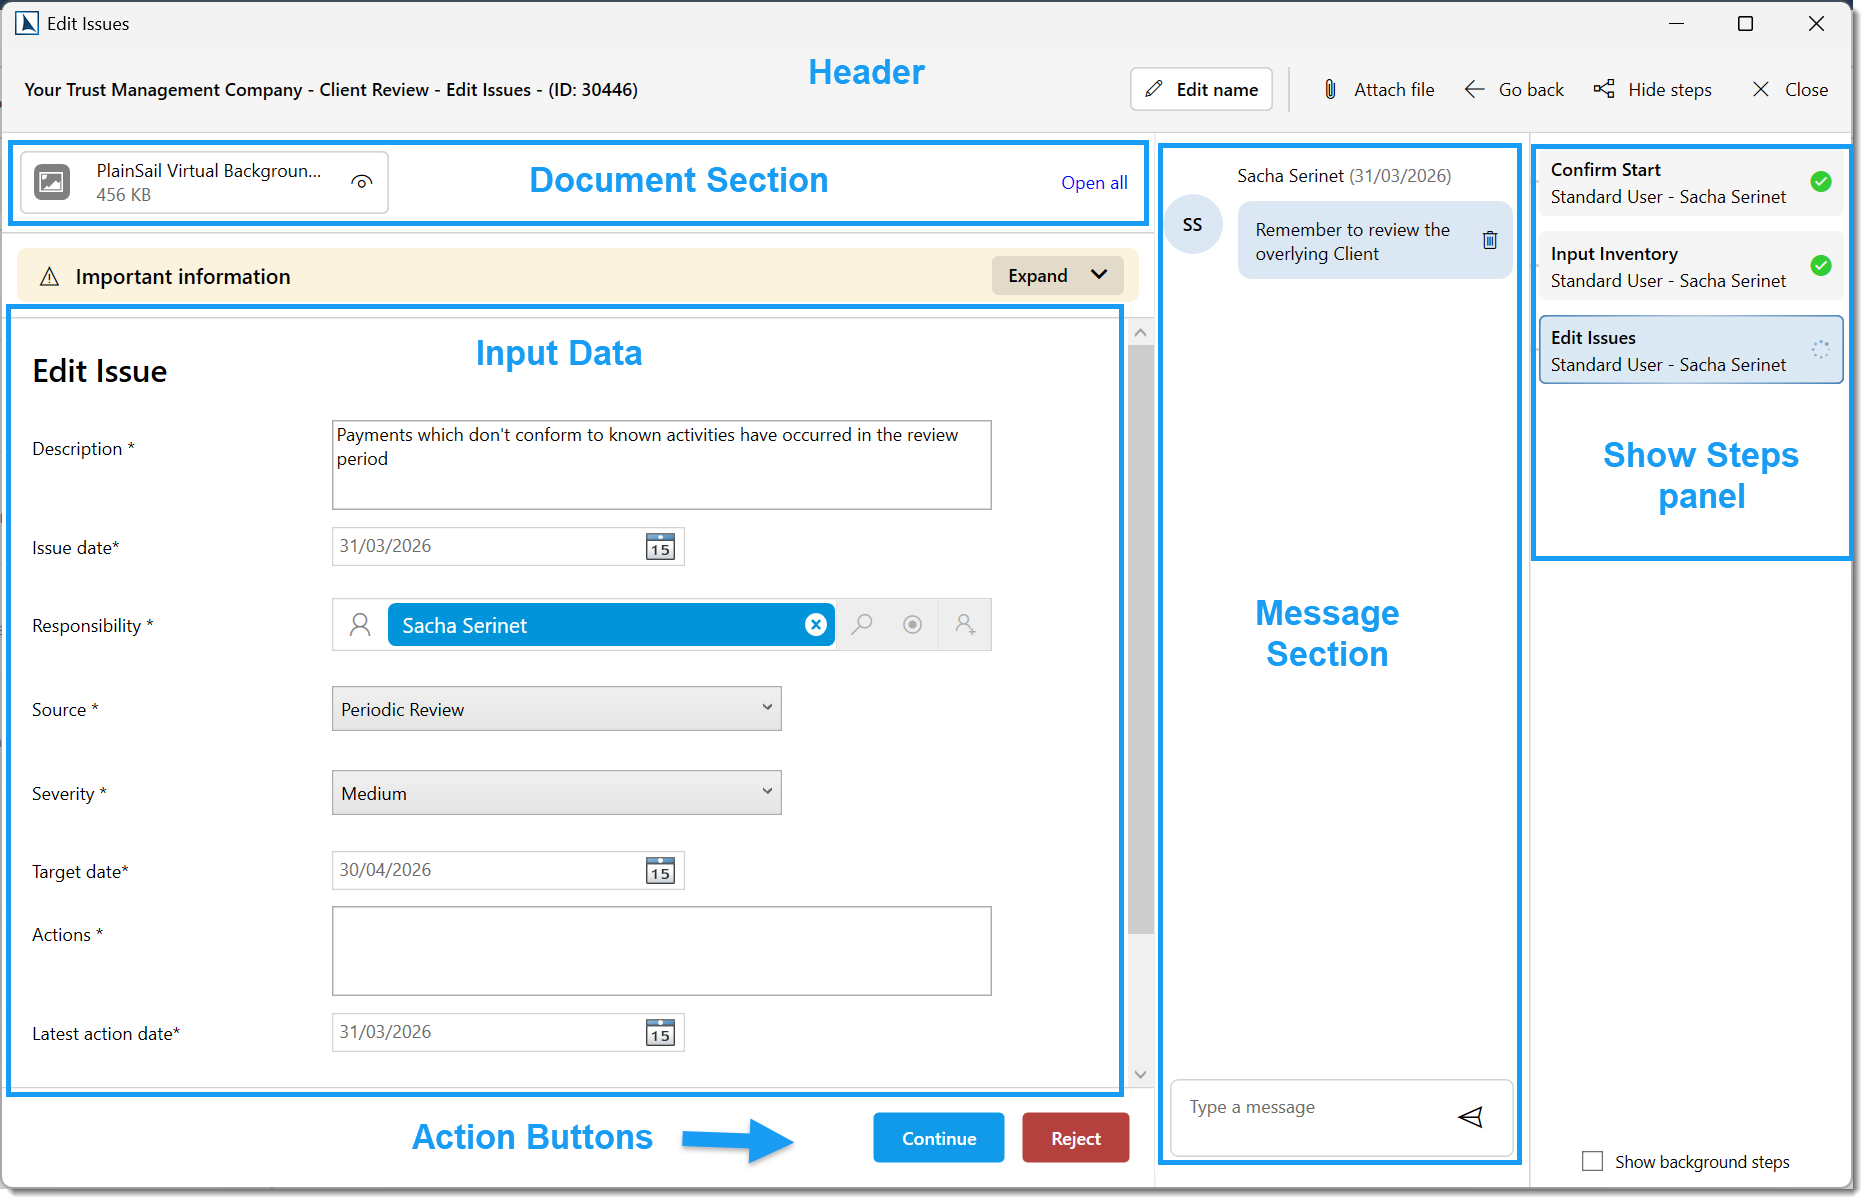
- Header – step name, subject entity, workflow name, plus action buttons: Attach File, Show Steps, Save, Go Back, and Close
- Document section – any documents collected during the workflow, plus files you attach manually
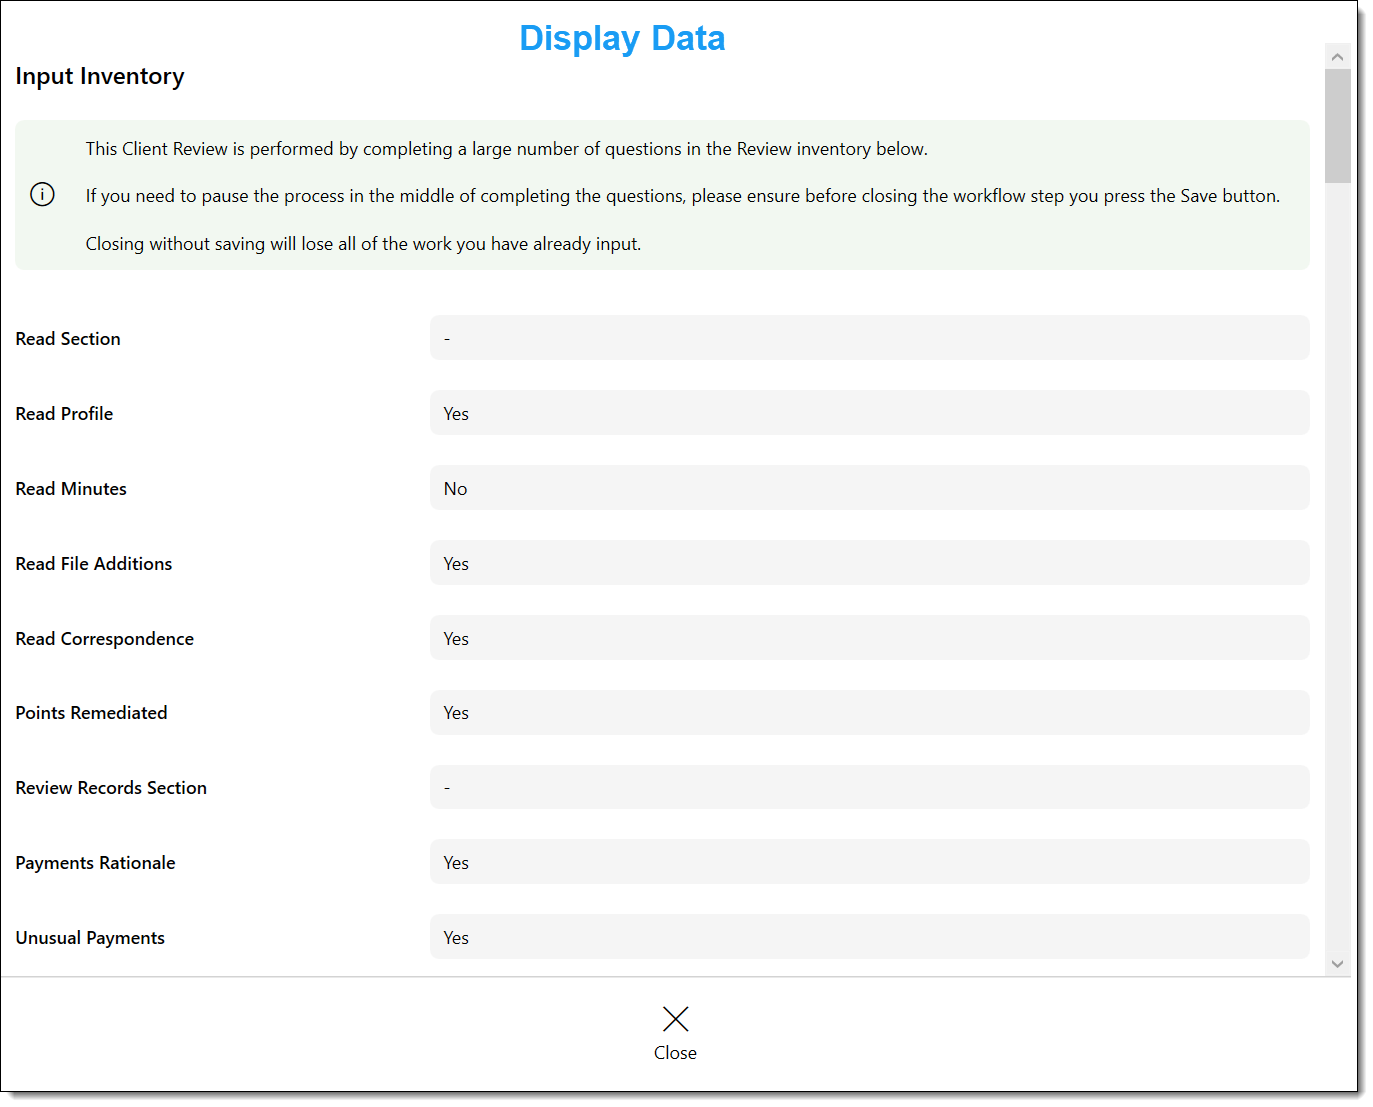
- Display Data – read-only information from prior steps (pale blue background)
- Input Data – fields you must complete before the action buttons become active
- Action Buttons – one or more buttons (Next, Approve, Reject, etc.) that advance the workflow
- Message section – a running log of messages entered by participants across all steps
- Show Steps panel – a sequential history of completed steps; toggle "Show background steps" to include system steps
Dashboard Widget
The Workflow widget on your dashboard lists all open steps assigned to you or to a group of which you are a member.

- Steps assigned specifically to you display your name – you are responsible for completing them
- Steps assigned to a group are visible to all group members – take the initiative unless another member is more appropriate
- Use the Mine Only filter to show only steps assigned directly to you
- Use the Approvals filter to show only four-eyes approval workflows
- The list refreshes automatically every few seconds
Notifications
When a workflow step is assigned to you, PlainSail notifies you in several ways:
- You receive a notification in the Notification Centre (Workflow group).
- The notification appears as a badge count on the bell icon in the toolbar.
- Clicking the notification opens the workflow step in a separate window.
- If the step is assigned to a team rather than a specific user, all members of the team receive the notification.
- Once any team member opens the step, it is locked to that user and removed from the other members’ lists.
Configurable Multi-Level Approvals
PlainSail supports configurable multi-level approval – four-eyes, six-eyes, eight-eyes, or more – so that data entry on certain screens requires one or more reviewers to authorise the change before it is committed. The most common configuration is four-eyes (dual-control) input, but your firm can set any number of approval levels to match its governance requirements.
How it works
On a screen configured for four-eyes input, the Save button is replaced with Send for Approval. Pressing this button launches an approval workflow that routes the data to a designated approver.
The approver sees the changed fields highlighted, can hover to view previous values, and chooses one of three actions:
- Authorise – data is committed and the inputter is notified
- Request Amendment – data returns to the inputter with a mandatory comment explaining what needs to change
- Reject – the workflow is terminated and no data is saved
Screens that support four-eyes
The following screens can be individually enabled for four-eyes approval by a system administrator:
- Bank Accounts
- Relationships (with per-type configuration)
- Loans
- Contact Details / Addresses (with per-type: Location, Telephone, Email, Skype)
- Inventories (with per-template configuration)
Approval Walk-through
The following describes the standard four-eyes approval workflow step by step.
Data input. The inputter creates or edits a record (e.g. a bank account or relationship) and clicks Send for Approval.
Supporting data. A screen appears where the inputter can attach documents and enter a message for the approver, then clicks Next.
Approver review. The step appears on the approver's dashboard. They review changed fields (by default only changed fields are shown – untick "Changed fields only" for context) and choose Authorise, Request Amendment, or Reject.
Outcome. If authorised, data is committed and the inputter is notified. If amendment is requested, the inputter receives the approver's comments and can edit and resubmit. If rejected, the workflow terminates with no data saved.
Managing Workflows
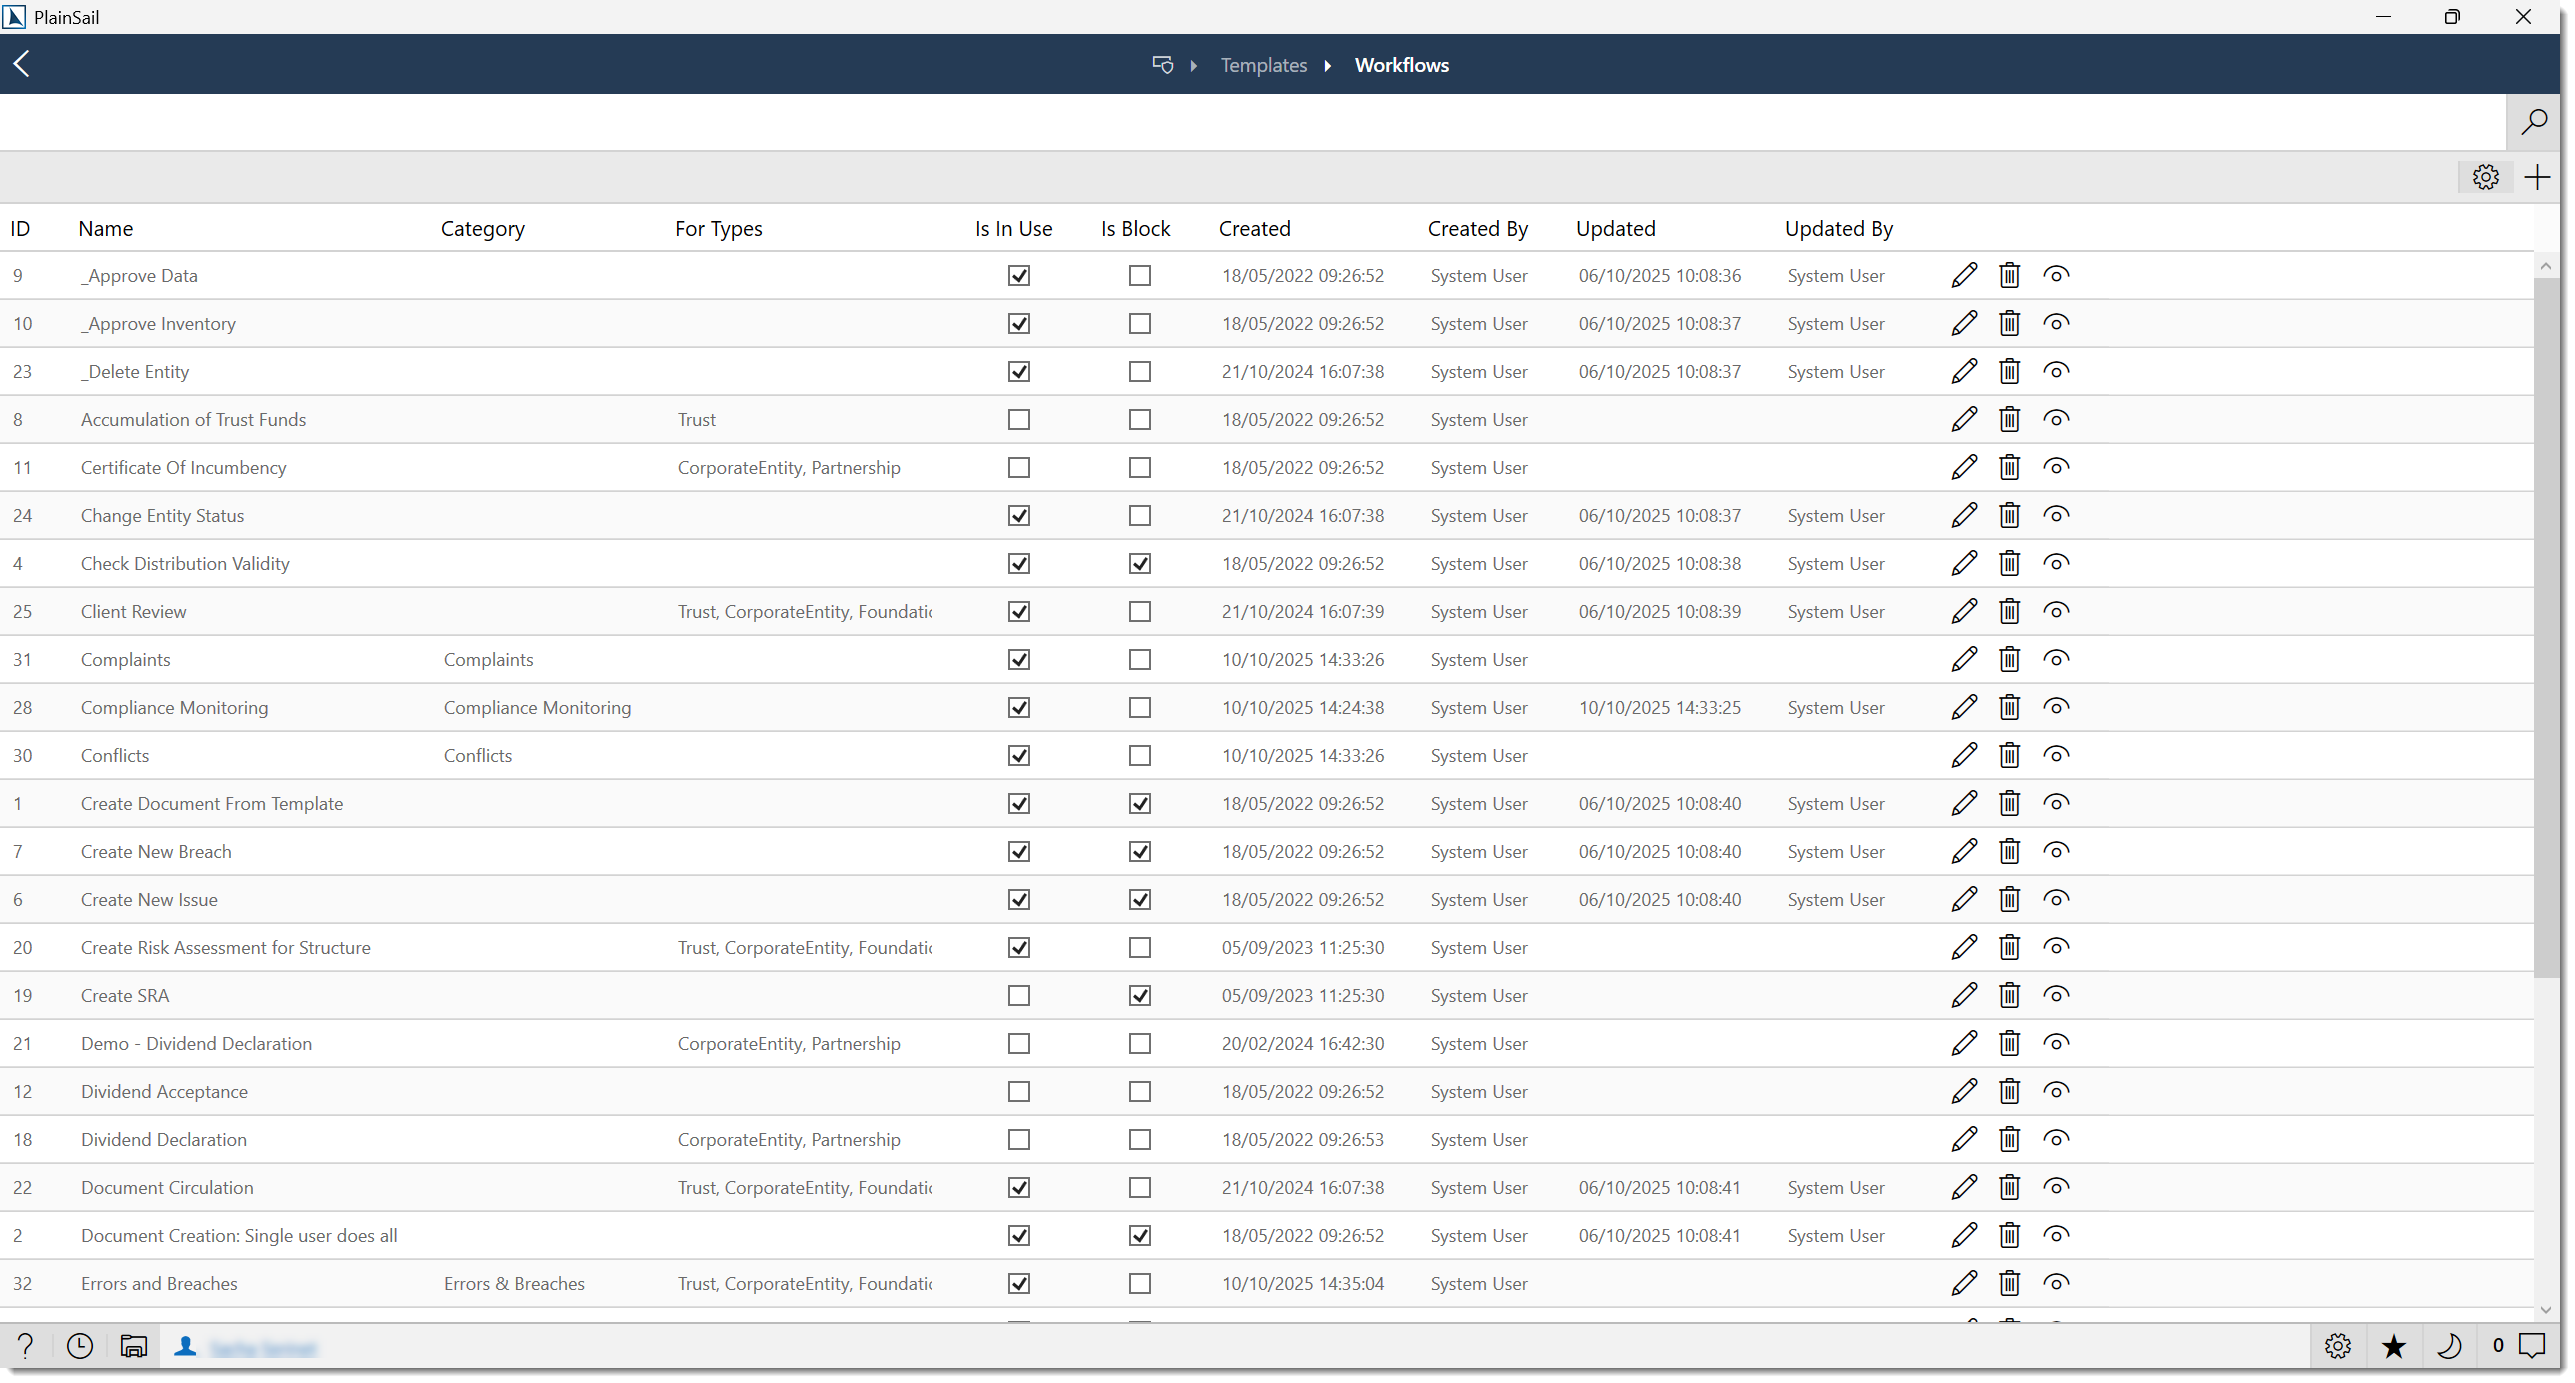
Global view
Navigate to Todo → Workflows for a comprehensive view of all workflow activity. By default, this lists all current user steps awaiting completion. Use the filters to refine by entity, workflow type, assignee, team, or status. You can also include system steps and completed steps.
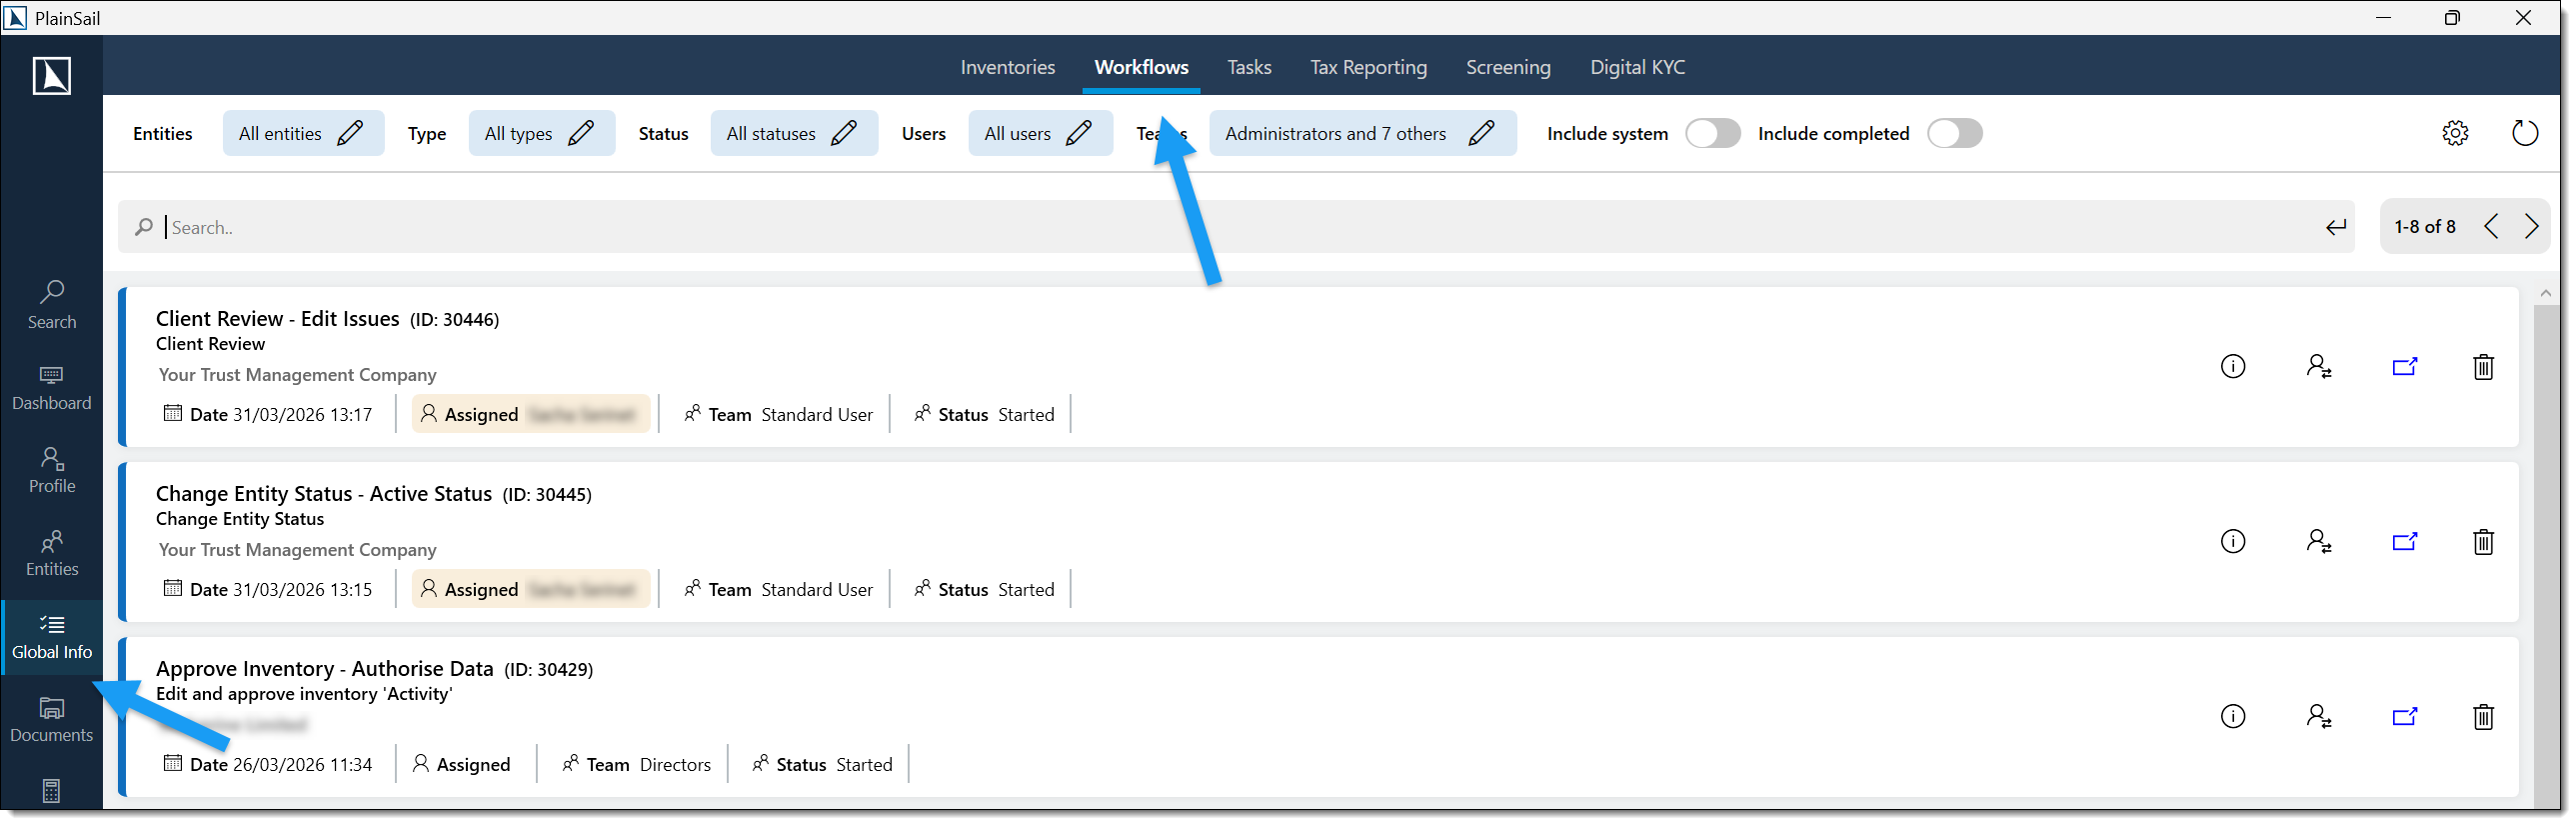
Each open step shows action icons:
- Information – detailed technical data for troubleshooting
- Reassign – change the step's assignee (supervisory personnel only)
- Open – open the step for completion
- Request cancellation – submit a cancellation request with a reason
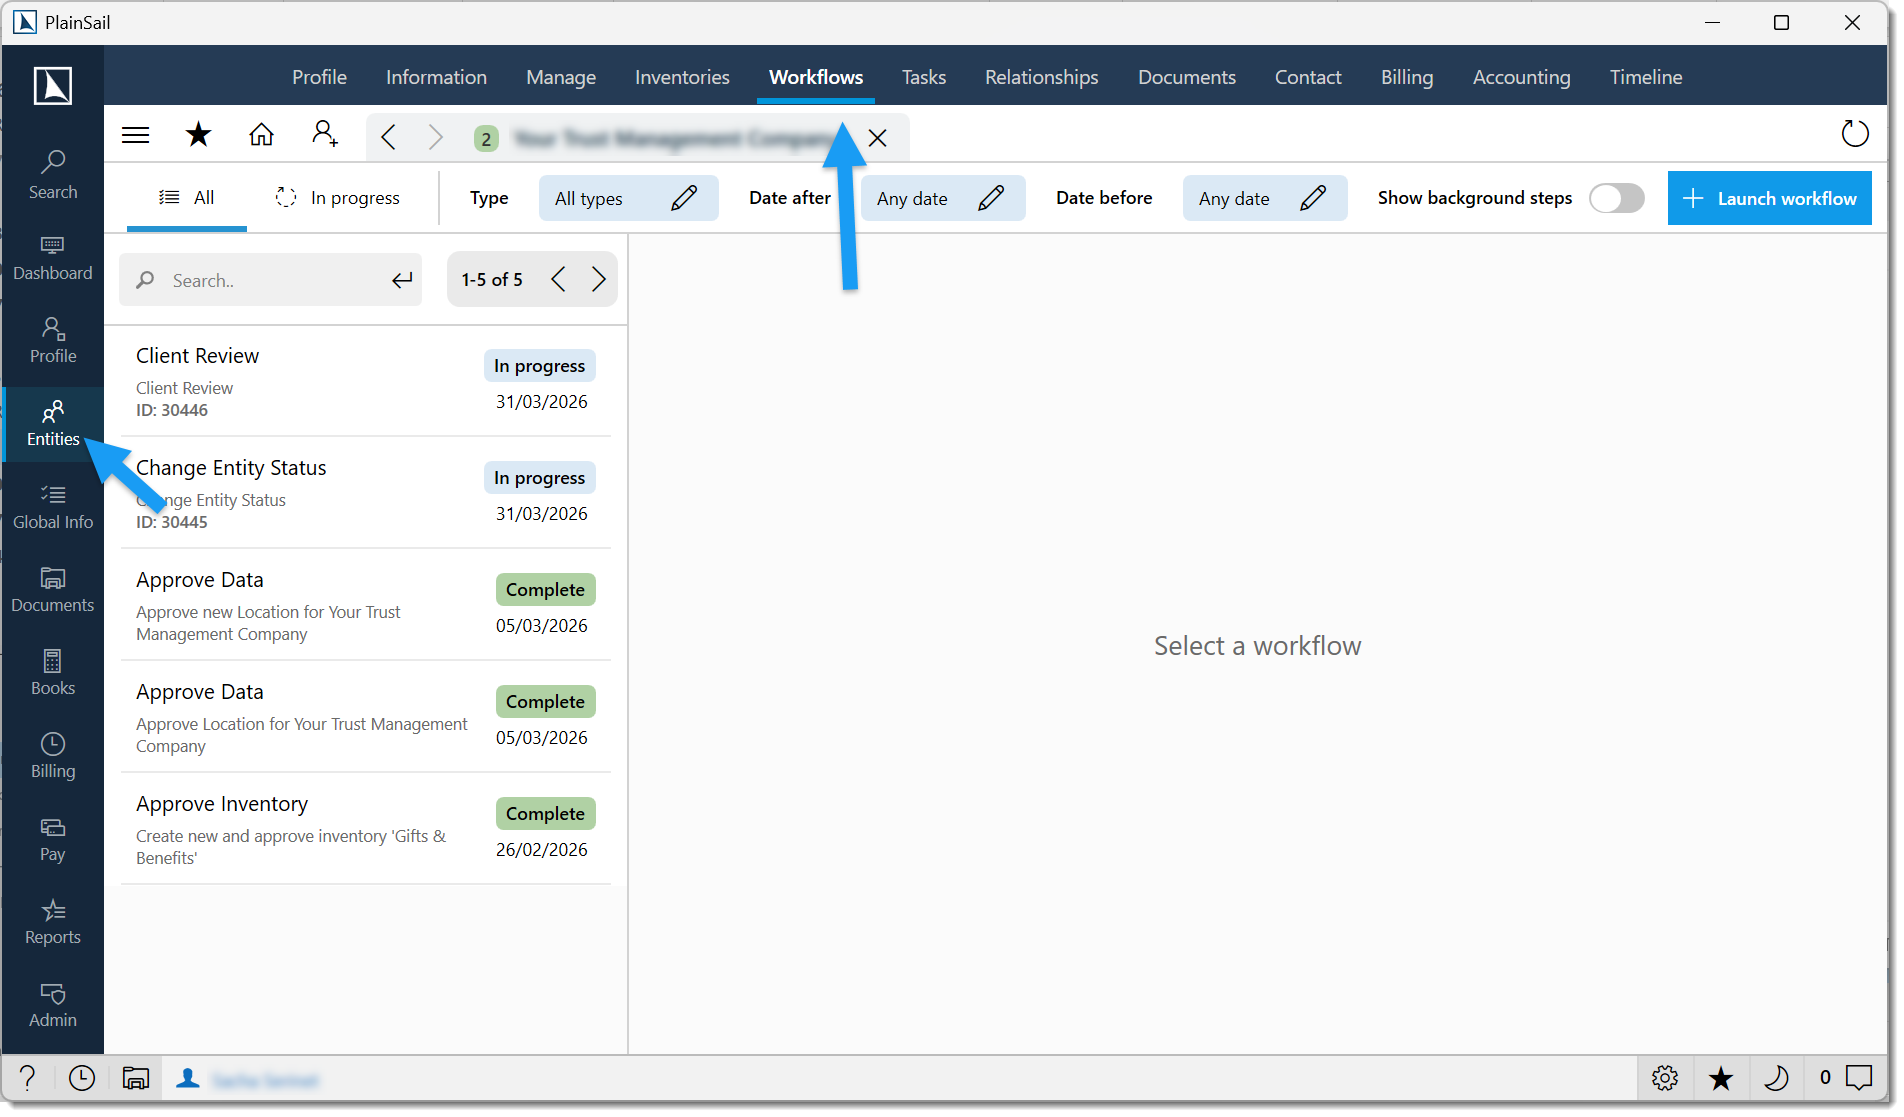
Entity view
Navigate to an entity's Workflows tab to see all workflows launched for that entity. Click any workflow to see a timeline of every user step, including input data, decisions made, messages, and associated documents.
SLAs & Escalation
PlainSail does not currently include built-in SLA timers or automatic escalation for workflow steps. Steps remain assigned until acted upon.
Workarounds
- Use the My Day (Tasks) dashboard widget to monitor overdue items.
- Administrators can view all workflows from Global Info > Workflows and identify stalled steps.
- Custom workflow templates can include “Send Notification” steps at defined intervals using scheduled triggers.
Timeout behaviour
Workflow steps do not time out automatically. A step remains in its current state indefinitely until:
- The assigned user completes it.
- An administrator cancels the workflow.
- The workflow is deleted.
Reporting
To view workflow completion rates and identify bottlenecks:
- Navigate to Global Info > Workflows for a cross-entity view of all active workflows.
- Use Reports > Query Builder to build custom queries against workflow data.
- Filter by workflow template, status, assigned user, and date range.
Cancelling a Workflow
Early stages (before submission to approver)
Click the Cancel button at the top right of the step screen. For approval workflows, you are offered the option to delete the workflow entirely – choosing "Yes" removes it as if it never existed.
Later stages (after data has been submitted)
Once data has been sent to an approver, the workflow can only be cancelled in two ways:
- The approver rejects the workflow
- From the entity's Inventories → Workflow tab, click Cancel alongside the workflow. Enter a reason – this routes to the Workflow Owners group for approval or rejection.
Configuring Approvals
System administrators can configure which screens require four-eyes approval.
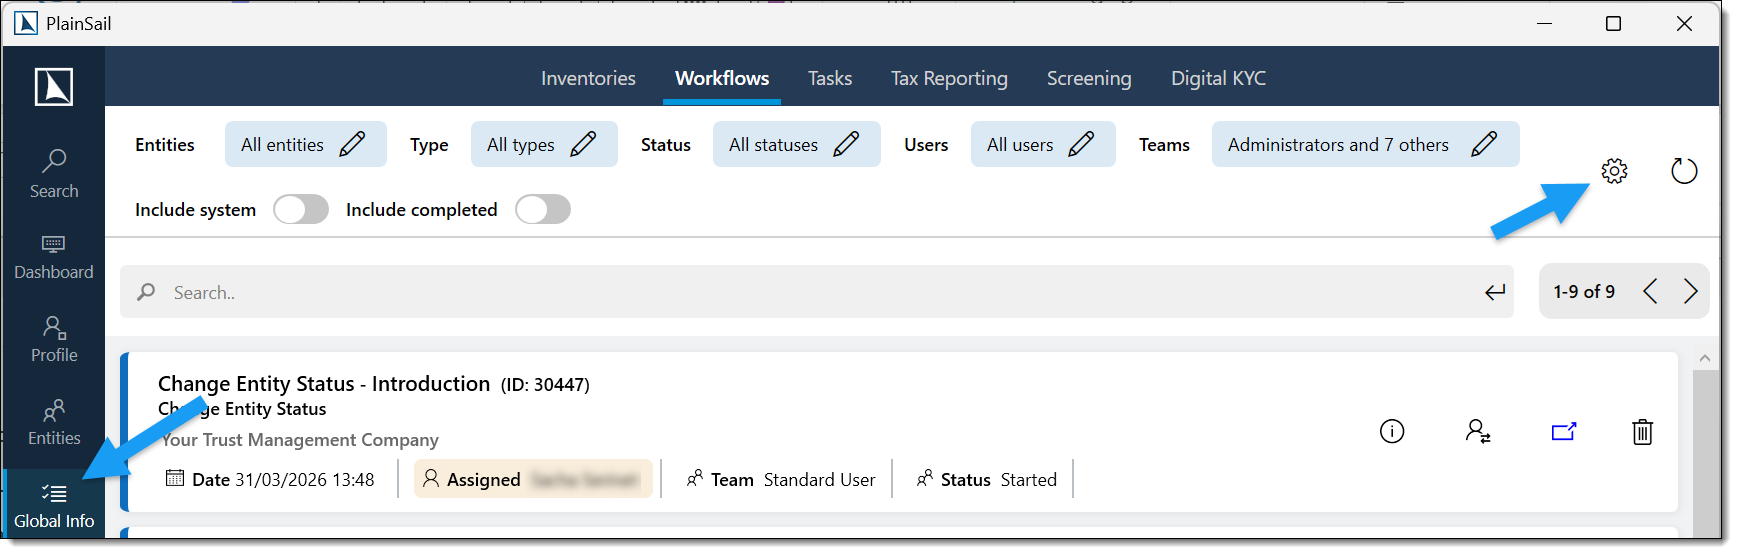
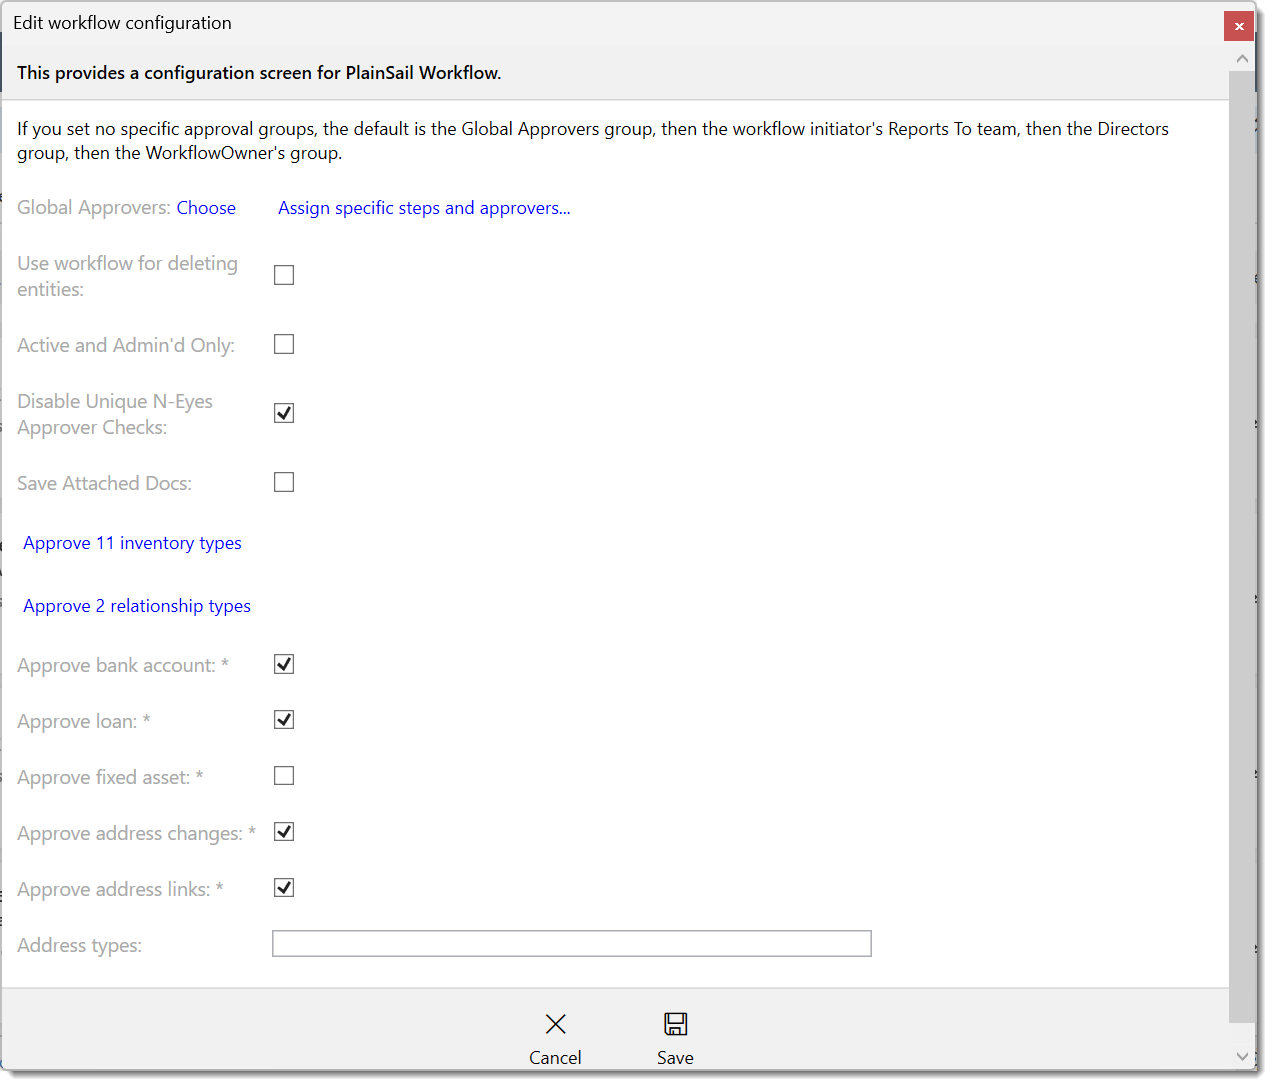
Navigate to Todo → Workflows → Settings (cog icon).
Tick the items that should require approval (Bank Accounts, Relationships, Loans, Contact Details). For Addresses, specify which types (Location, Telephone, Email, Skype) as comma-separated text.
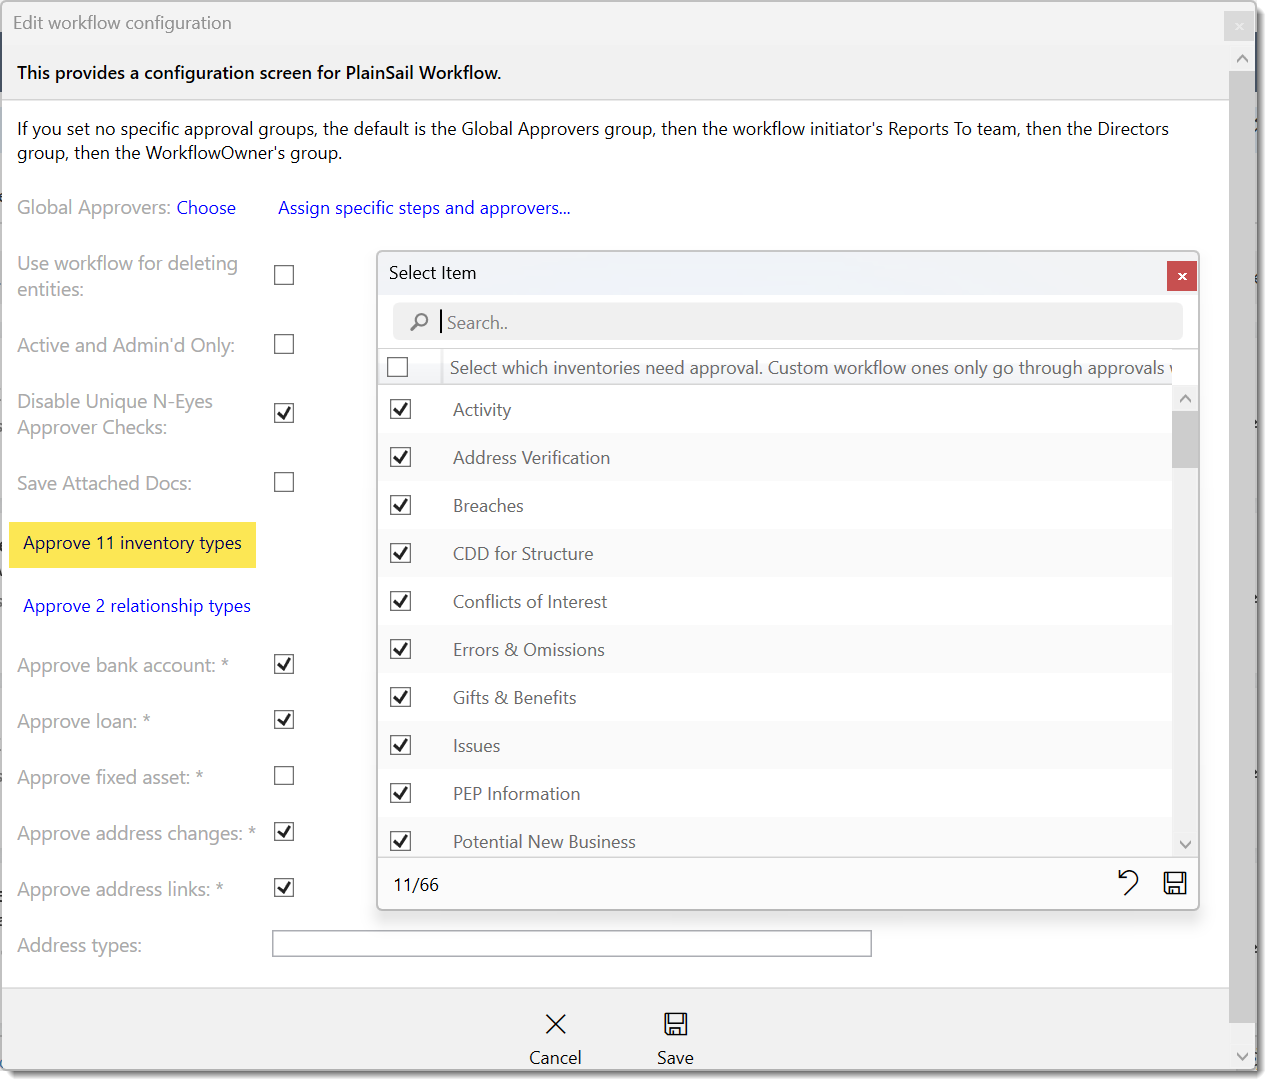
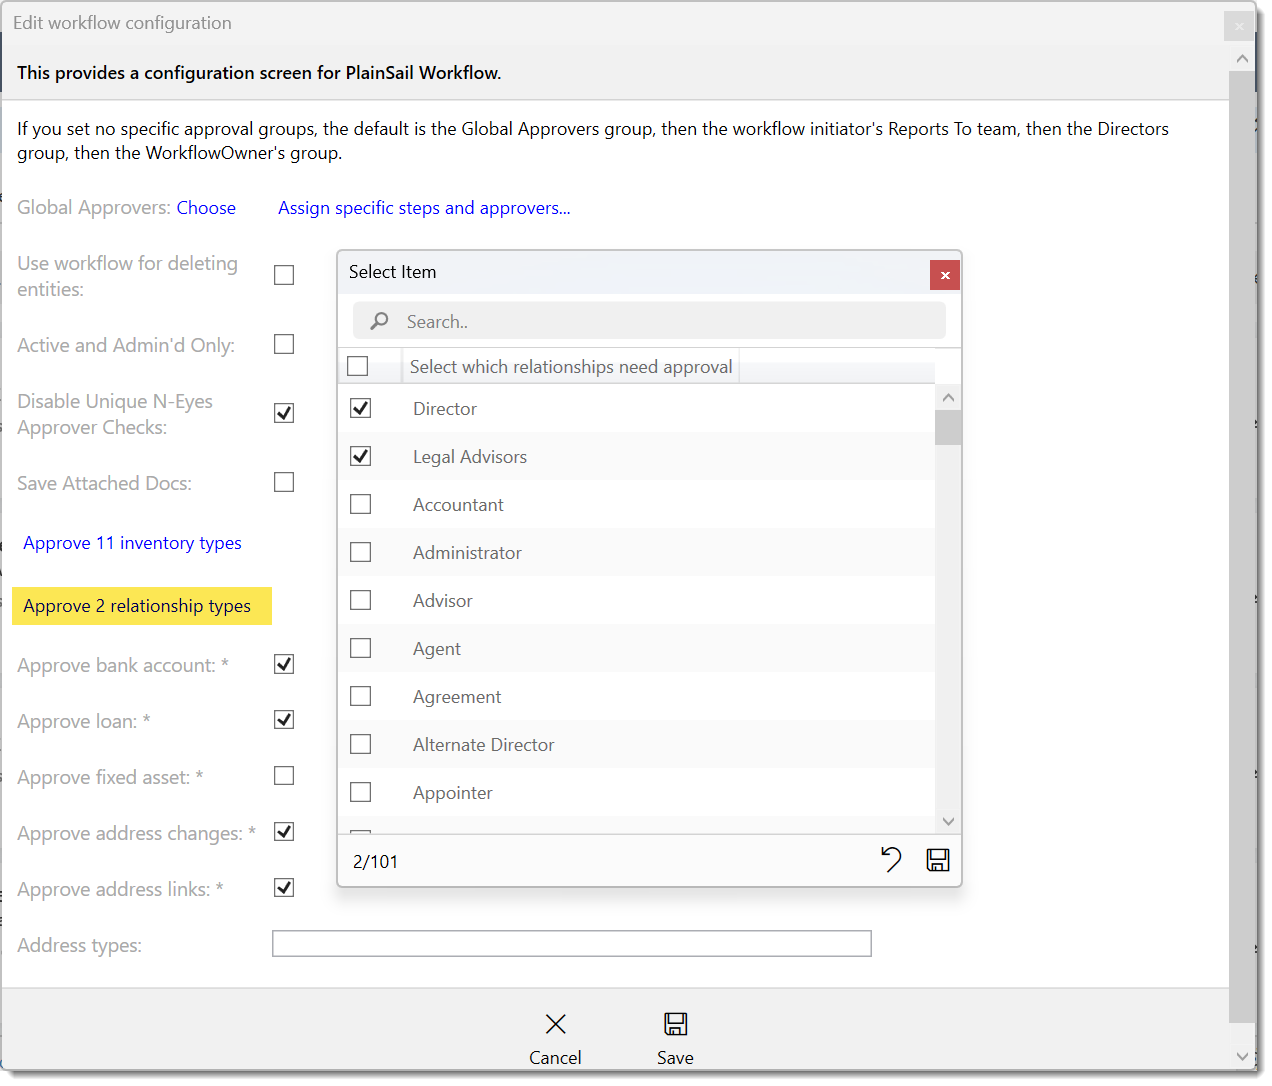
Click the Inventories link to select which inventory templates require four-eyes. Click the Relationships link for per-type relationship configuration.
Click Save. Changes take effect immediately on the current machine; other users must close and reopen PlainSail.
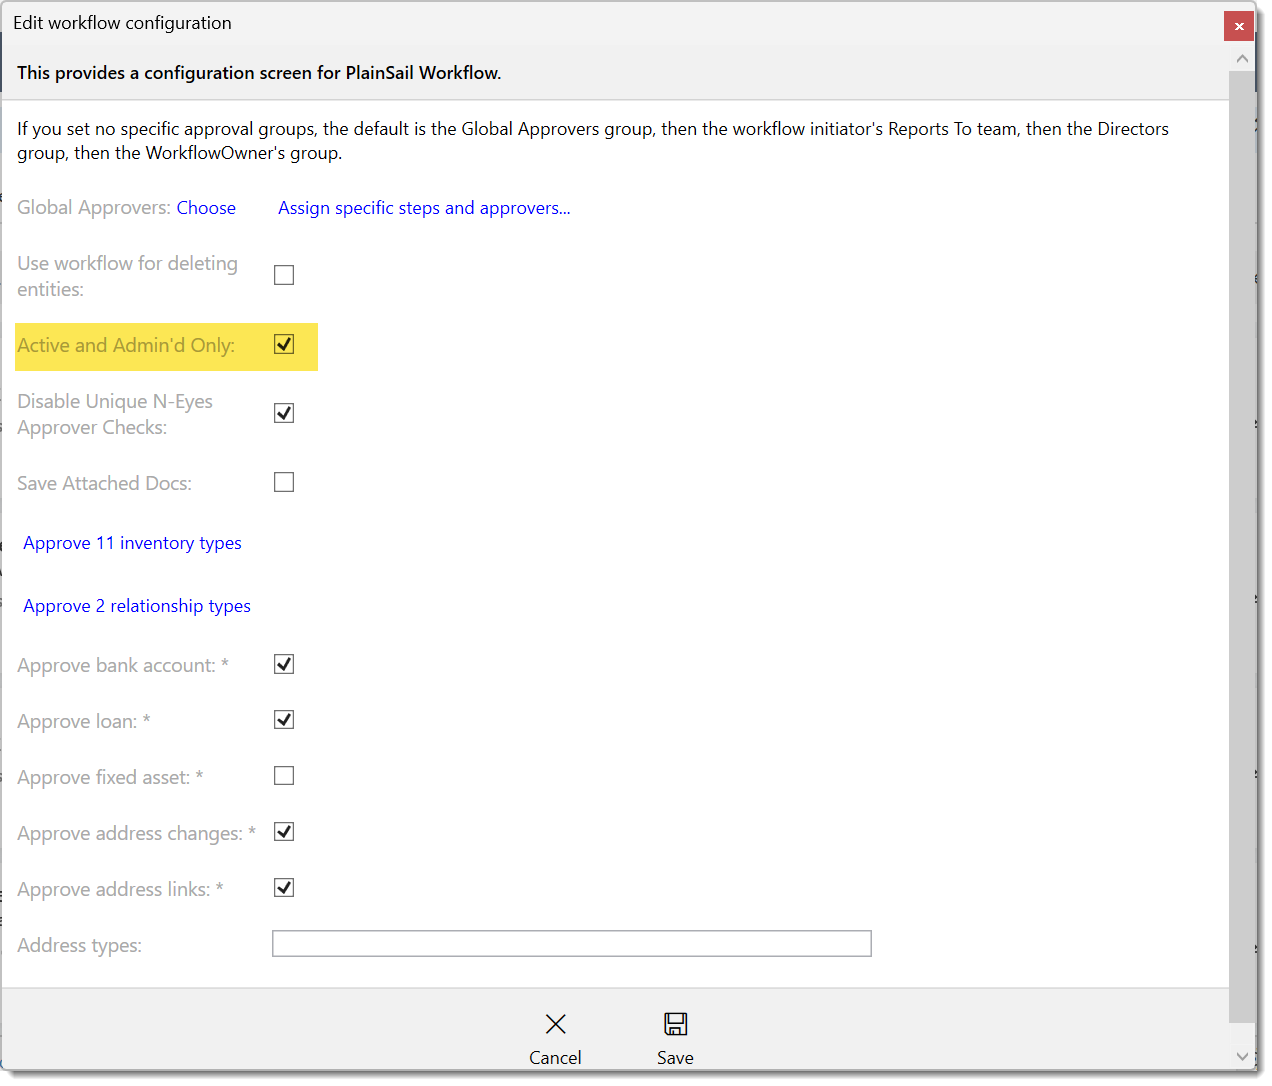
Active & Administered Only
Tick "Active and Admin'd Only" to enable four-eyes only for entities with a status of Active or Active-Closing that are marked as Administered. This is useful during onboarding when ancillary entities do not require full dual-control.
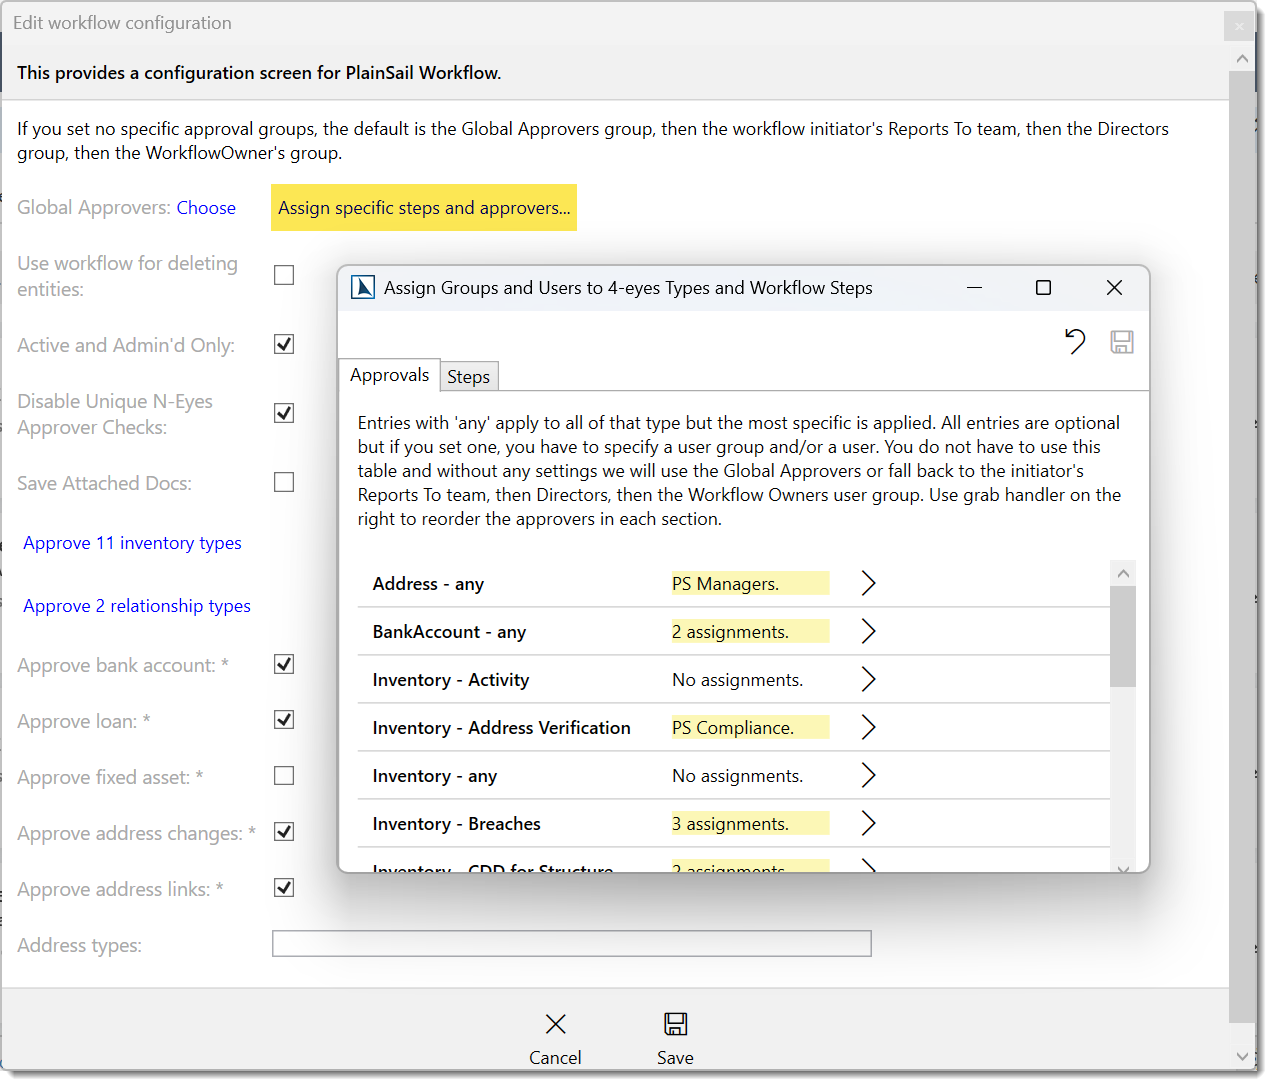
Setting specific approvers
Click "Set specific approvers" to configure different approval teams for different data types – for example, Compliance for CDD-related changes and Finance for payment requests. For each type, you can set a user group and/or a specific user or entity role.
Approver pool configuration
In the workflow template (Admin > Templates > Workflow Templates), each step has an assignment configuration. Assignments can be set to:
- Specific user – a named individual.
- User group – any member of a specified group (e.g. “A Signatories”, “Directors”).
- Workflow initiator – the user who started the workflow.
- Previous step user – the user who completed the previous step.
- Entity relationship – a person with a specific relationship to the entity (e.g. “Client Director”).
Administrator or Templates_Admin permission to configure workflow templates.
System Step Handlers
PlainSail includes over 50 system step handlers that execute automatically during workflows. Each step in a workflow template has a handler that defines what it does. Handlers are organised into five categories.
Functions
| Handler | Description |
|---|---|
Calculate Risk | Calculates the risk rating for an entity based on configured criteria. |
Calculate Workflow Risk | Calculates a risk score based on workflow field values. |
Create String From Values | Concatenates multiple workflow field values into a single string. |
Date Add | Adds a specified number of days/months/years to a date field. |
Date Diff | Calculates the difference between two dates. |
Date To String | Converts a date value to a formatted text string. |
Fields Have Value | Checks whether specified fields have values (validation gate). |
Fields Visibility | Shows or hides workflow fields based on conditions. |
Math Function | Performs arithmetic operations on field values. |
Function | Executes a generic function against workflow field values. |
SQL | Executes a custom SQL query (administrator-only). |
String Embed Id | Embeds an entity or record ID into a string value. |
Documents
| Handler | Description |
|---|---|
Launch Document | Opens a document from the document library within the workflow. |
Convert Word To PDF | Converts a Word document to PDF format. |
Delete Document | Deletes a document from the library. |
Open Field From Doc Type | Opens a workflow field based on a document type. |
Workflow
| Handler | Description |
|---|---|
Launch Workflow | Starts a child workflow from within the current workflow. |
Cancel Workflow | Cancels the current workflow or a specified workflow. |
Schedule Workflow | Schedules a workflow to start at a future date. |
Finish | Marks the workflow as complete. |
Start | The initial step handler when a workflow begins. |
Wait For Background | Pauses the workflow until a background process completes. |
User Interaction
| Handler | Description |
|---|---|
Block | Presents a blocking step that requires user action before proceeding. |
Merge | Collects and combines results from preceding workflow steps before continuing. |
UI Handler | Displays a custom form for user input. |
Edit Inventory | Opens an inventory for editing within the workflow step. |
Edit Screen Data | Opens an entity data screen for editing within the workflow. |
Process Issues | Processes issues/action items from an inventory review. |
Provide Inventory Feedback | Allows the user to provide feedback on an inventory within the workflow. |
Send Notification | Sends a notification to a user or group. |
Display List | Displays a read-only list of data for user review. |
SQL Picker | Presents the user with a pick-list populated from a SQL query. |
Retrieve & Persist Data
| Handler | Description |
|---|---|
Persist Business Entity | Saves entity data from workflow fields back to the entity record. |
Persist Administered Status | Updates the administered status of an entity. |
Persist Any Type | Saves any data type to the database. |
Persist Issues | Saves issue/action item data. |
Auto Persist Inventory | Automatically saves inventory data without user intervention. |
Post Single Transaction | Posts a single accounting transaction. |
Post Transaction Pair | Posts a debit/credit pair of transactions. |
Retrieve Entity | Loads entity data into workflow fields. |
Retrieve Bank Account | Loads bank account data into workflow fields. |
Retrieve Inventory | Loads inventory data into workflow fields. |
Retrieve Investment | Loads investment data into workflow fields. |
Retrieve Loan | Loads loan data into workflow fields. |
Find Inventory Id | Locates an inventory instance by criteria. |
Create Issues From Inventory | Generates action items from inventory review points. |
Set Field Defaults | Pre-populates workflow fields with default values. |
Set Field Values | Sets workflow field values based on rules. |
Convert Currency | Converts an amount between currencies using exchange rates. |
Delete Entity | Deletes an entity (used by the four-eyes deletion workflow). |
Delete Inventory | Deletes an inventory instance. |
Example: Make Payment Workflow
The Make Payment workflow is a pre-built process that illustrates how PlainSail’s workflow engine can combine user steps, system steps, and approval gates into a controlled business process. It verifies CDD requirements, obtains the necessary authorisations, and records the accounting entries for a payment. The specific stages below are drawn from the default workflow template. Your organisation’s Make Payment workflow may differ.
Workflow stages
| Stage | Type | Purpose |
|---|---|---|
| 1. Launch confirmation | User | The initiator confirms the source of funds is reliable before proceeding. |
| 2. Source of Funds verification | System | Checks whether the payer entity has a verified Source of Funds on file. Blocks if not. |
| 3. Payer information | System → User | Retrieves and displays the payer’s CDD data: risk rating, PEP connections, compliance flags. |
| 4. Payment details | User | The initiator completes the Make Payment inventory: payer, payee, amount, currency, bank account, value date, and narrative. |
| 5. Currency conversion | System | Retrieves the payee bank account and converts amounts to the base currency for threshold checks. |
| 6. Transaction profile check | System → User | Checks whether the payment is consistent with the entity’s transaction profile. If inconsistent, refers to Compliance for review. |
| 7. Payee information | System → User | Retrieves the payee’s CDD data. If screening or risk rating data is missing, the workflow pauses until resolved. |
| 8. Documentation | User | Attach supporting documents and add notes before routing to approvers. |
| 9. Compliance approval | Conditional | If either the payer or payee has a compliance referral flag, the payment is routed to Compliance for approval. |
| 10. MLRO approval | Conditional | If the payment involves a terrorism-financing / proliferation-financing country, a sanctioned country, or a high-risk country, the MLRO reviews. |
| 11. Signatory approvals | User (four-eyes) | Two approvals are required. The signatory level depends on the base-currency amount: below the first threshold routes to C then B signatories; above the first threshold to B then B; above the second threshold to A then A. The initiator cannot also be an approver. |
| 12. Save payment inventory | System | Automatically persists the completed Make Payment inventory. |
| 13. Post transaction | System | If a year-end exists and currencies match, posts the accounting entry (bank account vs suspense). Otherwise reports that manual posting is needed. |
| 14. Finish / Abandon | System | The initiator is informed of the outcome. If the payment was abandoned at any stage, the workflow records the reason. |
Permissions Reference
Workflow step access is primarily controlled by step assignment (who the step is assigned to) rather than by global roles. A user can only see and act on steps assigned to them or their teams. The following global permissions also apply:
| Permission | Description |
|---|---|
Administrator | Full access to workflow configuration, template editing, and all workflow steps. |
Templates_Admin | Create and edit workflow templates, task templates, and triggers. |
Workflow_Edit_Name | Edit the name of a running workflow instance. |
Keyboard Shortcuts
| Shortcut | Context | Action |
|---|---|---|
| F5 | Workflow list | Refresh the workflow list. |
| Escape | Workflow step window | Close the workflow step window. |
FAQ
My workflow step has not appeared – where is it?
Be patient. The workflow may be executing consecutive system steps. Step updates are pushed via SignalR, so your next user step will appear as soon as the system steps finish.
Can I reassign a step to someone else?
Yes, from the Todo → Workflows screen if you have supervisory permissions. Otherwise, ask a Workflow Owner to reassign it.
Can two users open the same step simultaneously?
No. When you open a step it is locked exclusively to you. Other users will see it removed from their dashboard, or receive a message that another user has it open.
Why are the action buttons disabled?
All mandatory input fields must be completed before action buttons become active. Scroll down to check for unfilled fields.
Can I go back to a previous step?
Yes. Every user step screen includes a Go Back button that redirects the workflow to a previous step.
Can I create custom workflows?
PlainSail does not yet include a self-service workflow designer. Custom workflows can be commissioned through our professional services team.
How do I terminate a workflow I no longer need?
Use the Request Cancellation option from the global Workflows screen. You must provide a reason, and a Workflow Owner will approve or reject the request.
How do I see the history of a completed workflow?
Navigate to Global Info > Workflows and filter by status “Completed”. Click the workflow to see all steps and their completion details.
What notifications do assignees receive?
Assignees receive an in-app notification in the Notification Centre. There is no automatic email notification by default. Email alerts can be configured via “Send Notification” step handlers in the workflow template.
How do I set up escalation for overdue steps?
There is no built-in escalation. Use scheduled triggers or custom workflow steps with “Send Notification” handlers to remind users of overdue steps.
Can I run the same workflow for multiple entities at once?
Workflows are launched per entity. To run the same workflow for multiple entities, launch the workflow from each entity individually. For bulk operations, use the “Add inventory to entities” utility (which creates background tasks) or contact your administrator about batch workflow launching.
- Entities & Client View – launching workflows from entity records
- Inventories & Configuration – inventory-driven workflow steps
- Global Info & Compliance – cross-entity workflow views and tasks
- Admin & Permissions – workflow templates, triggers, and approver configuration
Test Yourself
Put your workflow knowledge to the test with these 10 questions covering step types, assignments, approvals, and process management.