Help Centre
Administration
Your central hub for system configuration, user management, templates, audit trails, background tasks, and everything else that keeps PlainSail running smoothly.
Key points
- Most Admin screens require the Administrator role – sub-sections note any alternatives
- The Utilities screen gives you quick access to dozens of categorised admin tools
- Templates let you design inventory checklists, workflows, tasks, and automation triggers
- The Audit Log tracks every change made across the system with full detail
- User permissions work through groups – roles are assigned to groups, users inherit them
- Entity permissions control which entities each user can see (separate from roles)
Overview
The Admin area is where you configure system-wide settings, manage users, maintain reference data, review audit trails, monitor background services, and access a suite of administrative tools. You'll find it on the rightmost tab (cog icon) of the main navigation ribbon.
Administrator role. Where a screen needs a different role, it's noted in the relevant section below.
Admin sub-tabs
The Admin ribbon contains these top-level areas:
- Utilities – admin tools like entity merging, bulk operations, user management, and associated configuration tabs
- Templates – inventory/CDD template administration including fields, workflows, tasks, and triggers
- Documents – search indexes, checked-out documents, recycle bin, and workspaces
- Global Information – reference data such as relationships, properties, risk ratings, taxes, countries, and addresses
- Health Check – error log viewer with search, reporting, and debug controls
- Audit Log – full change history for every record in the system
- Queued Tasks – background task queue for monitoring, retrying, and managing scheduled work
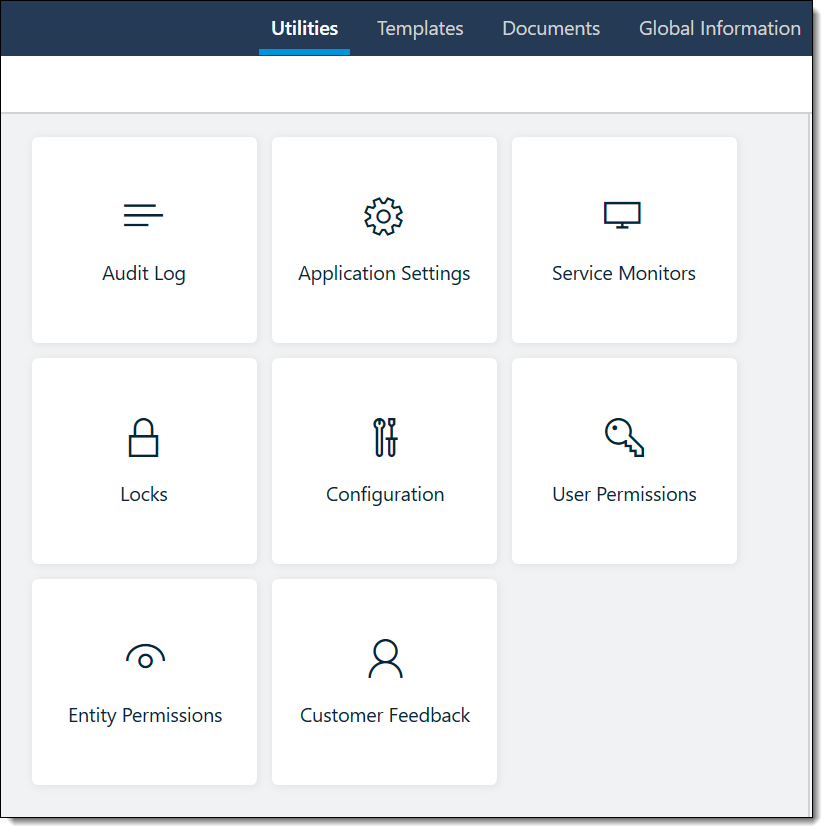
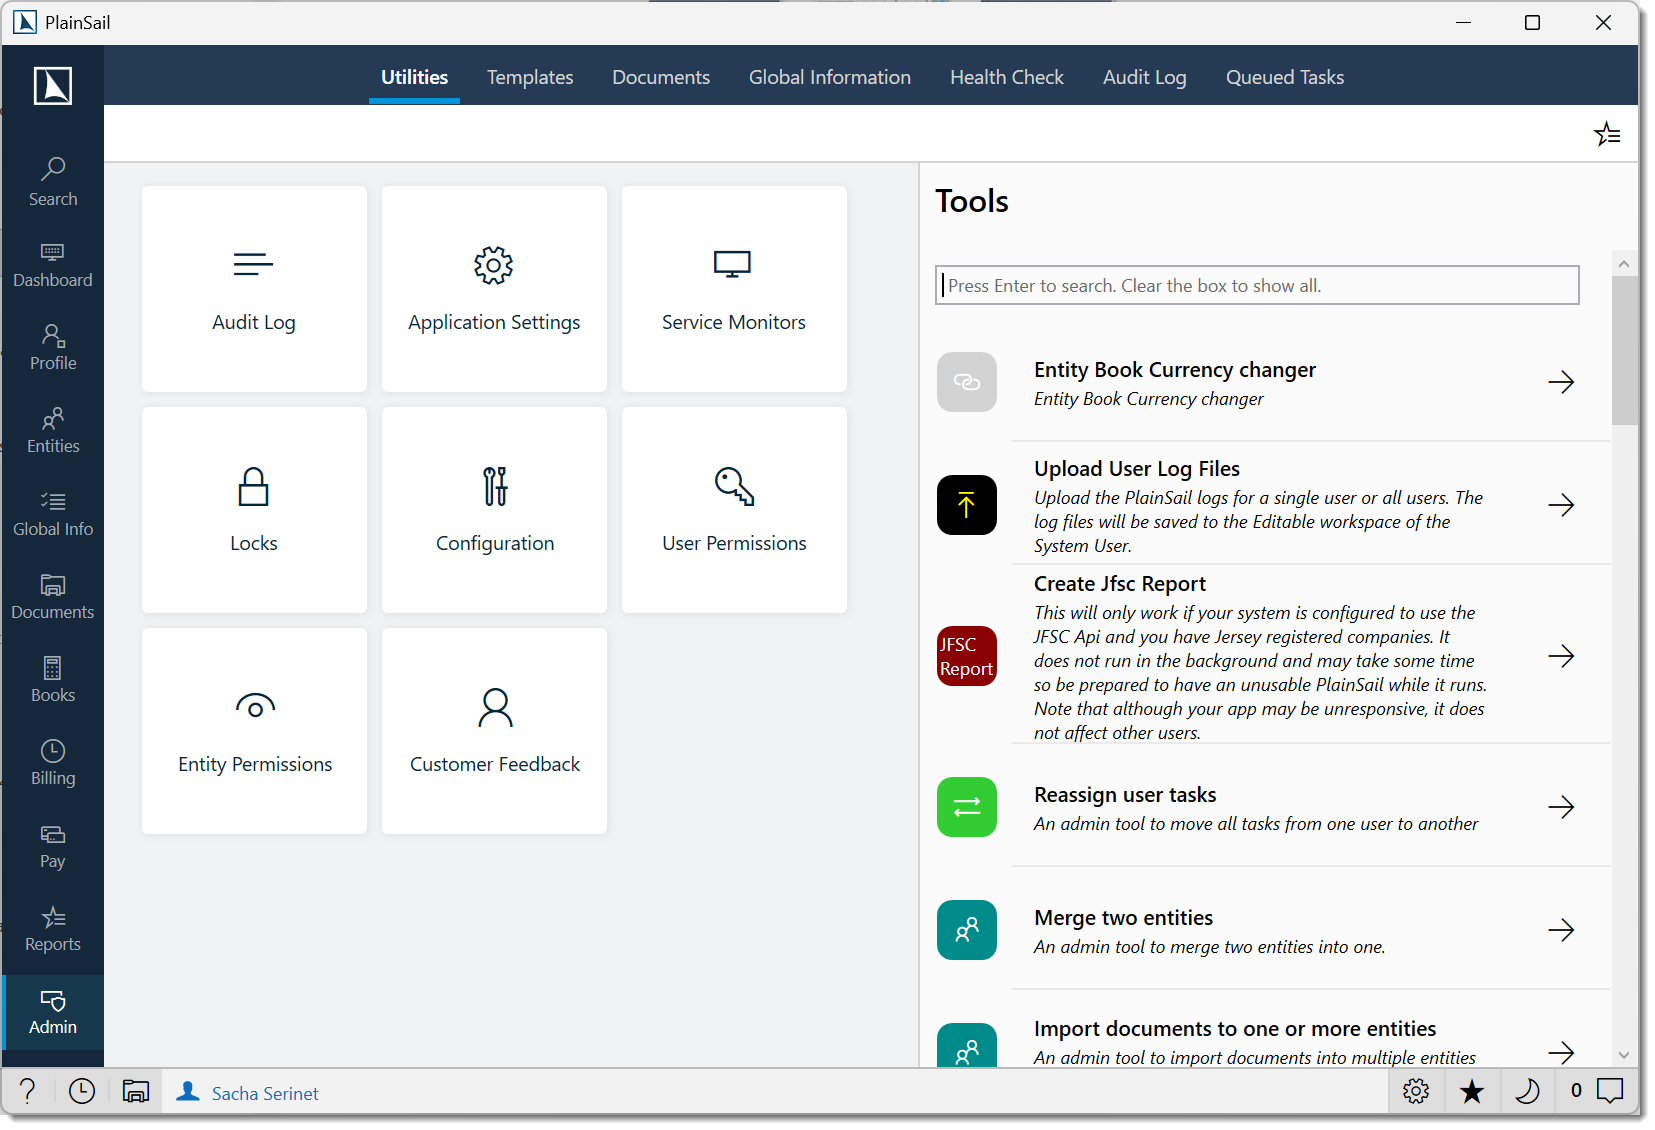
Utilities
The Utilities screen is the main Admin landing page. It shows a searchable, categorised grid of admin tools – each displayed as a tile with a title, description, category, and colour-coded icon.
How to get there
Select Admin > Utilities from the navigation ribbon.
Finding tools
Type in the search bar at the top to filter utilities by title, description, or category. Results update instantly as you type. Tools you don't have permission to use are automatically hidden.
Associated tabs
Along the bottom of the Utilities screen you'll see links to related areas (depending on your permissions):
- Audit Log – change history
- Application Settings – your personal app preferences (saved screen filters, layout choices, etc.)
- Service Monitors – background service status
- Locks – view and manage record locks
- Configuration – system-wide settings
- User Permissions – manage users, groups, and roles
- Entity Permissions – control which entities users can see
- Customer Feedback – user-submitted issues and suggestions
Utility Tools
Utilities are organised into five categories. Here's what each tool does:
Documents
- Set document permission – choose which entities allow access to practice management documents
- Import documents to entities – bulk-import documents from a folder structure
- Generate missing email indexes – create search entries for emails that were added without the Outlook add-in
- Synchronise two file persisters – sync file storage between two storage providers (e.g. when migrating)
- Validate blob storage – check that cloud storage matches PlainSail's records (read-only, makes no changes)
- Reapply metadata to blob storage – refresh metadata used for full-text document searching
Entities
- Merge two entities – combine two entities into one, transferring all data from the source to the target
- Convert an entity – change an entity's type (e.g. Person to Company)
- Reassign relationships – bulk reassign relationships when a director or officer is replaced
- Update entity images – update profile images from a folder of image files
- Update addresses – refresh addresses that use an address provider
- Client profile page – configure which fields appear on the entity profile and control the PEP setting
- Add inventory to entities – select a template and add it to one or more entities
- Create screening file – export a client list for upload to your screening provider
Entity merge procedure
Navigate to Admin > Utilities and click Merge two entities.
Select Source: Search for and select the entity to be absorbed.
Select Target: Search for and select the entity to receive all data.
Review: The system shows what will be transferred – relationships, documents, inventories, bank accounts, tasks, workflows, contact details, and accounting data (if applicable).
Confirm: Click Merge. A confirmation prompt warns that this action cannot be undone. The source entity is deleted after all data is transferred.
Entity conversion procedure
Navigate to Admin > Utilities and click Convert an entity.
Select Entity: Search for the entity to convert.
Select New Type: Choose the target entity type.
Review Warnings: The system warns about type-specific fields that will be lost (e.g. “First Name” on a Person does not exist on a Corporate Entity) and relationships that may no longer be valid.
Click Convert to confirm.
Finance
- Test cheque template – preview a cheque template without making real payments
- Change book currency for client – change an entity's base currency (via plugin)
- Repost invoice journal – reprocess the accounting entries for one or more invoices (useful after updating ledger mappings)
- Repost credit note journal – reprocess the accounting entries for a credit note
- Setup global accounting policy notes – manage the policy notes that appear on Financial Statements
- Override month end date – set or clear a month-end override date within all timesheets for a billing run
Users
- Reassign user tasks – move all tasks from one user to another
- Update default time activities – restrict which fee types are available for selected teams
- Block/Allow all logins – prevent non-admin users from logging in (admins can always log in and reverse this)
- Log off all users – send a forced logoff with a configurable timer and message. Cannot be cancelled once started.
- Upload user log files – upload application log files for PlainSail support to review
Other
- Reset local configuration – reset your local config file (you'll need to close PlainSail first)
- Refresh screens – refresh all displays without restarting
- Refresh permissions – reload your role assignments without restarting
- Control client monitor – turn the local background monitor on/off for debugging
- Synchronise schedule – add missing events to the background schedule
- Flatten inventory views – rebuild the report views used for inventory reports (backups are kept automatically)
- Refresh inventory display values – fix stale display values in inventory summaries where the lookup source has changed
- Create JFSC report – generate difference reports via the JFSC (Jersey only – runs in the foreground, so your app will be busy until it finishes)
- Test email – test your email delivery settings
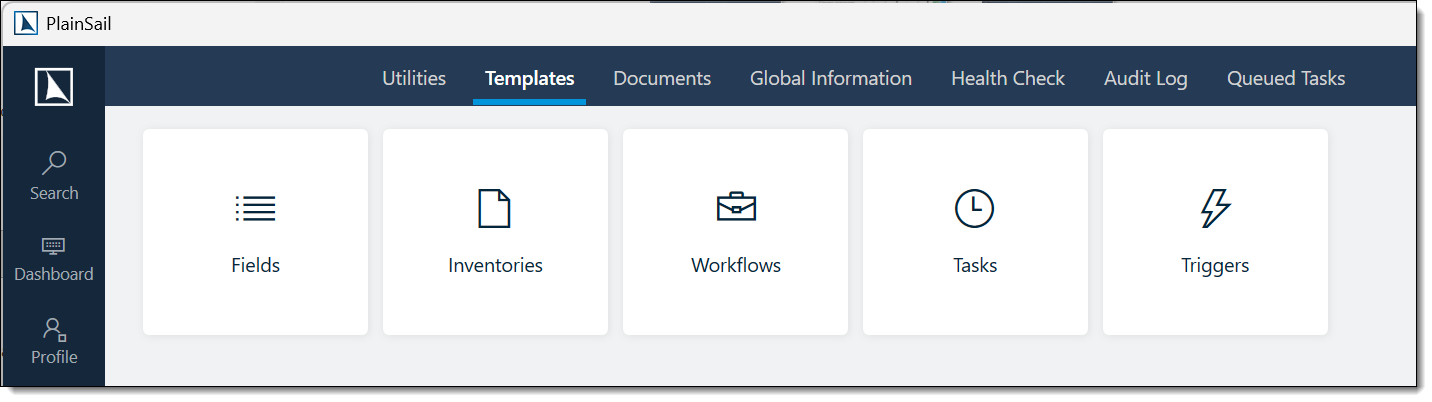
Templates
The Templates section is where you build and manage the reusable building blocks behind inventories (CDD checklists), workflows, scheduled tasks, and automation triggers.
Templates_Admin role. Workflows, Tasks, and Triggers require Administrator.
How to get there
Select Admin > Templates from the navigation ribbon.
Fields
The Fields tab lists all field definitions available to your inventory templates. Each field has a name, data type (text, number, date, lookup, dropdown, file upload, etc.), and controls for how many values it allows.
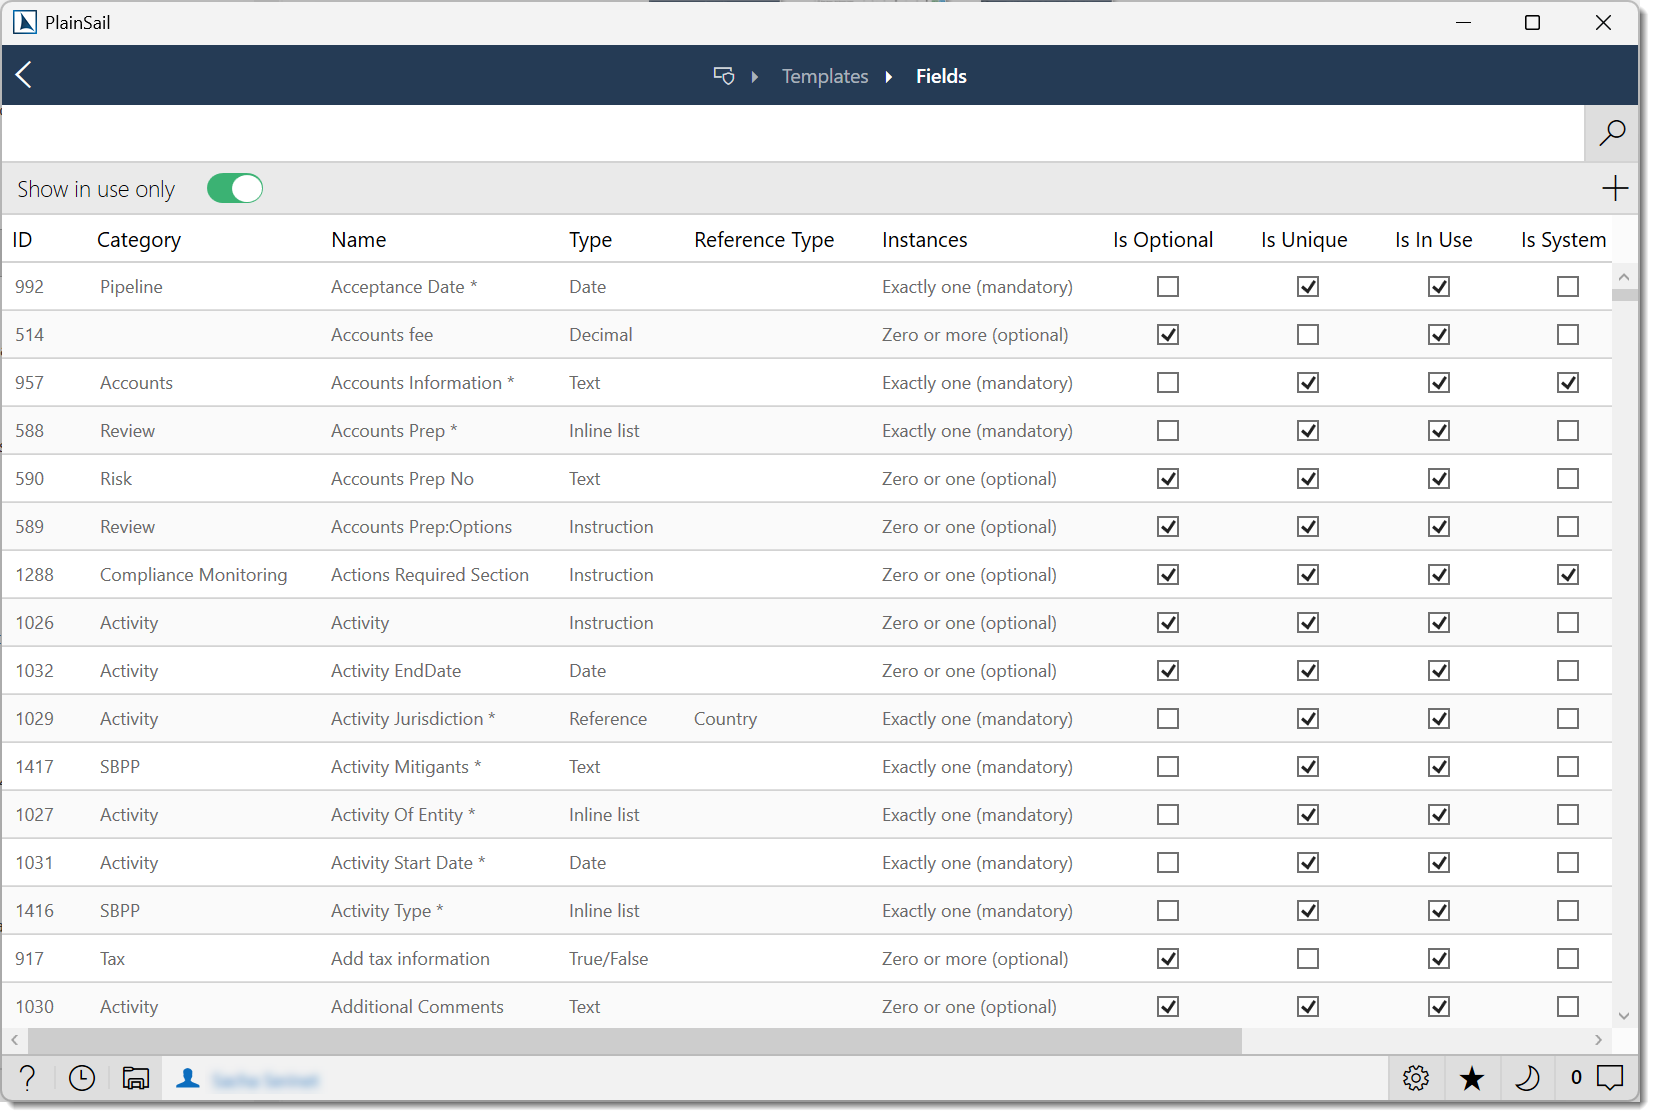
- Ctrl+N or Ctrl+A – add a new field
- Double-click a field to edit it
- Show Usages – find all templates that use a field
- Deleting a field that's in use marks it as not in use rather than removing it
Inventory Templates
Each template defines a complete checklist – sections, fields, rules, and conditions. You can control which entity types it applies to, how many instances are allowed, and whether it's created automatically.
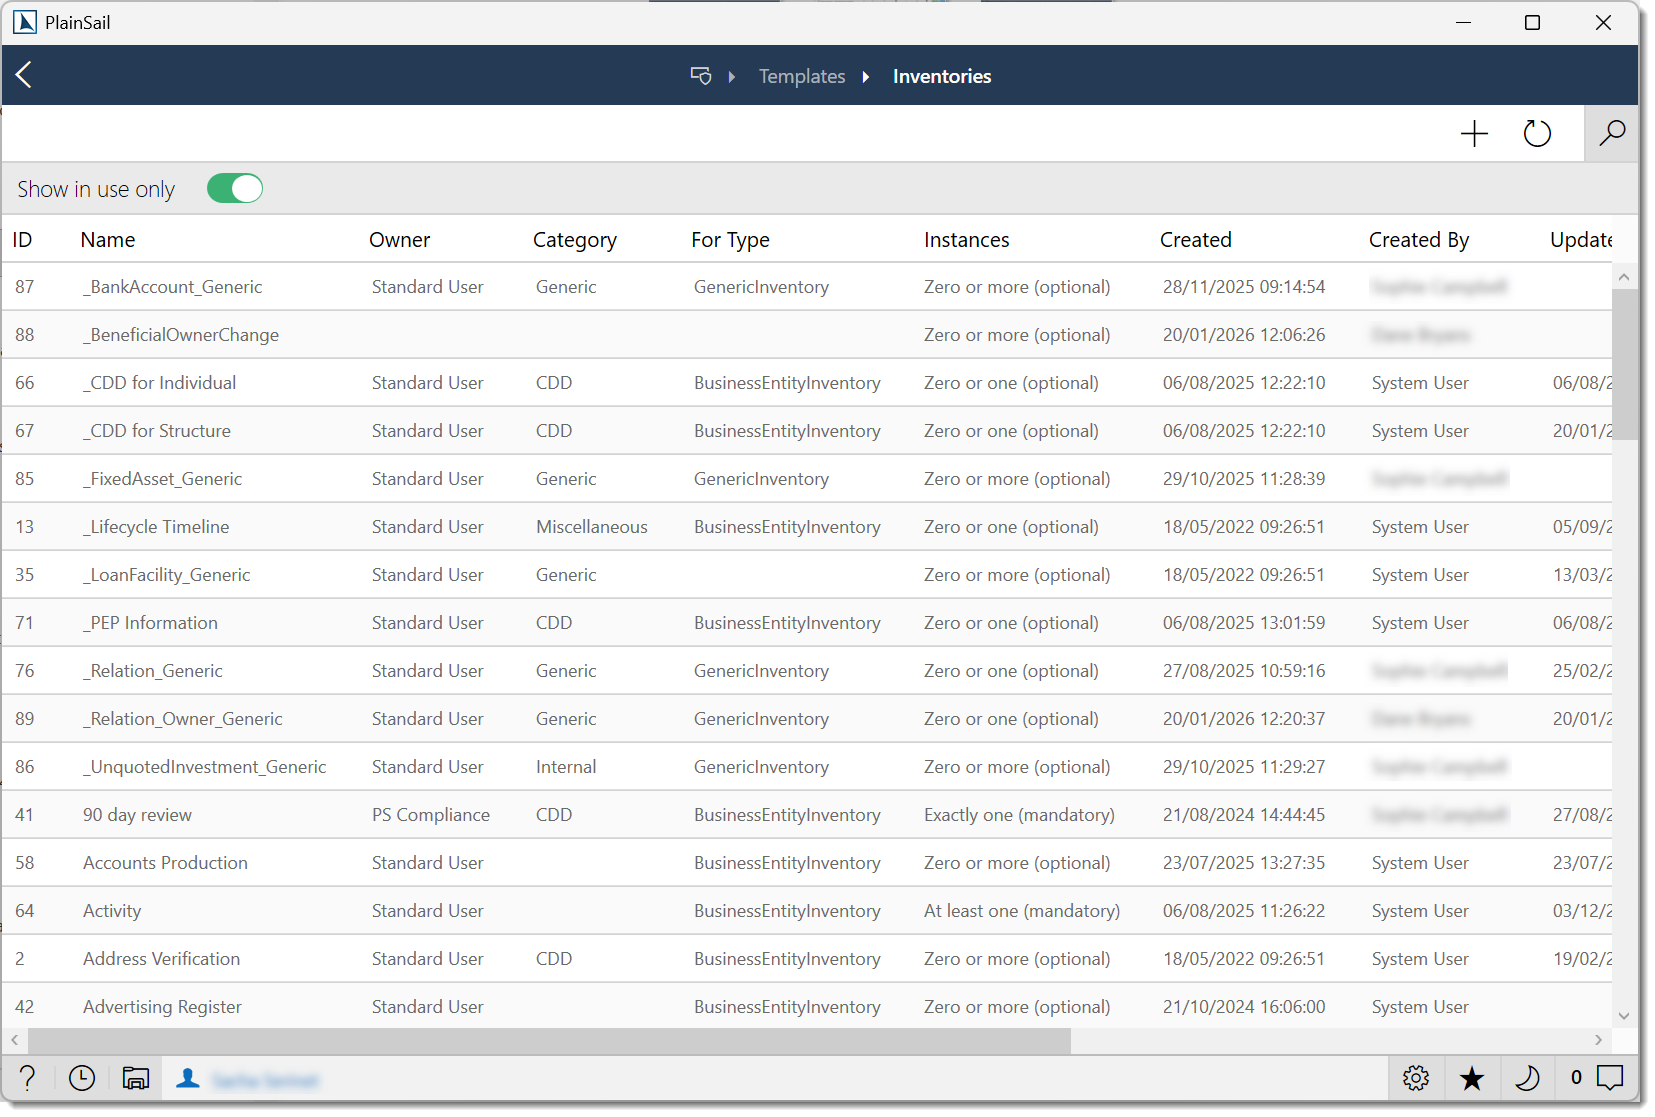
- Add – create a new template
- Edit – open the template editor to add, remove, and reorder fields and sections
- Sync/Recalculate – reprocess all existing instances of a template
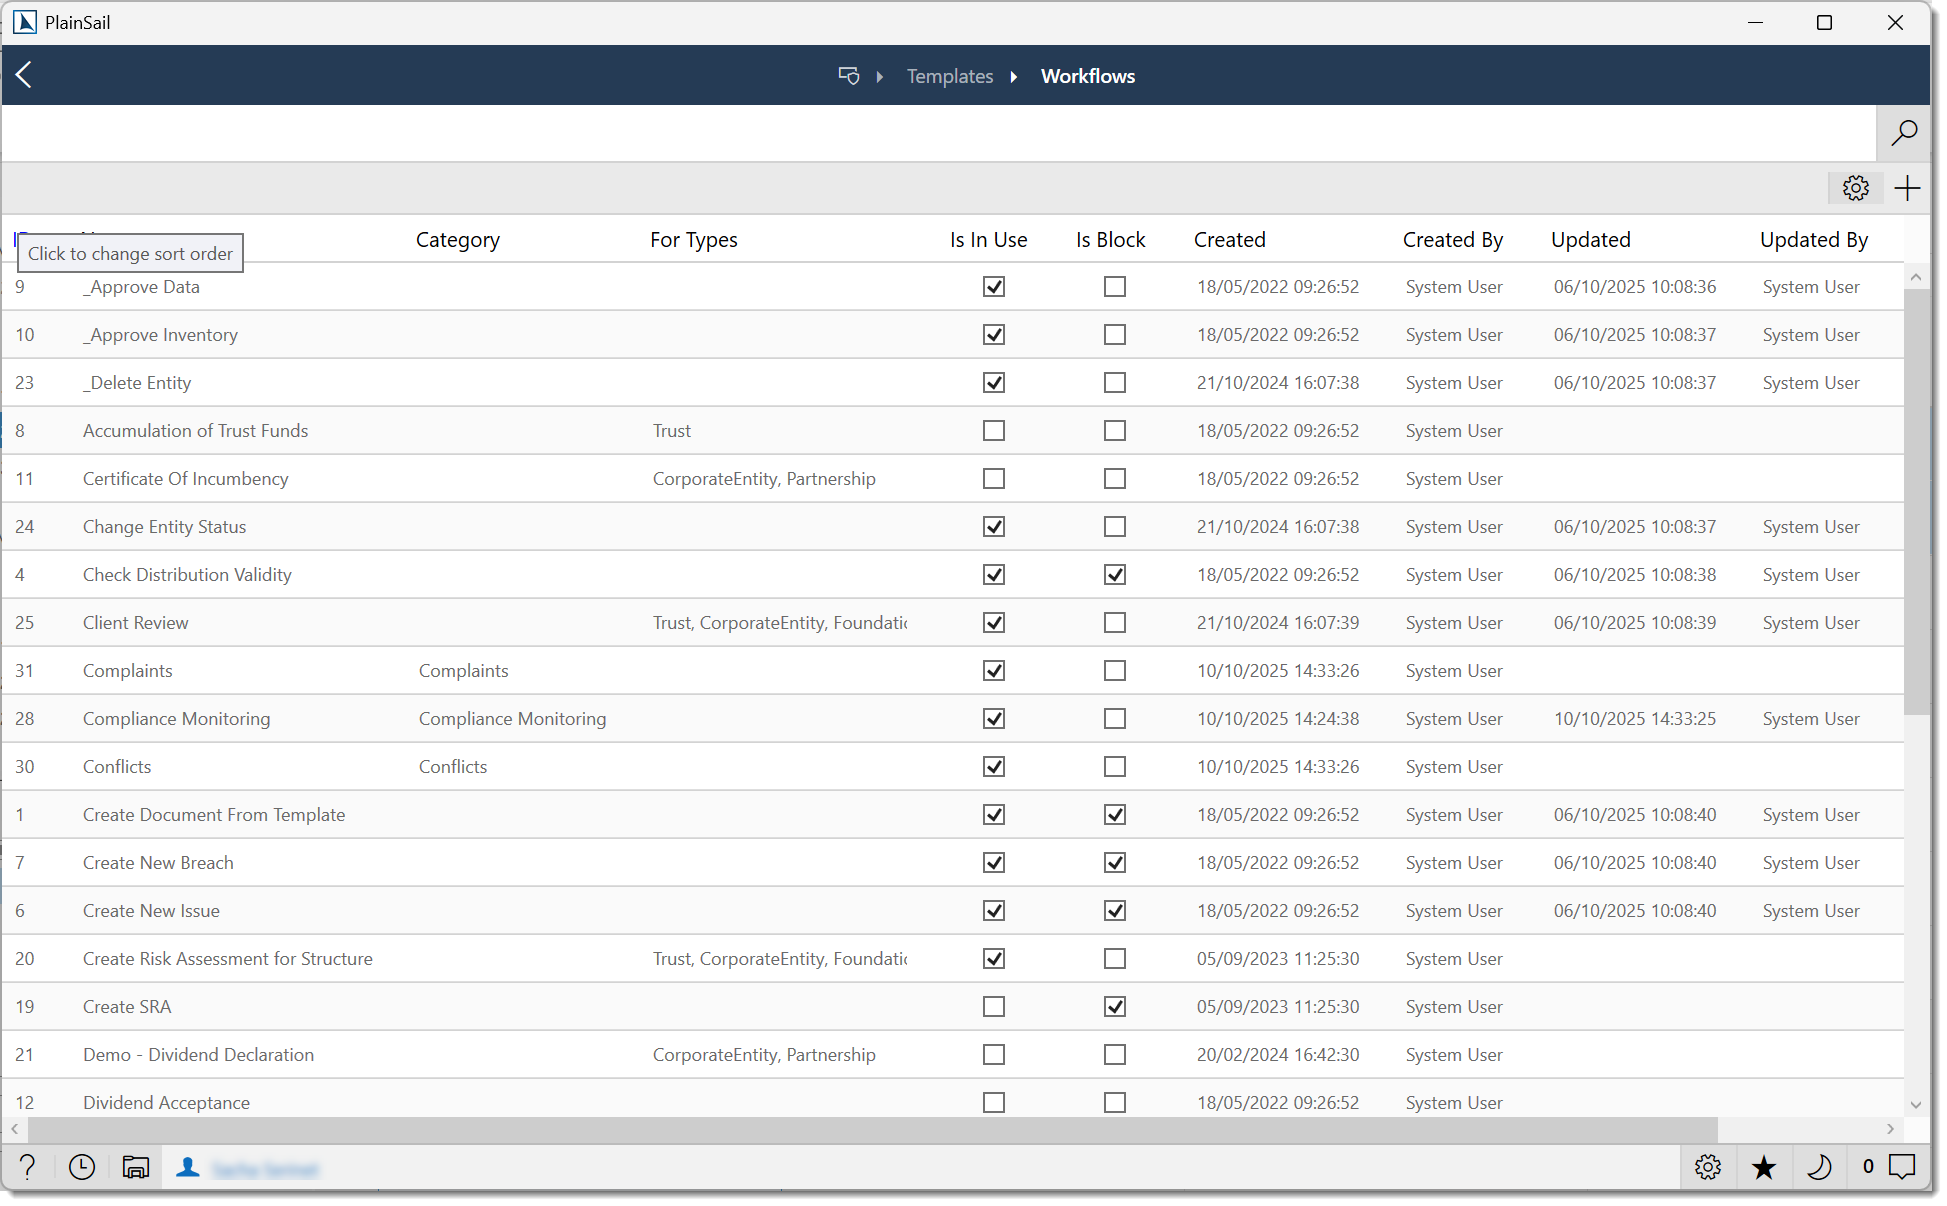
Workflow Templates
Define multi-step processes with steps, assignments, conditions, branching logic, and actions. See the Workflows guide for more on how workflows work day-to-day.
Task Templates
Set up recurring or one-off tasks with a name, schedule (daily, weekly, monthly, etc.), assignment (user, team, or role), and entity scope.
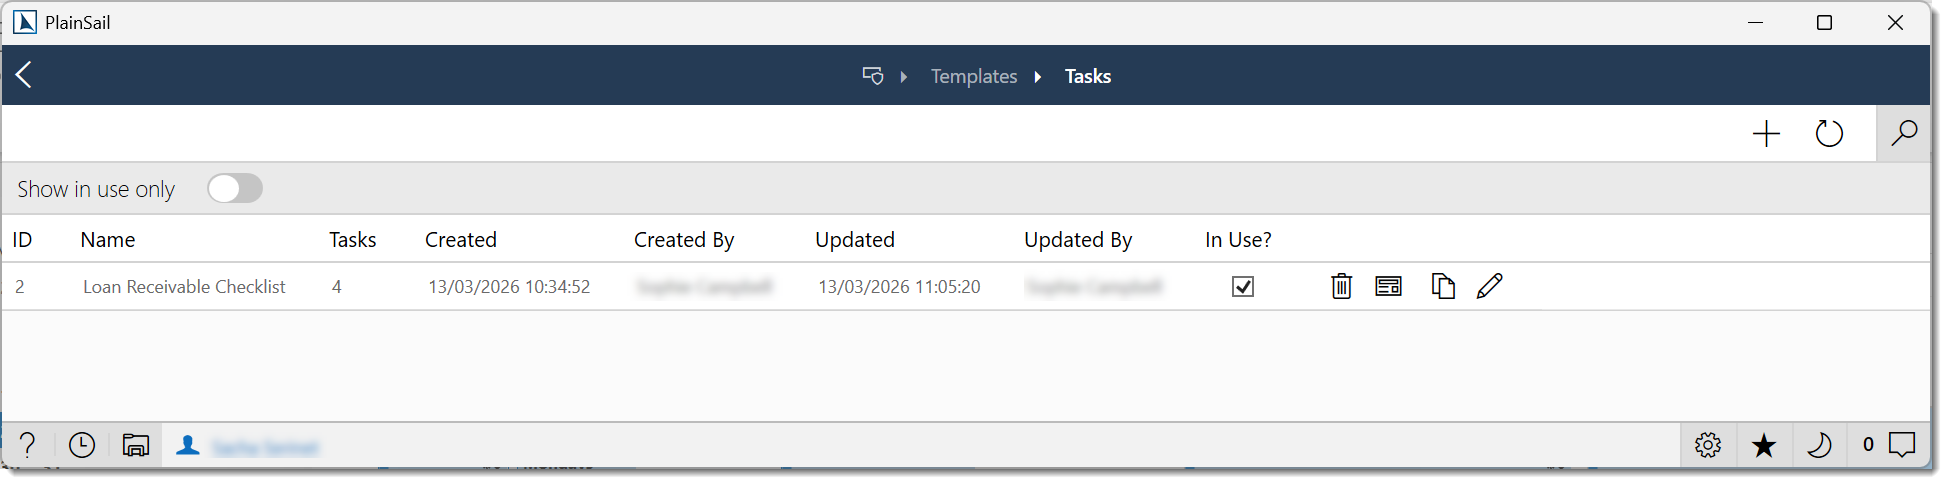
Task template fields
| Field | Description |
|---|---|
| Name | Template name. |
| Description | What the task is for. |
| Category | Task category (from the UserTaskCategory list). |
| Priority | Default priority for created tasks. |
| Assigned To | Default assignee (user or user group). |
| Schedule | When to create the task: Daily, Weekly, Monthly, Quarterly, or Annually. |
| Entity Scope | Which entities to create tasks for: All, Administered, Specific type, or Custom filter. |
| Due Date Offset | Number of days after creation for the due date. |
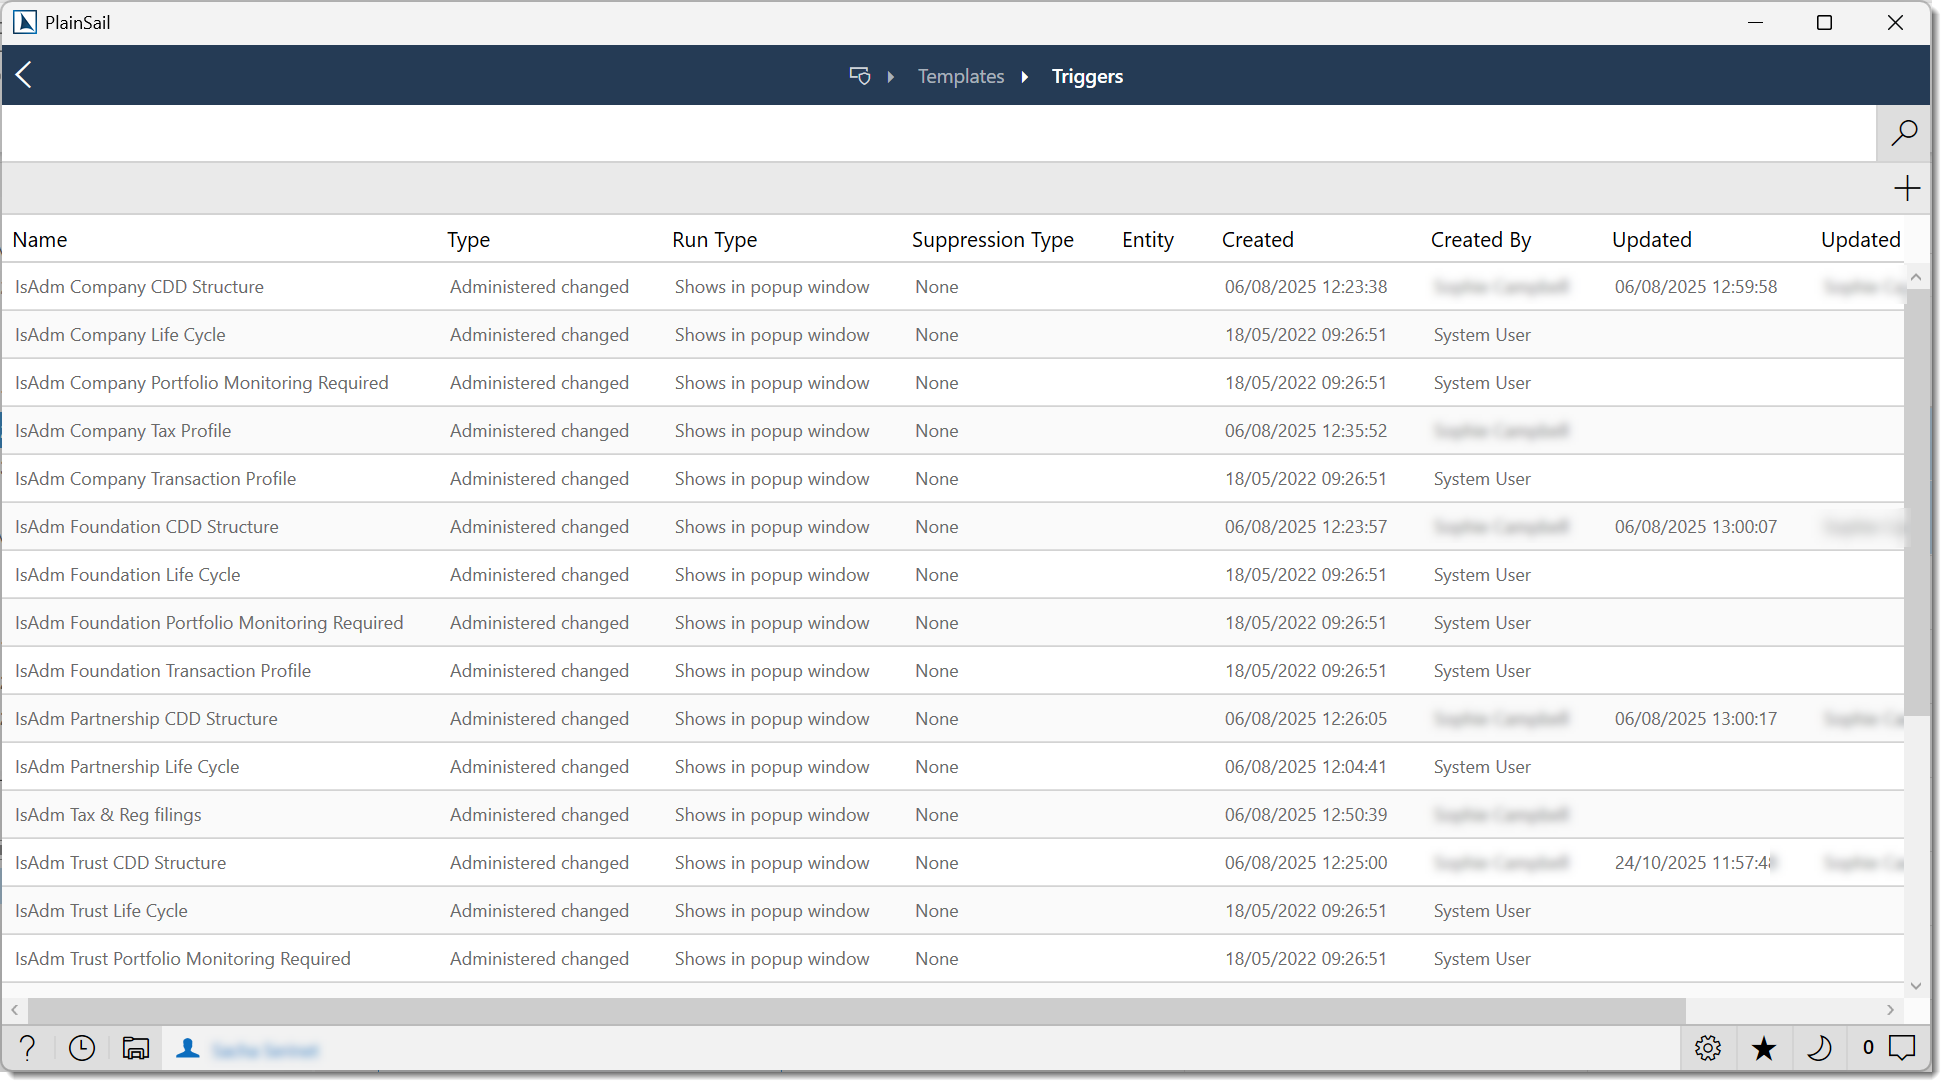
Triggers
Triggers automatically create inventories, workflows, or tasks when something happens – for example, when a new entity is created, a relationship is added, or an entity's administered status changes.
- Entity Created – fires for new entities of a specific type
- Relationship Created – fires when a new relationship is added
- Address Linked – fires when an address is linked to an entity
- Inventory Created – fires when an inventory is created
- Administered Entity Changed – fires on changes to the administered status
- Always True – fires unconditionally (useful for testing)
Trigger configuration reference
The table below shows the configurable trigger types, what each responds to, and typical configuration options.
| Type | Description | Configuration |
|---|---|---|
| Entity Created | Fires when a new entity is created. | Filter by entity type. Action: launch inventory, launch workflow, create task. |
| Relationship Created | Fires when a relationship is created between entities. | Filter by relationship type. Action: launch inventory, launch workflow, create task. |
| Address Linked | Fires when an address is linked to an entity. | Filter by address type. Action: launch inventory, launch workflow, create task. |
| Inventory Created | Fires when an inventory instance is created on an entity. | Filter by template name. Action: launch workflow, create task. |
| Administered Entity Changed | Fires when an entity's administered status changes. | Filter by entity type, old and new administered status. Action: launch inventory, launch workflow, create task. |
Configuring a trigger
Navigate to Admin > Templates > Triggers.
Click Add New.
Select the trigger type.
Configure the filter conditions (which events should fire this trigger).
Configure the action (what should happen when the trigger fires).
Set the active status (enabled/disabled) and click Save.
Testing a trigger
There is no built-in “test” mode for triggers. To verify a trigger works correctly:
- Create a trigger with narrow filter conditions.
- Simulate the event (e.g. create a test entity).
- Verify the action was executed (check tasks, workflows, or notifications).
- Review Admin > Queued Tasks for any errors.
Debugging trigger misfires
If a trigger does not fire as expected:
- Check that the trigger is active (not disabled).
- Verify the filter conditions match the event.
- Check Admin > Queued Tasks for failed task entries.
- Review the system Audit Log for errors.
Documents Administration
The Documents admin section manages document infrastructure across the system. Select Admin > Documents to get here.
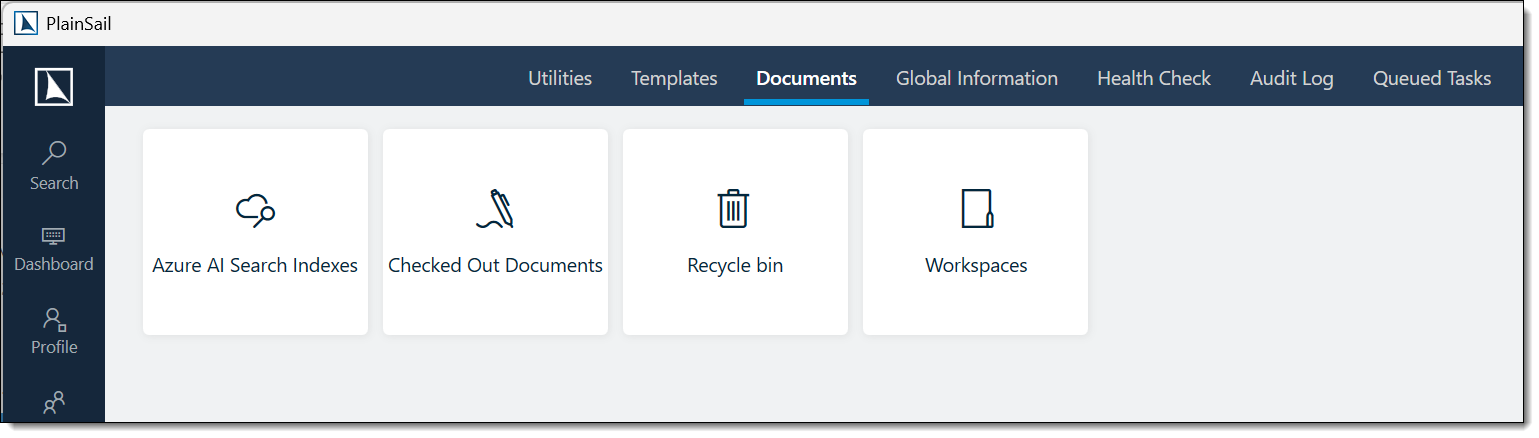
- Search Indexes – manage the full-text search indexes used for finding documents by content. Create new indexes, edit configurations, and trigger rebuilds.
- Checked Out Documents – see all documents currently checked out by users. Handy for finding locked files and forcing check-ins when someone has forgotten.
- Recycle Bin – view and manage deleted documents. You can restore them to their original location or permanently delete them.
- Workspaces – manage document workspaces – the folder hierarchies used to organise files. Create, rename, or restructure as needed.
Global Information
Global Information is where you maintain the reference data used throughout PlainSail. Select Admin > Global Information to get here.
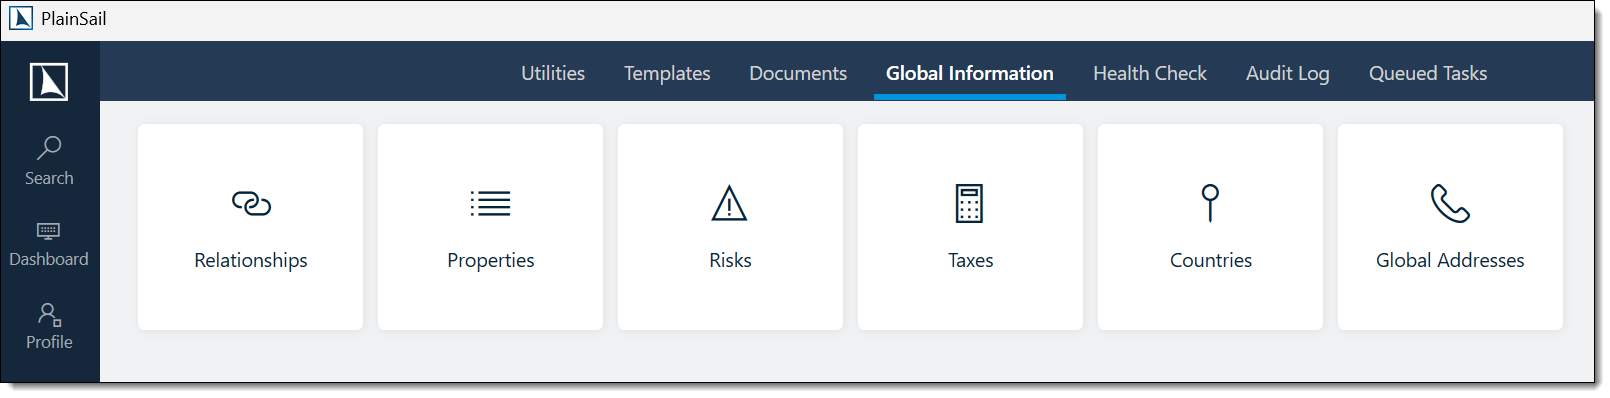
Relationships
Manage relationship types that describe how entities connect (e.g. Director, Shareholder, Beneficiary). Each type has a name, reverse label, description, and an option to trigger automatic screening when the relationship is created.
Properties
Manage category lists and property bags – the dropdown values and classifications used across the system (entity categories, activity types, CDD risk categories, sub-types, etc.).
Risks
Define risk rating levels (e.g. Low, Medium, High, Very High) with scores and colours used in risk assessments.
Taxes
Manage tax types (e.g. GST, VAT) with rates and bands used in billing and invoicing.
Countries
Maintain the country list including currency mappings. You can switch between a card view and a table view.
Global Addresses
Manage shared addresses used by multiple entities (e.g. a registered agent's address).
- Navigate to Admin > Global Information > Global Addresses to view, create, edit, or delete shared addresses.
- Link a global address to an entity via the entity’s Contact tab.
- Useful for office addresses shared across many entities managed by the same firm.
Health Check (Error Log)
The Health Check screen shows application errors logged by all users. Select Admin > Health Check from the ribbon.
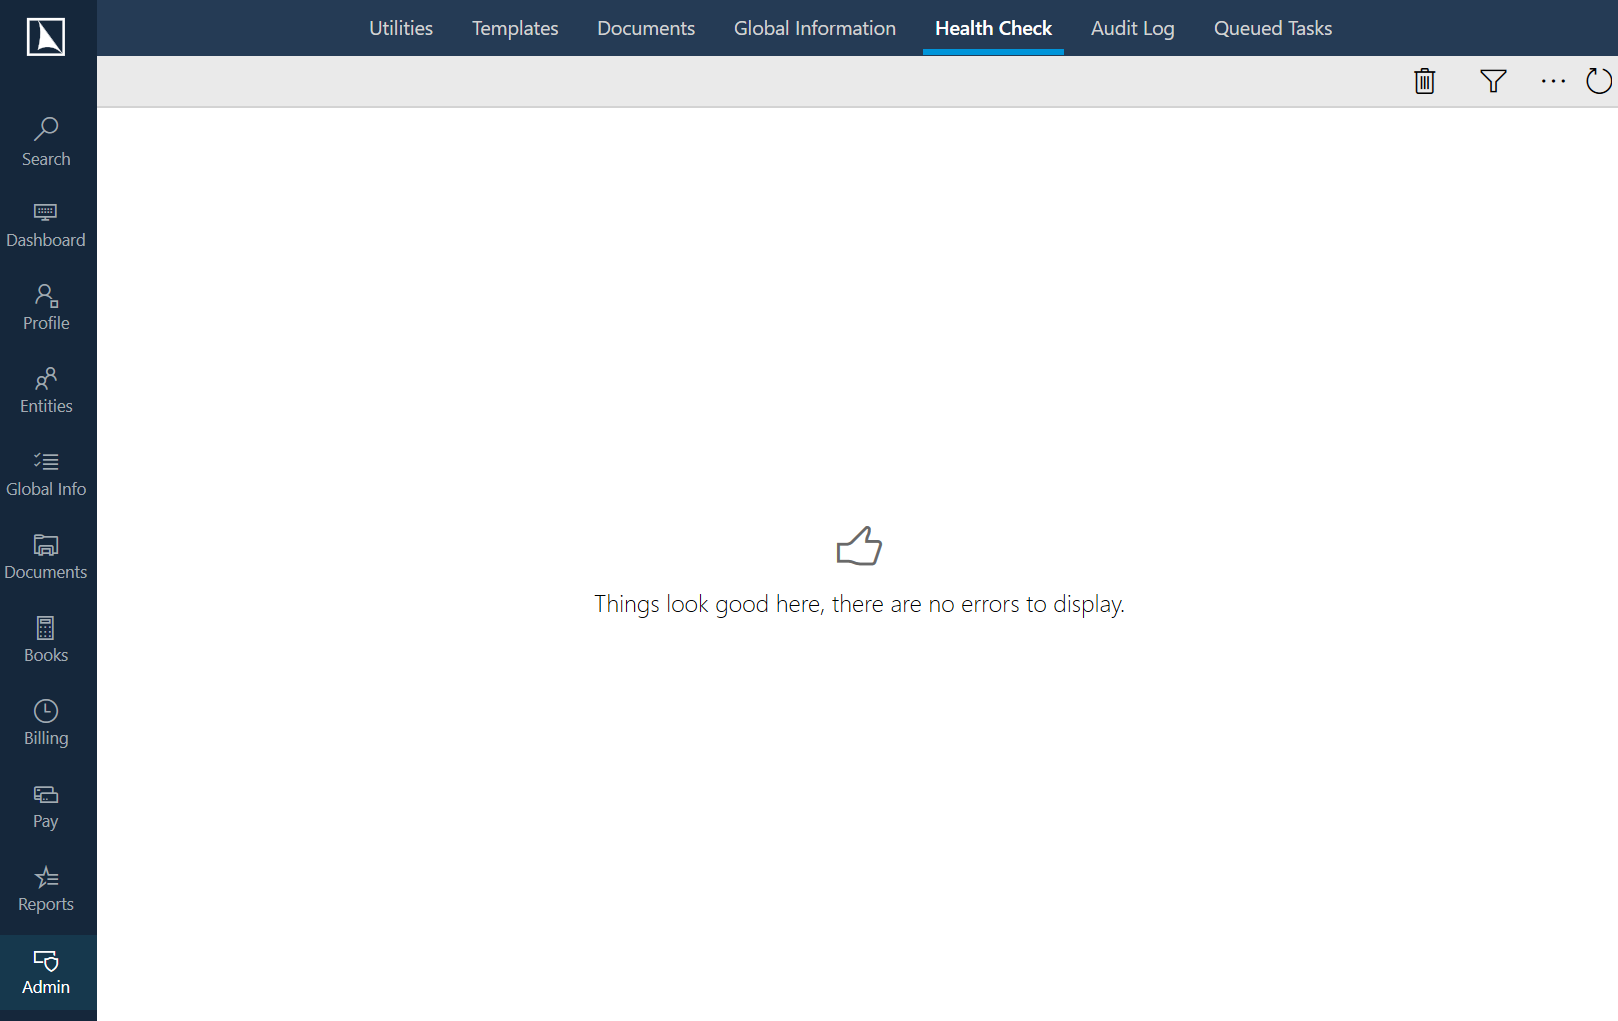
What you'll see
Each error shows the date, who it affected, the error message, a description, the area of the application where it occurred, and how many times it's happened.
Filtering
- Date range – defaults to today; changing the date refreshes automatically
- User – filter by affected user (non-admins can only see their own errors)
- Search – text search across messages and descriptions
- Max records – limit results to 100, 200, 500, 1,000, or 5,000
Actions
- Report Error – send the error to PlainSail support. If it's already been reported, you'll see who sent it and when.
- Delete Error – remove a single error (only do this if support is already aware of it or it's trivial)
- Delete All Errors – remove all errors from the system. Use extreme caution – only do this if instructed by PlainSail support.
- Track User – quickly filter to the user who experienced the selected error
Debug panel
Click Show Log Files to access debug controls. You can switch to detailed logging for troubleshooting, then switch back to normal mode when you're done. Debug logging only affects your session and doesn't persist after a restart.
Audit Log
The Audit Log records every create, update, and delete operation in the system – who made the change, when, and exactly what changed. Select Admin > Audit Log from the ribbon (or from the Utilities tabs).
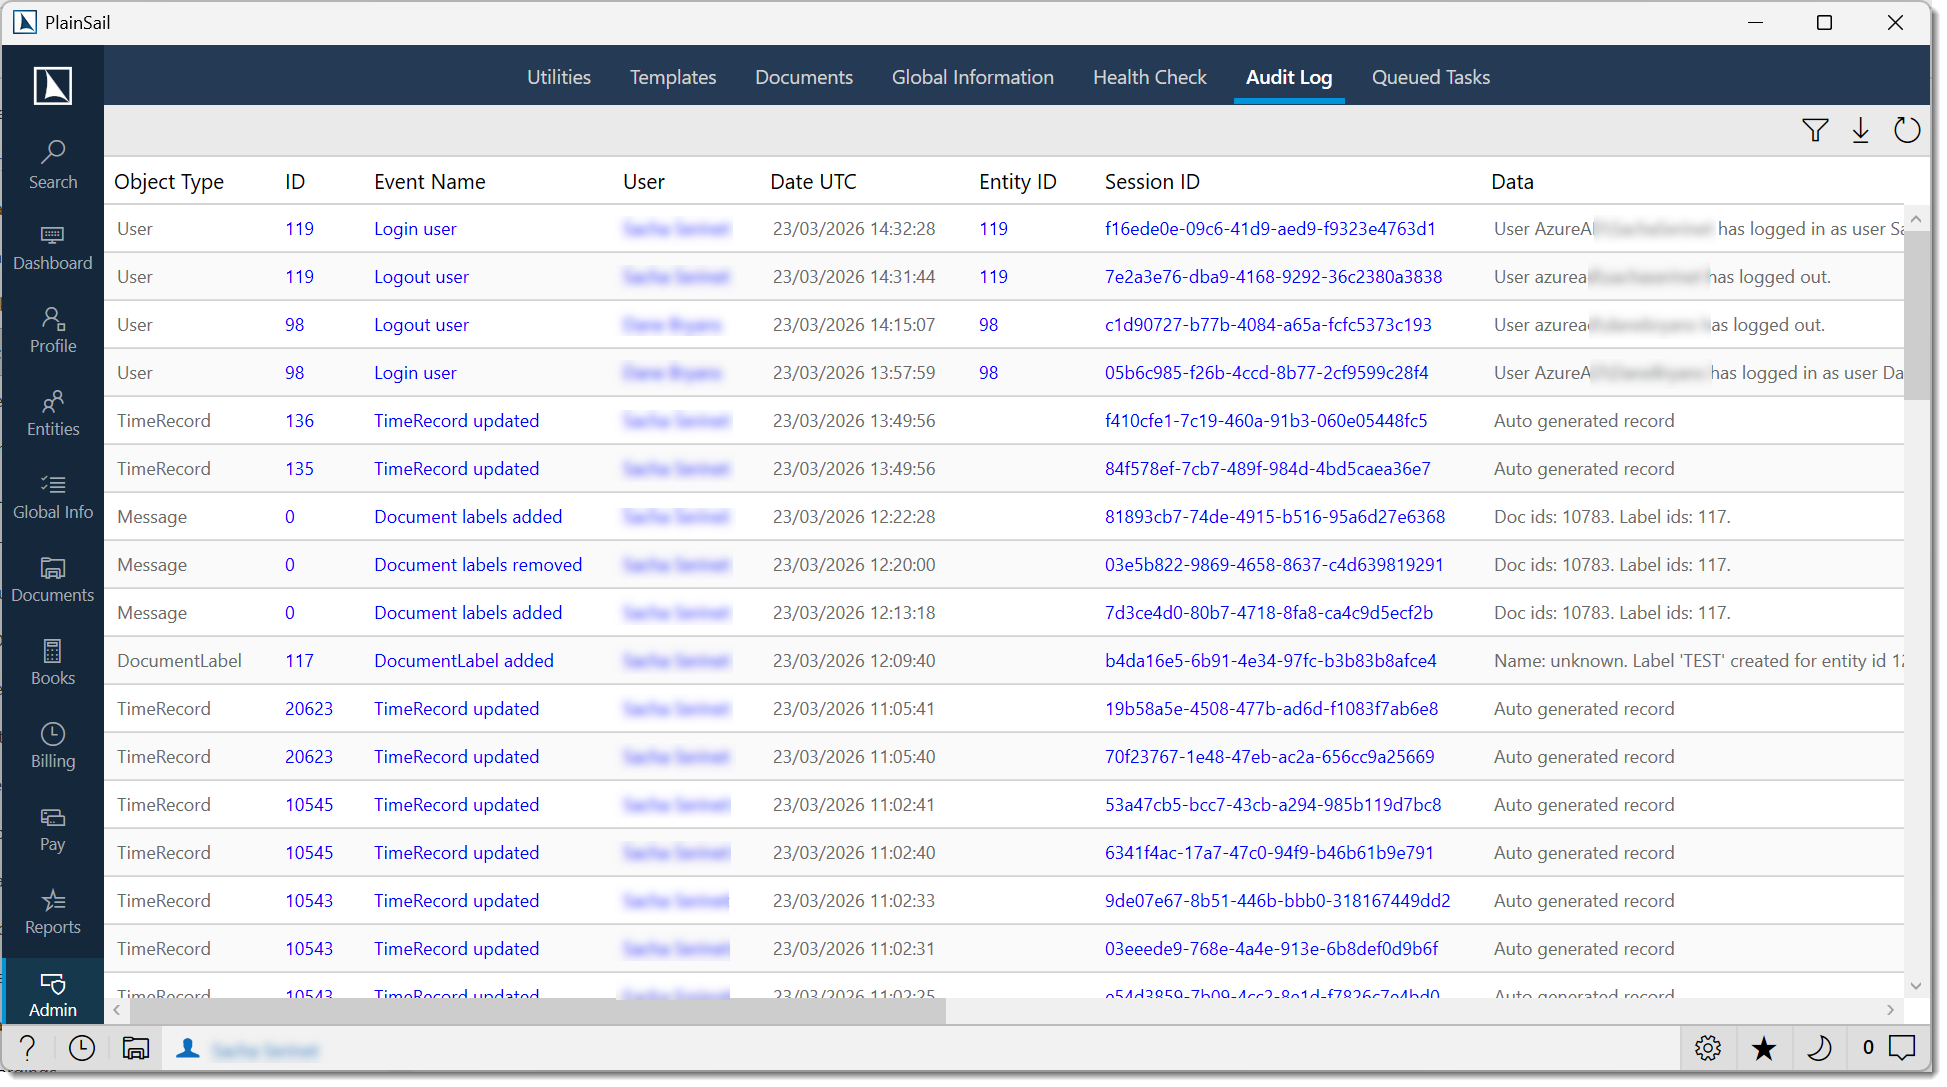
What you'll see
Each entry shows the date, event type (e.g. Entity Updated, Document Saved), who made the change, the type and ID of the record that changed, and any additional context.
Filtering
- Date range – defaults to today
- User – filter by who made the change
- Event name – filter by a specific type of event
- Max records – limit results
Useful actions
- Track Object – show the full history of a specific record across all time
- Track Business Entity – show all changes related to a particular entity
- Navigate to Entity – jump directly to the entity in the Client View
- Show Session – see every property-level change made in a single save operation (property name, old value, new value)
- Export to Excel – export the current filtered data to a spreadsheet report
Queued Tasks
Queued Tasks shows all background work being processed by PlainSail's background service – screening jobs, workflow triggers, billing tasks, document operations, and more. Select Admin > Queued Tasks.
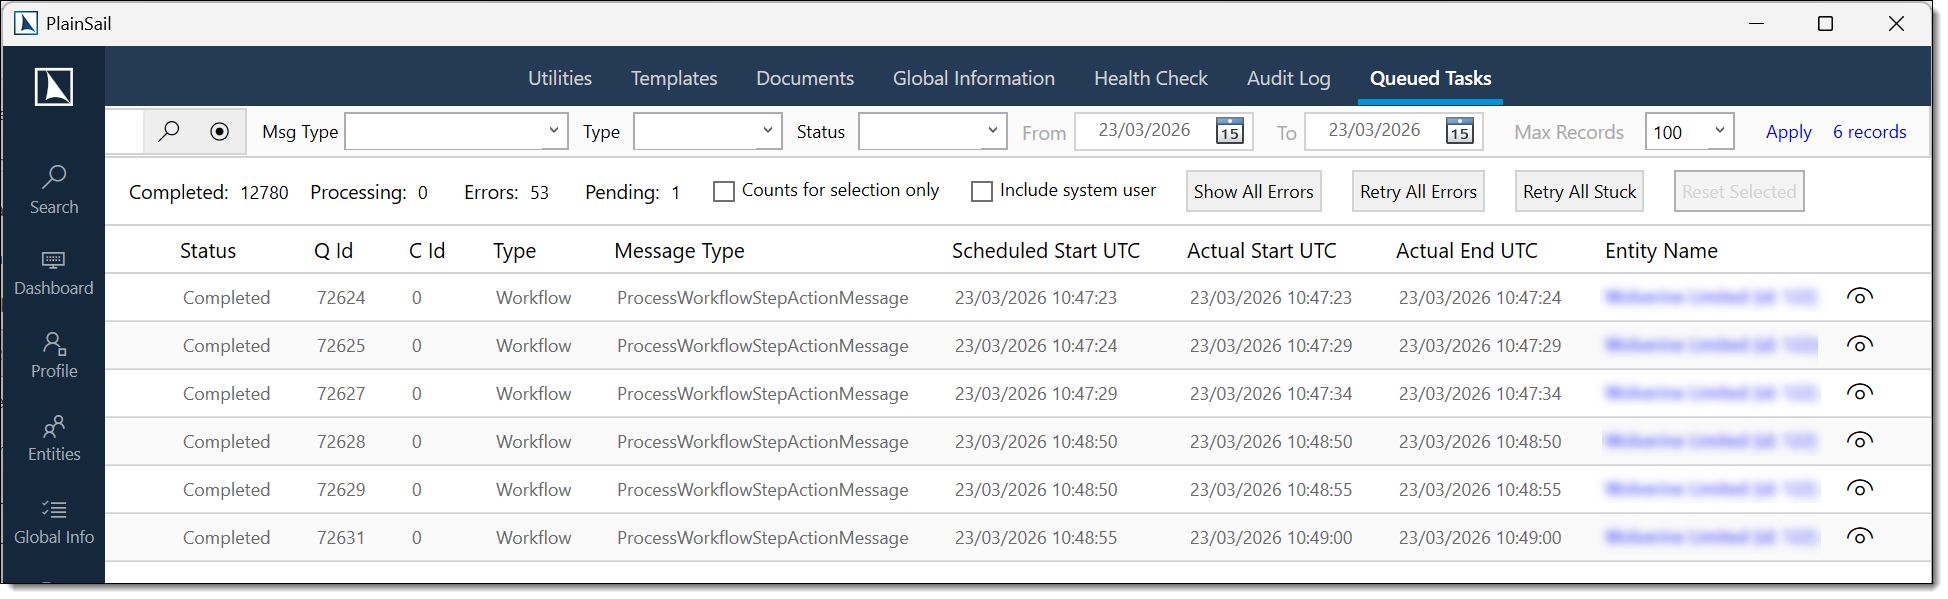
What you'll see
Each task shows which entity it relates to, the type of work, its status (Pending, Processing, Completed, or Error), when it was scheduled, and any error details if it failed. Four summary badges at the top show counts by status.
Filtering
- Date range – when the task was originally scheduled
- Entity – filter by a specific entity (click an entity name on any task to set this)
- Status – Pending, Processing, Completed, or Error
- Event type & message type – narrow down to specific kinds of work
- Show system tasks – toggle to include routine background operations (off by default)
Dealing with errors
- Show All Errors – reset filters and show every failed task across all dates
- Retry All Errors – reset all failed tasks so they're reprocessed
- Retry All Stuck – reset tasks that have been processing for more than 5 minutes without finishing (usually from a service interruption)
- Retry All Selected – reset only the tasks you've ticked
Service Monitors
The Service Monitors screen shows the status of all background services. Navigate to Admin > Utilities > Service Monitors.

What you'll see
Each service shows its name, when it was last started, when it last checked for work, when it's next scheduled to check, and any control messages.
Actions
- Restart Services – restart all background services (takes effect on the next check-in)
- Reset Errors – clear error counts for all services so they resume normal operation
Local background controls
A separate Background Services screen (via the "Control client monitor" utility) lets you pause and resume your local background polling. This only affects your own session – it doesn't impact other users or the main background service.
Background service reference
The following background services are monitored by PlainSail:
| Service | Description |
|---|---|
| Notification Service | Delivers in-app notifications to users. |
| Background Task Processor | Executes queued tasks (imports, sync, calculations). |
| Outlook Integration | Monitors Outlook interop status. |
| Document Indexer | Indexes documents for full-text search (when configured). |
| Email Delivery | Monitors SMTP connectivity for outbound emails. |
| External Feed Processor | Fetches data from external providers (bank feeds, investment data). |
Service status values
- Running (green) – the service is operational.
- Stopped (red) – the service has stopped. Requires investigation.
- Warning (amber) – the service is running but has encountered non-critical errors.
Record Locks
When someone opens a record for editing, it's locked to prevent conflicts. The Locks screen shows all current locks. Navigate to Admin > Utilities > Locks.
What you'll see
Each lock shows what type of record is locked, the entity it relates to, who holds the lock, and when it was acquired.
Actions
- Unlock – release a specific lock. The user holding it receives a notification explaining what happened.
- Unlock All for User – release all locks held by a user. Note: system-level locks must be unlocked individually to prevent accidental bulk releases.
- Track User – filter to see all locks held by a particular person
System Configuration
The System Configuration screen controls core settings that affect the entire application. Navigate to Admin > Utilities > Configuration.
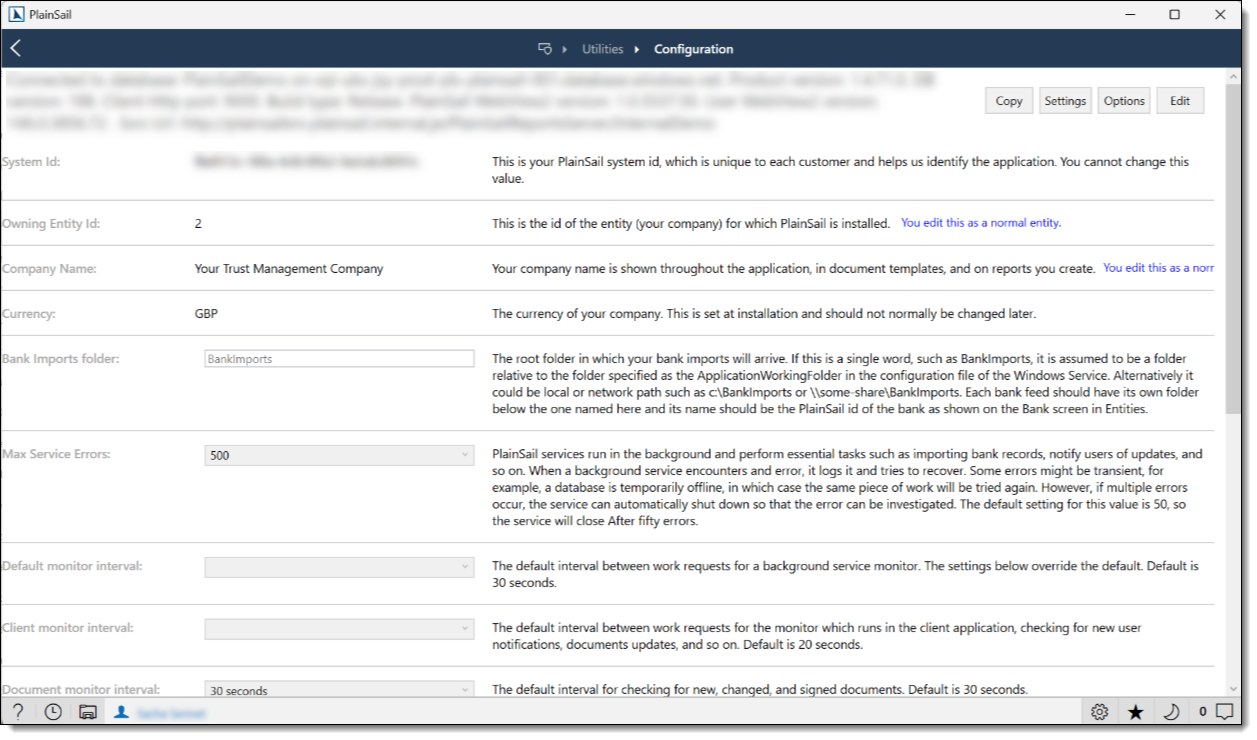
System information
The header displays your environment details – connected server, version numbers, and build type. Click Copy System Info to copy this to your clipboard (useful when raising support tickets).
Key settings
- Company Name – shown throughout the application
- Currency Code – the system's default currency. Changing this is very unusual and may affect historical records.
- Owning Entity – your organisation's entity. Click Navigate to open it.
- Bank Imports Folder – where bank import files are located
- Timekeeping Minutes Per Unit – time recording granularity (5, 6, 10, 12, 15, 20, 30, or 60 minutes)
- Default Working Hours Per Week – standard hours for utilisation calculations
- Block All Logins – whether non-admin logins are currently blocked
- Monitor Intervals – how often each background service checks for work
- Max Service Errors – how many errors a service can accumulate before it stops itself
Advanced options
Click Show Options to open the advanced configuration editor. This includes settings for screening, digital KYC, cloud storage, report configuration, and other feature-specific options. It uses the same field/section layout as inventory templates.
Local app settings
Click Show Settings to view local application configuration – server connections, file paths, logging preferences, and connection settings. Press Ctrl+S to save, Escape to cancel.
System version numbers
The application version is displayed in the bottom-left corner of the application window in Major.Minor.Patch.Build format (e.g. 4.8.12.1234):
- Major – significant platform changes
- Minor – feature releases
- Patch – bug fixes and minor updates
- Build – the specific build number
SMTP email configuration
Outbound email (for invoice delivery, notifications, etc.) requires SMTP to be configured:
Navigate to Admin > Configuration.
Set the SMTP server address, port, authentication credentials, and sender address.
Test the configuration using the Test email utility under Admin > Utilities.
Two-factor authentication
Two-factor authentication (2FA / MFA) is not configured within PlainSail. It is managed at the organisational level by your IT team. Once a user has authenticated, PlainSail picks up that credential automatically.
Backup and restore
PlainSail stores data in a SQL Server database. Backup and restore are managed at the database level:
- Backups – configured by your DBA using SQL Server’s built-in backup tools (full, differential, transaction log).
- Restore – performed by your DBA. Restoring from backup replaces all data.
- PlainSail does not have a built-in backup/restore UI.
- Document files are stored separately (either in the database or on a file share, depending on configuration). Ensure document storage is included in your backup strategy.
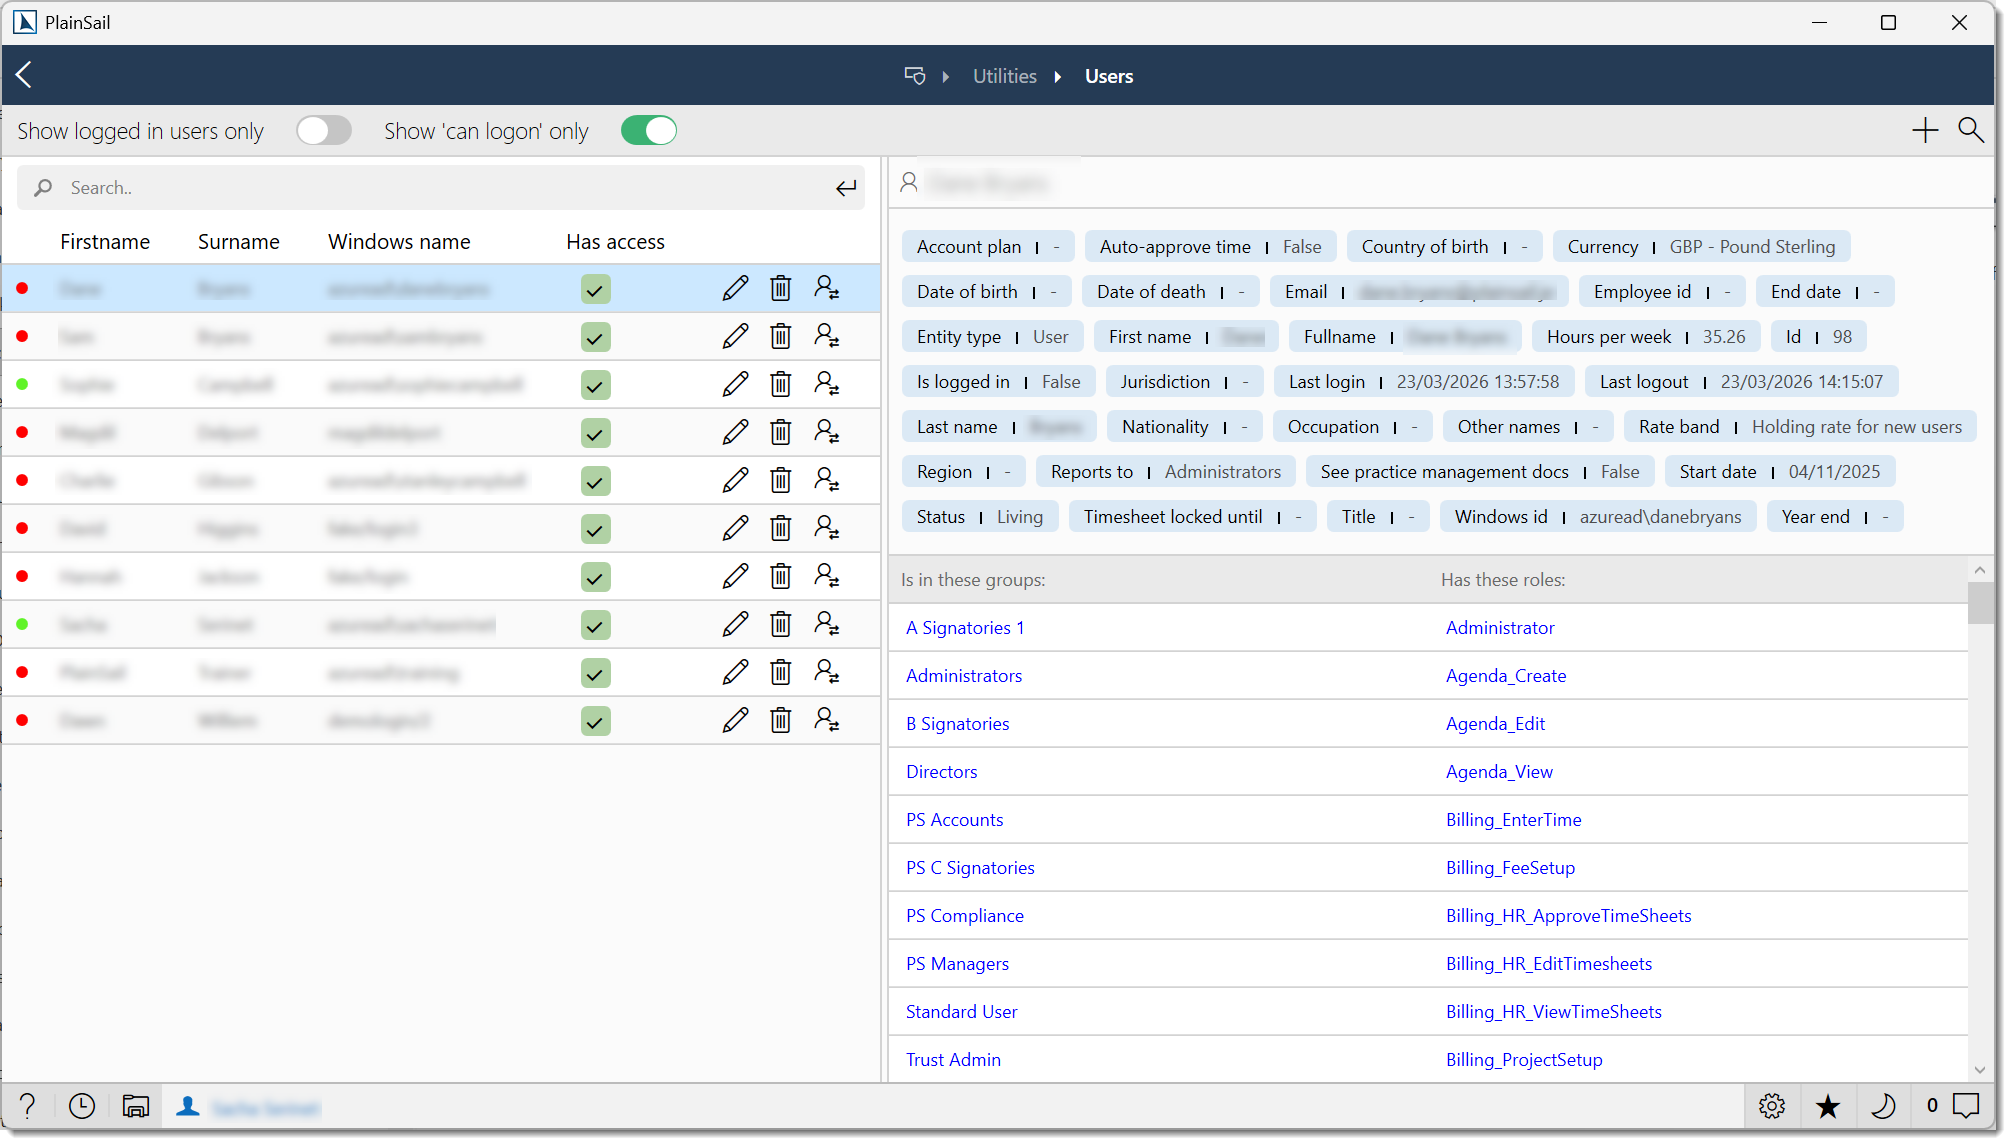
User Permissions
User Permissions is where you manage who can log in and what they're allowed to do. Navigate to Admin > Utilities > User Permissions.
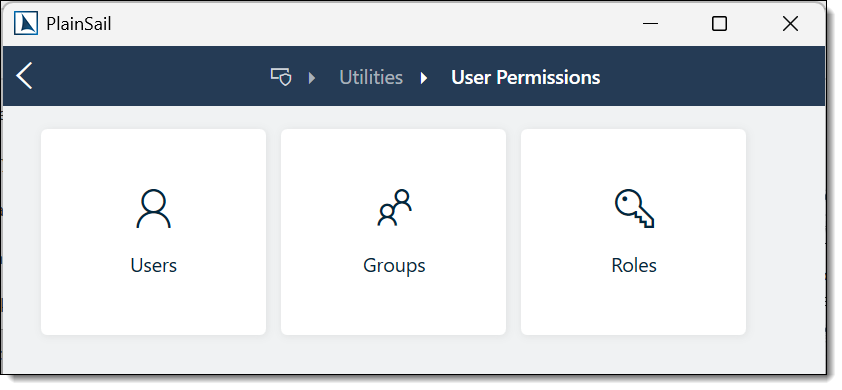
The screen has three sub-sections: Users, Groups, and Roles.
Users
The Users list shows all accounts, sorted by last name. Select a user to see their details: name, email, groups, roles, login status, and settings like auto-approve timesheets and practice management access.
- Search – filter by name, login name, or email. Press Escape to clear.
- Can logon only – show only active users (on by default)
- Logged in only – show only currently signed-in users
Adding a user
Click Add User and complete the required fields: Windows name, first name, last name, email, start date, and target utilisation.
Click Save. The user is added to the Standard User group automatically, and you're prompted to add them to entity permission groups.
User creation field reference
| Field | Required | Description |
|---|---|---|
| First Name | Yes | User’s first name. |
| Surname | Yes | User’s surname. |
| Windows Name | Yes | The user’s login username. This is how PlainSail identifies the user at sign-in. Your IT team can confirm the correct value. |
| No | User’s email address for notification delivery. | |
| Entity Link | Yes | Link to the user’s entity record (Person type). |
| Start Date | Yes | The date the user’s access begins. Users cannot log in before this date. |
| End Date | No | The date the user’s access ends. Set this when a user leaves the organisation. |
| Target Utilisation | No | The target billable hours percentage. Used for utilisation reports in the Billing widget. |
| Reports To | No | The user’s line manager. Controls who can approve timesheets, overtime claims, and which users appear in management reports. |
| User Groups | Yes | Assign the user to one or more user groups (e.g. Standard User, Administrators). |
| Roles | Yes | Assign specific roles (permissions) from the role list. |
Bulk import
Click Add Users (plural) to search your domain for Windows accounts not yet in PlainSail. Double-click cells to edit values before importing. A summary shows successes and any failures.
Editing & deactivating
Select a user and click Edit (or double-click) to change their details. To deactivate, untick Can logon. To fully remove, click Delete – if the user has any work history, their login is disabled instead of deleting them.
Impersonation
For testing permissions, select a user and click Impersonate. Your roles are temporarily replaced with theirs until you restart or use Refresh Permissions. This only affects roles, not entity visibility. You cannot impersonate the system user.
Groups
Groups are the primary way to manage permissions. Roles are assigned to groups, and users inherit roles through their group memberships.
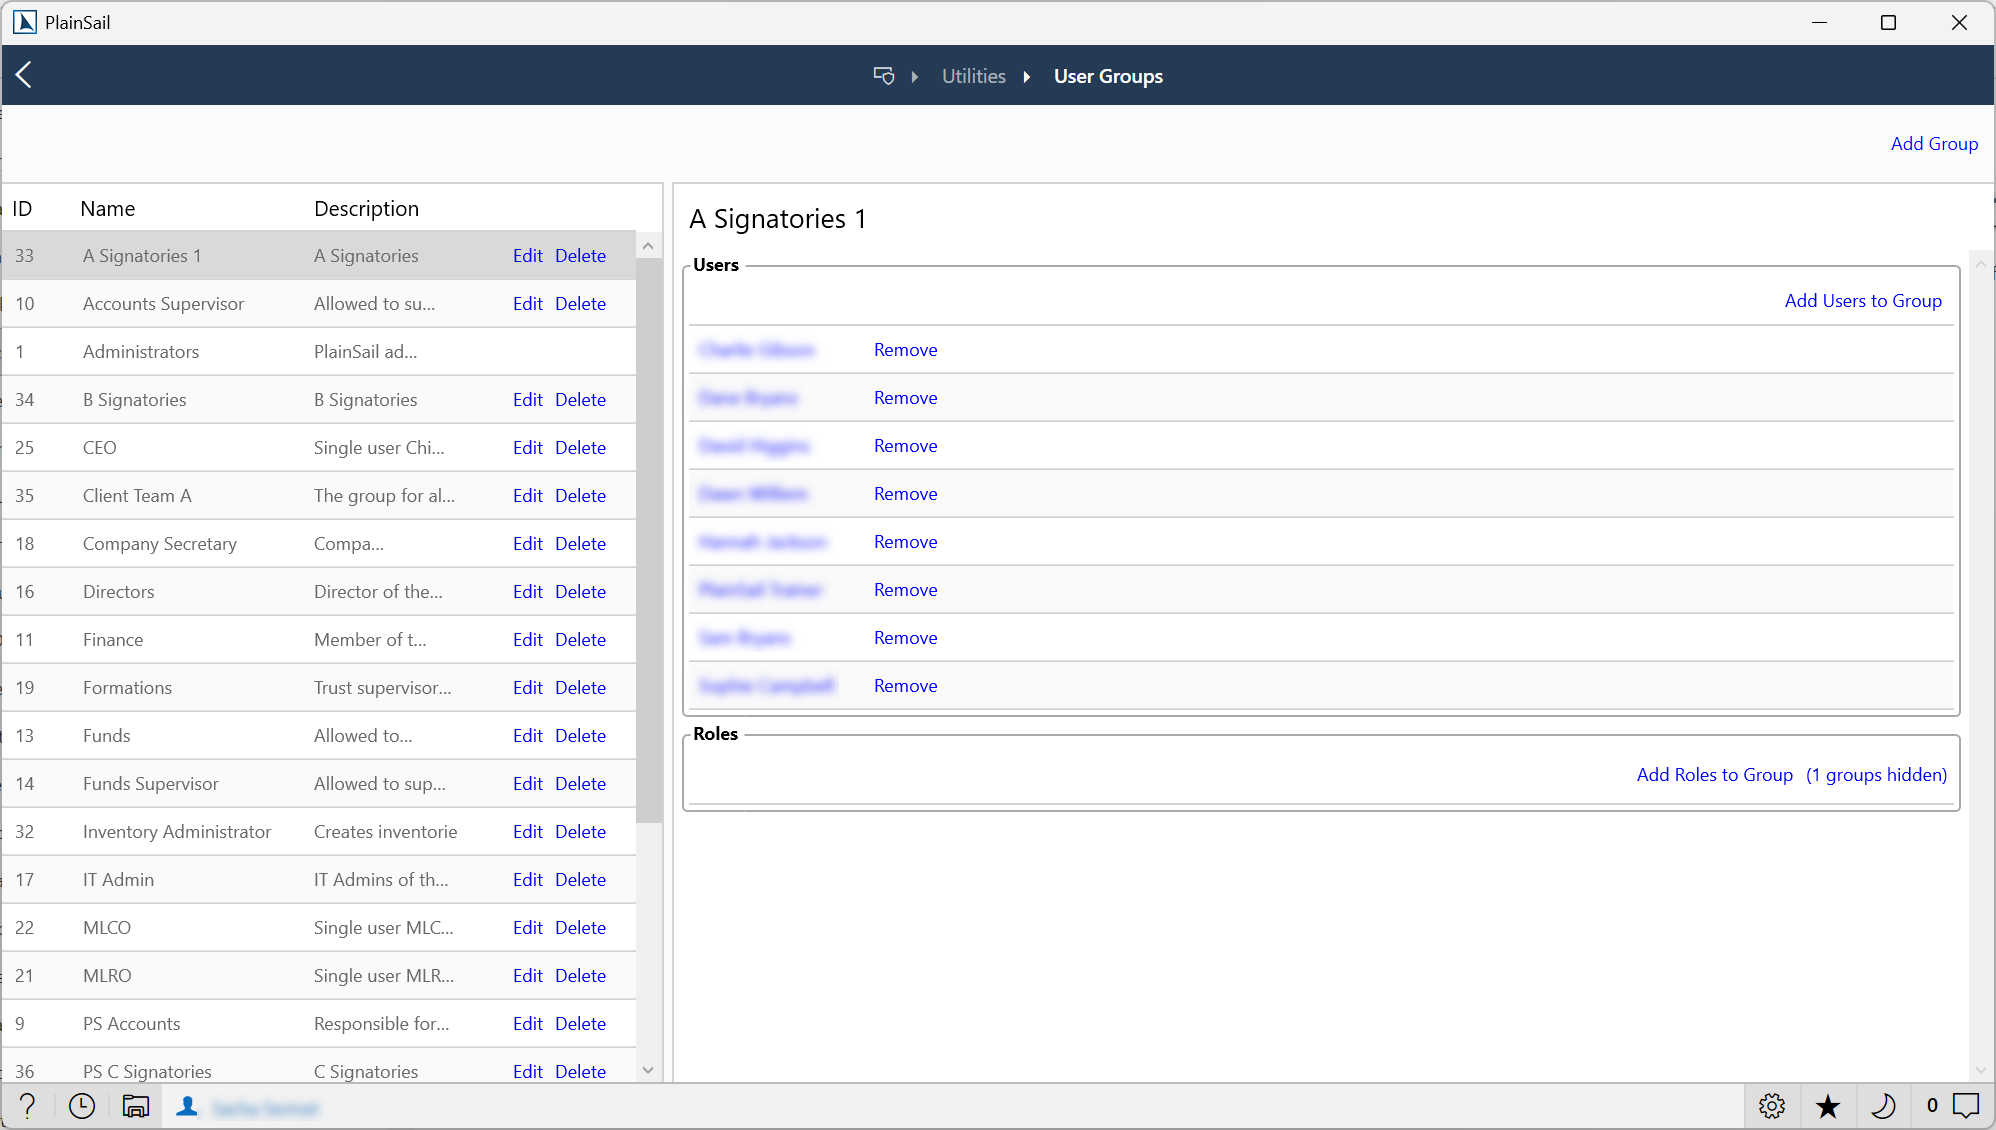
- Administrators – full access. Roles can't be changed. You can't remove the last user or yourself.
- Standard User – baseline group for all users. Its roles are often hidden when picking roles for other groups to reduce clutter.
To create a group, click Add Group and enter a name and description. Then add users and roles as needed. When picking roles, you can choose which base groups' roles to filter out.
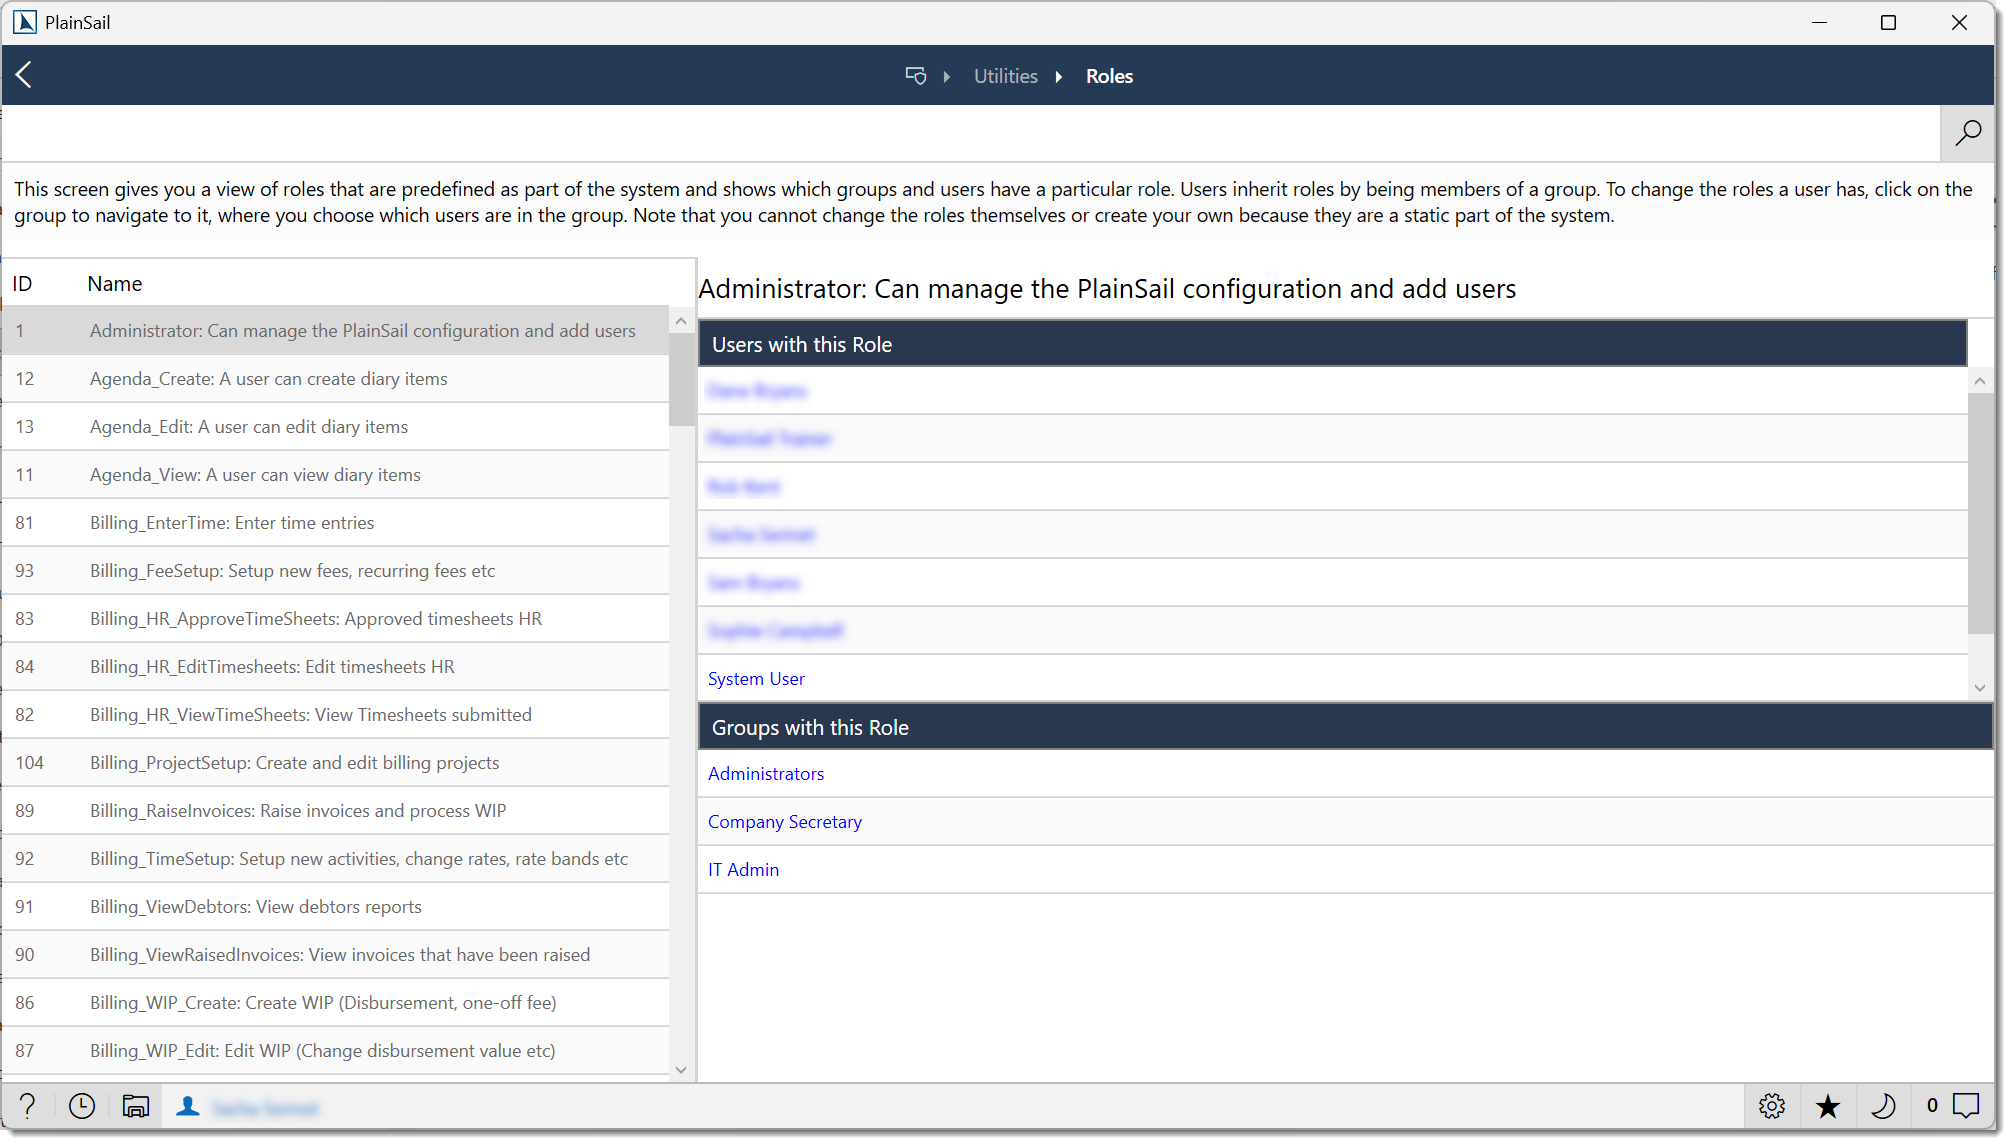
Roles
Roles are predefined in the system – you can't create or delete them. The Roles tab lets you search all roles and see which users and groups hold each one. Click any user or group name to navigate to it.
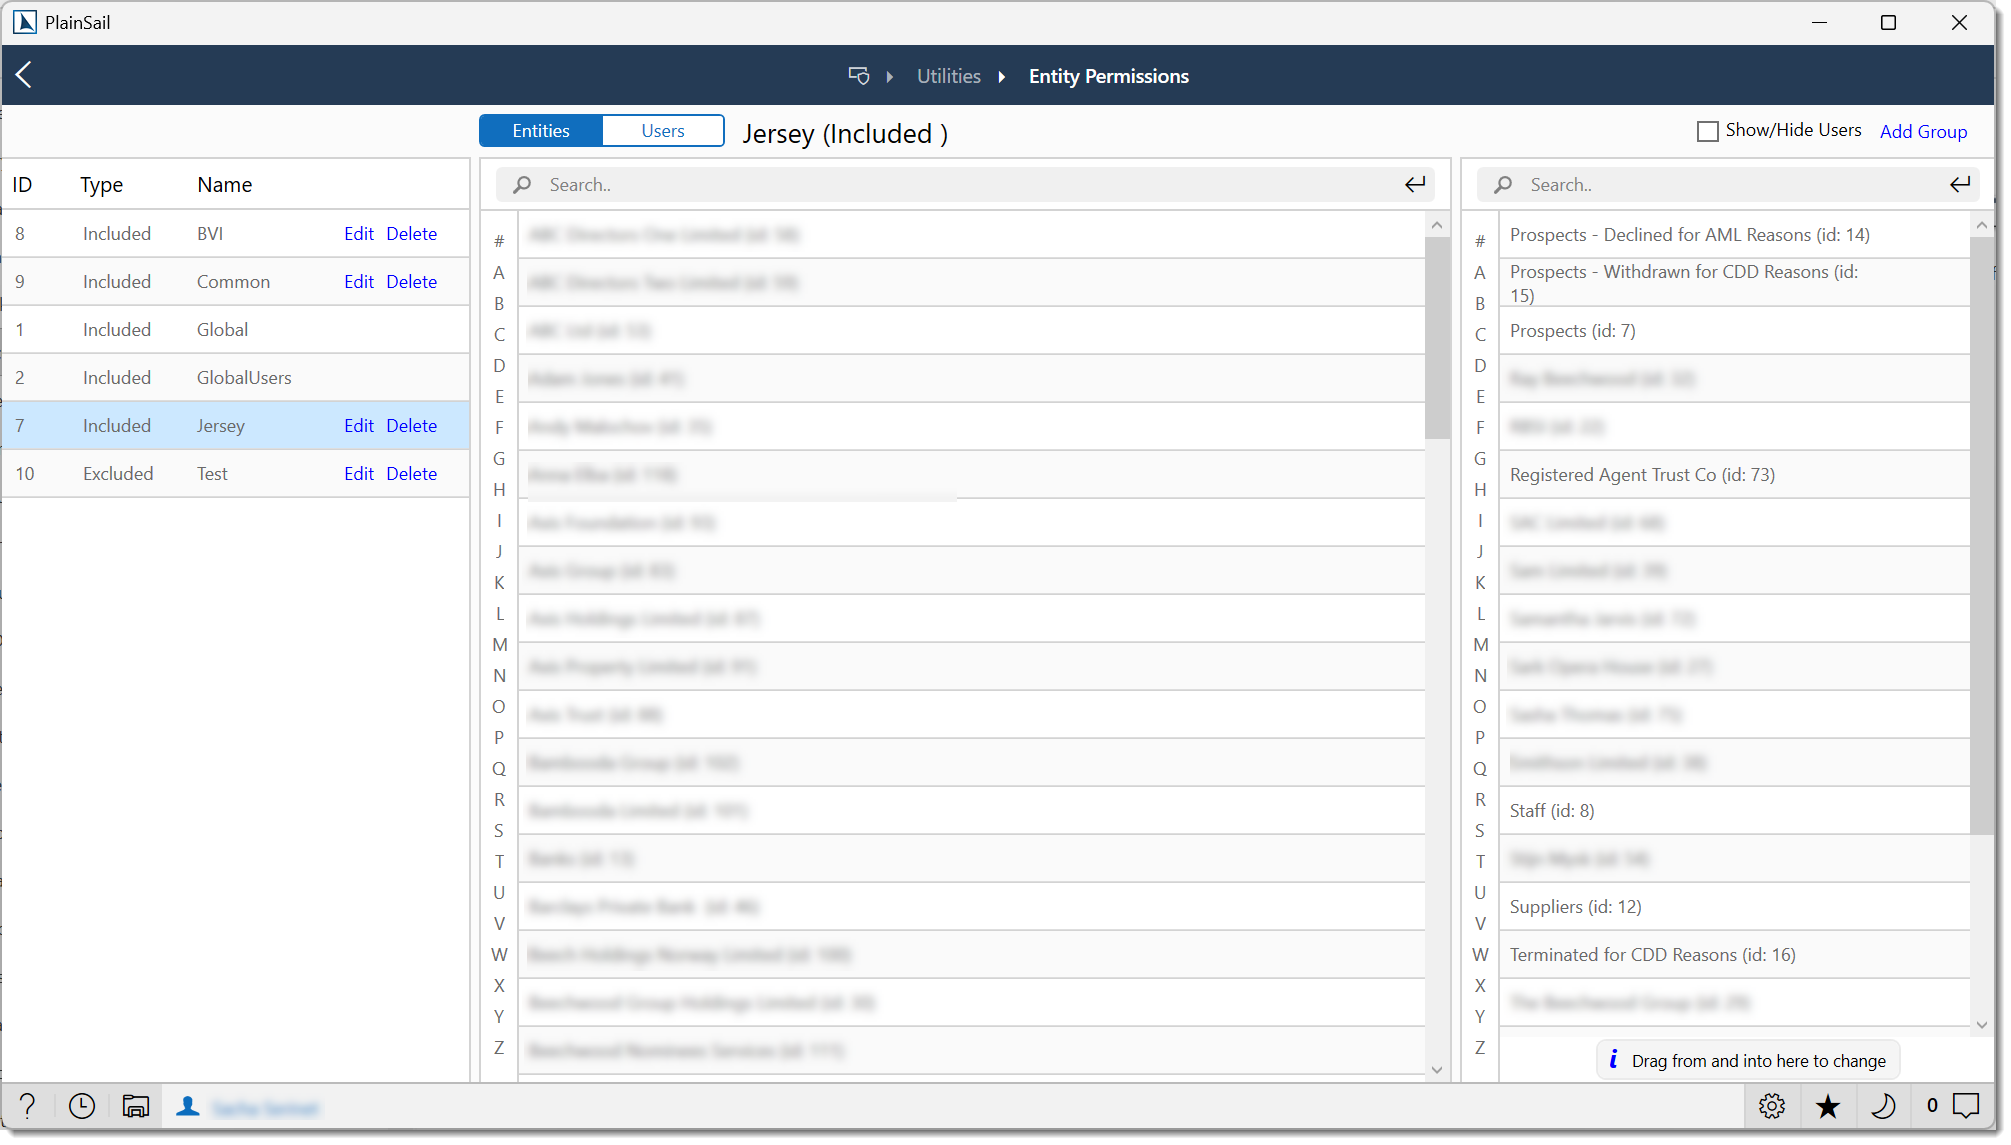
Entity Permissions
Entity permissions control which entities each user can see. This is completely separate from roles (which control what you can do). Navigate to Admin > Utilities > Entity Permissions.
How it works
Users and entities are organised into permission groups. Each group has an inclusion type:
- Included – users in the group can see the entities in it
- Excluded – entities are hidden from users in the group, even if visible through another group. Exclusion always wins.
The screen
Three panels: groups on the left, the selected group's entities or users in the centre, and available items to add on the right.
Managing groups
- Add Group – create a new group with a unique name and inclusion type
- Edit Group – change the name or switch between Included/Excluded (a warning explains the impact)
- Add Entities / Users – drag from the Available panel to the group, or use the add buttons
- Apply – save your changes (changes are pending until you click Apply)
- Fix Global Group – reset the global group to contain all entities and all admin users
Special groups
- Global Permissions Group – contains all entities by default (baseline visibility)
- Global Users Group – a special exclusion group for hiding users from entity lookups
Investigating permissions
Two powerful tools for troubleshooting:
- "Who can see this entity?" – select an entity and see which users have access
- "What can this user see?" – select a user and see all entities visible to them
Customer Feedback
The Customer Feedback screen collects issues and suggestions submitted by users from anywhere in the application. Navigate to Admin > Utilities > Customer Feedback.

Feedback_Edit role.
What you'll see
Each entry shows who submitted it, when, which screen they were on, a short description, the full detail, and whether it's been archived or forwarded to PlainSail support.
Actions
- Edit – update the description or details
- Archive / Unarchive – hide from the default view (or bring it back)
- Send to PlainSail – forward the feedback to support (once sent, it can't be unsent)
- Delete – permanently remove the entry
Use the filters to search by text, and toggle Show Archived or Show Sent to include those entries.
Permissions Reference
Admin roles
Administrator– full access to all Admin screensTemplates_Admin– manage inventory fields and templates
Common feature roles
Entities_Edit– edit entity recordsEntities_PaymentMethods_Create– test cheque templatesDocuments_View/Documents_ViewPracticeManagement– document accessBilling_TimeSetup/Billing_FeeSetup– billing configurationEntities_Accounting_ViewPracticeManagementAccounts– month-end override utilityFeedback_Edit– manage customer feedbackReports_View– access the Reports area
Super User
Some utilities require "Super User" access, which means having any of the admin-level roles. This is slightly broader than requiring the specific Administrator role.
Complete roles reference by module
The tables below list every predefined role in PlainSail, organised by module. Use Admin > User Permissions > Roles to see which users and groups hold each role.
Dashboard
| Role | Description |
|---|---|
Dashboard_ChangeWidgets | Customise dashboard widget layout. |
Entities
| Role | Description |
|---|---|
Entities_View | View entities. |
Entities_Create | Create entities. |
Entities_Edit | Edit entities. |
Entities_EditIsAdministeredStatus | Change administered status. |
Entities_EditRiskRating | Change risk rating. |
Entities_SetEndDate | Set entity end date. |
Entities_Shares_View | View share classes. |
Entities_Shares_IssueAndCreateClasses | Manage shares. |
Entities_BankAccounts_View | View bank accounts. |
Entities_BankAccounts_Create | Create bank accounts. |
Entities_BankAccounts_Edit | Edit bank accounts. |
Entities_Debts_View | View debts. |
Entities_Loans_View | View loans. |
Entities_Loans_Create | Create loans. |
Entities_Loans_Edit | Edit loans. |
Entities_Assets_View | View fixed assets. |
Entities_Assets_Create | Create fixed assets. |
Entities_Assets_Edit | Edit fixed assets. |
Entities_PaymentMethods_View | View payment methods. |
Entities_PaymentMethods_Create | Create payment methods. |
Entities_PaymentMethods_Edit | Edit payment methods. |
Entities_Timeline_View | View entity timeline. |
Entities_Profile_ViewPracticeManagement | View practice management entities. |
Entities_TaxReporting_View | View entity-level tax reporting. |
Relationships & Contact
| Role | Description |
|---|---|
Relationships_View | View relationships. |
Relationships_Create | Create relationships. |
Relationships_Edit | Edit relationships. |
Contact_View | View contact details. |
Contact_Create | Create contact details. |
Contact_EditAddress | Edit addresses. |
Contact_EditAddressLink | Edit address links. |
Documents
| Role | Description |
|---|---|
Documents_View | View documents. |
Documents_ViewPracticeManagement | View practice management documents. |
DocumentTemplates_ViewCreateEdit | Manage document templates. |
Inventories
| Role | Description |
|---|---|
Inventories_View | View inventories. |
Inventories_ViewOtherGroups | View inventories of other groups. |
Inventories_Edit | Edit inventories. |
Inventories_Create | Create inventories. |
Inventories_Delete | Delete inventories. |
Inventories_Change_IsHidden | Change hidden status. |
GlobalInventories_View | Access global inventories view. |
Bookkeeping & Accounting
| Role | Description |
|---|---|
Bookkeeping_View | View bookkeeping area. |
Bookkeeping_MyBatches_View | View own batches. |
Bookkeeping_OtherUserBatches_View | View other users’ batches. |
Bookkeeping_Invoices_Post | Post invoices. |
Bookkeeping_Payments_Make | Make payments. |
Bookkeeping_Scenarios_View | View scenarios. |
Bookkeeping_Scenarios_Edit | Edit scenarios. |
Bookkeeping_ChartOfAccounts_View | View chart of accounts. |
Bookkeeping_ChartOfAccounts_Edit | Edit chart of accounts. |
Bookkeeping_ChartOfAccounts_Delete | Delete chart of accounts entries. |
Bookkeeping_ChartOfAccounts_AccountPlans_ViewEditDelete | Manage account plans. |
Bookkeeping_BankReconciliation_BankDownloads_View | View bank downloads. |
Bookkeeping_BankReconciliation_Rules_View | View reconciliation rules. |
Bookkeeping_BankReconciliation_Rules_Edit | Edit reconciliation rules. |
Bookkeeping_BankReconciliation_Rules_Delete | Delete reconciliation rules. |
Bookkeeping_BankReconciliation_Rules_CreateGlobal | Create global reconciliation rules. |
Bookkeeping_ExchangeRates_View | View exchange rates. |
Bookkeeping_ExchangeRates_Edit | Edit exchange rates. |
Bookkeeping_QuotedInvestments_View | View quoted investments. |
Bookkeeping_QuotedInvestments_Edit | Edit quoted investments. |
Bookkeeping_QuotedInvestments_Create | Create quoted investments. |
Bookkeeping_UnquotedInvestments_View | View unquoted investments. |
Bookkeeping_UnquotedInvestments_Edit | Edit unquoted investments. |
Bookkeeping_UnquotedInvestments_Create | Create unquoted investments. |
Bookkeeping_ManualJournal_InvestmentAccounts | Post journals to investment accounts. |
Entities_Accounting_View | View entity accounting. |
Entities_Accounting_PostJournal | Post journals. |
Entities_Accounting_PostTrade | Post trades. |
Entities_Accounting_ReconcileBankAccount | Reconcile bank accounts. |
Entities_Accounting_ReverseBatch | Reverse batches. |
Entities_Accounting_ViewTrialBalance | View trial balance. |
Entities_Accounting_ViewAccountingReports | View accounting reports. |
Entities_Accounting_ViewPracticeManagementAccounts | View practice management accounts. |
Entities_Accounting_ChangeAccountPlan | Change account plans. |
Entities_Accounting_CloseYear | Close year-end. |
Entities_Accounting_Portfolio_View | View portfolios. |
Entities_Accounting_Portfolio_Edit | Edit portfolios. |
Entities_Accounting_Portfolio_Create | Create portfolios. |
Billing
| Role | Description |
|---|---|
Billing_EnterTime | Enter time records. |
Billing_HR_ViewTimeSheets | View timesheets. |
Billing_HR_ApproveTimeSheets | Approve timesheets. |
Billing_HR_EditTimesheets | Edit timesheets. |
Timesheets_ViewAllUsersTimesheets | View all users’ timesheets. |
Timesheets_ApproveOvertime | Approve overtime. |
Billing_WIP_View | View WIP. |
Billing_WIP_Create | Create WIP. |
Billing_WIP_Edit | Edit WIP. |
Billing_WIP_Finalise | Finalise WIP. |
Billing_RaiseInvoices | Raise invoices. |
Billing_ViewRaisedInvoices | View raised invoices. |
Billing_ViewDebtors | View debtors. |
Billing_TimeSetup | Time configuration. |
Billing_FeeSetup | Fee configuration. |
Billing_ProjectSetup | Project configuration. |
Entities_Billing_View | View entity billing. |
Entities_Billing_EditPreferences | Edit billing preferences. |
Tax Reporting
| Role | Description |
|---|---|
TaxReport_StartManual | Start manual reports. |
TaxReport_AmendDataBeforeSubmission | Amend before submission. |
TaxReport_AmendDataAfterSubmission | Amend after submission. |
TaxReport_VerifyData | Verify report data. |
TaxReport_ApproveData | Approve report data. |
TaxReport_Administer | Administer tax reporting. |
Entities_TaxReporting_View | View entity tax reporting. |
Screening & Digital KYC
| Role | Description |
|---|---|
Screening_View | View screening data. |
Screening_Administer | Administer screening. |
Screening_ChangeRequiresScreening | Change screening requirements. |
DigitalKyc_View | View digital KYC. |
DigitalKyc_Administer | Administer digital KYC. |
DigitalKyc_CreateResetVerification | Create/reset verifications. |
Reports
| Role | Description |
|---|---|
Reports_View | View reports. |
Reports_ViewGlobal | View global reports. |
Reports_CreateAccountingReports | Create accounting reports. |
Administration
| Role | Description |
|---|---|
Administrator | Full system administrator access. |
IT Admin | IT-level administrator access. |
Templates_Admin | Manage templates (inventory, document, workflow). |
Tasks_ViewOtherTeams | View tasks of other teams. |
UserTasks_Delete | Delete user tasks. |
Feedback_Edit | Edit customer feedback. |
ExternalFeeds_Fetch | Fetch external feed data. |
ExternalFeeds_Administer | Administer external feeds. |
Workflow_Edit_Name | Edit workflow instance names. |
Loans_MergeLoan | Merge loan records. |
Agenda_View | View agenda. |
Agenda_Create | Create agenda items. |
Agenda_Edit | Edit agenda items. |
Keyboard Shortcuts
- F5 – refresh the current list on most Admin screens
- Escape – close a pop-up editor or cancel editing (applies to local settings and template field editors)
- Ctrl+N or Ctrl+A – add a new field (Templates > Fields)
- Ctrl+S – save local app settings (only available in the Show Settings dialogue)
Tips & Warnings
Good to know
- Configuration changes are picked up by other users automatically within a few minutes.
- All retry operations on queued tasks are recorded in the audit trail.
- Background services are managed by a supervisor service that checks on them periodically and can restart them.
- When you delete a user who has work history, their login is disabled rather than deleting them – this preserves the audit trail.
Things to watch out for
- Blocking logins doesn't log out current users – use "Log off all users" for that, and note that logoffs can't be cancelled once started.
- Don't run the task monitor manually on a live system – having two monitors processing the same tasks can cause corruption. The Start/Stop controls are only available in test environments.
- System-level locks need individual unlocking – "Unlock All for User" skips these to prevent accidentally releasing critical bookkeeping locks.
- Changing the system currency is very unusual – it can affect historical records. A warning will appear before you can confirm.
- Entity permission changes are significant – they take effect immediately and can change what users see right away.
- The JFSC report runs in the foreground – it will keep your application busy until it completes (other users are not affected).
FAQ
Can I assign a role directly to a user?
No. Roles are always assigned to user groups. Create a group with the role you need and add the user to it.
What happens if a user is in both an Included and Excluded permission group for the same entity?
Exclusion always wins. The entity will be hidden. Remove it from the exclusion group to restore visibility.
Can I create custom roles?
No. Roles are predefined in the system. If you need a new permission, contact PlainSail support.
How do I find out what roles a user has?
Select the user on the Users tab – the detail panel shows all their groups and inherited roles. Or search the Roles tab to see who holds a specific role.
Why can't I edit the system user?
The system user is a protected internal account. It can't be edited, deleted, impersonated, or removed from the Administrators group.
What does "Fix Global Group" do?
It resets the Global Permissions Group to contain all entities and all administrator users, removing any non-admin users. If your organisation relies on non-admin users having global visibility, you'll need to re-add them afterwards.
How do I retry failed background tasks?
Go to Admin > Queued Tasks, click Show All Errors to see them, then use Retry All Errors or tick individual tasks and use Retry All Selected.
Where can I see what changed in a specific save?
In the Audit Log, find the entry and click Show Session. This shows every property that was changed, with old and new values.
How do I troubleshoot "user can't see an entity"?
Go to Admin > Entity Permissions and find the entity.
Use "Who can see this entity?" to check who has access.
If the user is missing, add them to an Included group that contains the entity, or remove the entity from any Excluded group the user belongs to.
How do I troubleshoot "user can't perform an action"?
Go to Admin > User Permissions > Roles and search for the role.
Check whether the user appears in the "Users with role" list.
If not, add the role to one of the user's groups, or add the user to a group that already has it.
How do I reset a user’s password?
PlainSail uses your organisation’s login credentials. Password resets are managed by your IT team, not within PlainSail.
How do I back up the system?
Backups are managed at the SQL Server database level. Use SQL Server Management Studio or automated backup scripts configured by your DBA. Make sure document file storage is included in your backup strategy.
What do the system version numbers mean?
The version is displayed as Major.Minor.Patch.Build (e.g. 4.8.12.1234). Major = significant platform changes, Minor = feature releases, Patch = bug fixes, Build = the specific build number.
How do I configure email settings?
Navigate to Admin > Configuration and set the SMTP server address, port, authentication credentials, and sender address. Use the Test email utility to verify delivery.
- Getting Started – user login, navigation, and entity permissions overview
- Entities & Client View – entity merge, conversion, and deletion procedures
- Billing & Invoicing – billing roles and fee configuration
- Workflow & Approvals – workflow template design and trigger configuration
Test Yourself
Test your admin and permissions knowledge with these 10 questions covering roles, groups, entity access, and system administration tools.