Help Centre
Document Management
Storing, editing, versioning and circulating documents within PlainSail – including templates, approval workflows, and the Outlook integration.
Before you begin
- The PlainSail version of any document is the definitive copy
- Documents operate on a checkout / check-in basis – always check back in promptly
- Assign meaningful, consistent file names when uploading
- Do not copy a document to link it to multiple entities – use the entity link feature instead
- Use labels for sub-categorisation within workspaces
- Develop documents in an editable workspace, then convert to PDF when finalised
Overview
PlainSail provides a fully integrated document management system. Unlike traditional file-share approaches, documents in PlainSail are stored centrally and can belong to multiple entities simultaneously – eliminating duplication and ensuring a single source of truth.
Key capabilities include:
- Multi-entity assignment – a single document can be linked to any number of entities
- Full version control – every edit is tracked with the ability to view or restore previous versions
- Notes and annotations – internal-only commentary can be attached to any document
- Electronic circulation – route documents for approval without leaving the platform
- Access control – workspace-level permissions govern who can view and edit documents
- Template engine – Word-based templates with dynamic markers for automated document generation
- Multiple access points – reach documents via the entity view, the global Documents sidebar, or the filing tray
Key Concepts
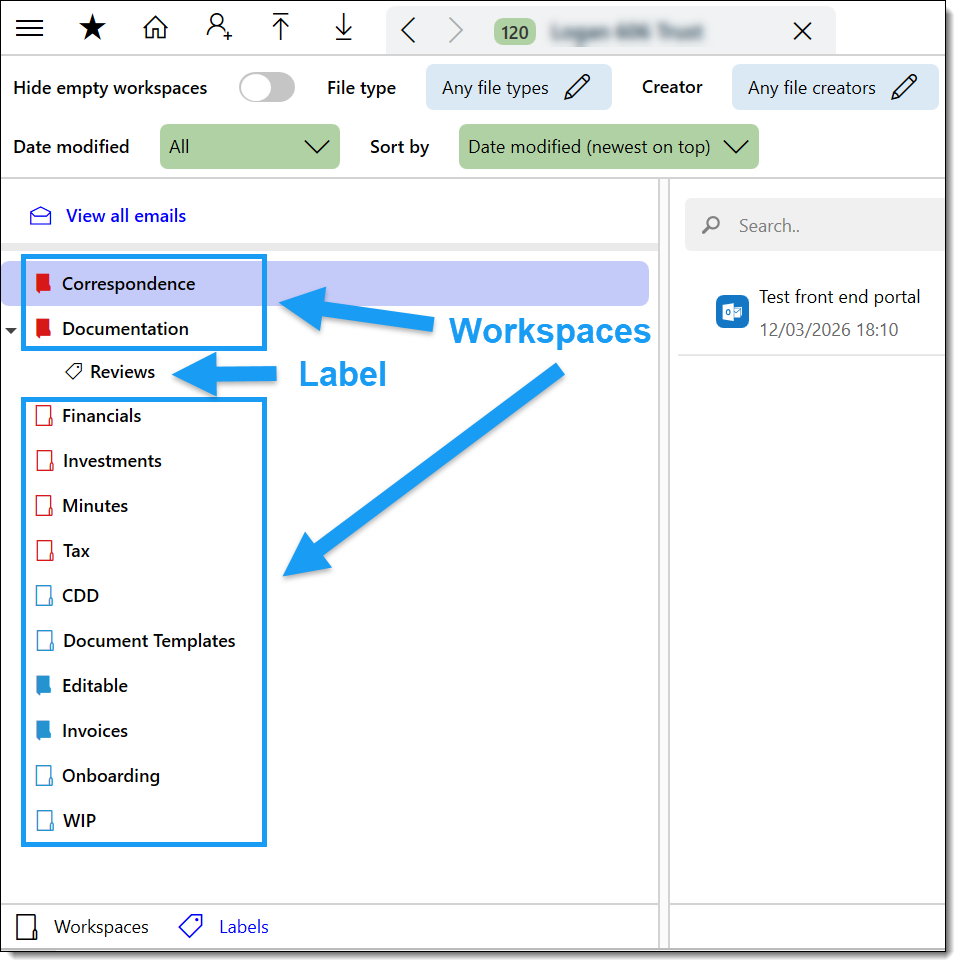
Workspaces
Every document belongs to at least one workspace. Workspaces function as logical folders and control both organisation and access. Entities may have multiple workspaces (e.g. "Correspondence", "Board Minutes", "Compliance"), and a document can appear in more than one workspace without being duplicated.
Labels
Labels provide an additional layer of categorisation within a workspace. They are useful for tagging documents by year, project, or any other taxonomy your organisation requires. Labels can include date-based variables such as @@CurrentYear, @@NextYear, and @@PreviousYear for automatic rotation.
Check-out / check-in
PlainSail operates on a check-out / check-in model. When a user opens a document for editing, it is checked out – preventing concurrent edits by other users. The document must be checked back in to make changes visible to others and to create a new version in the history.
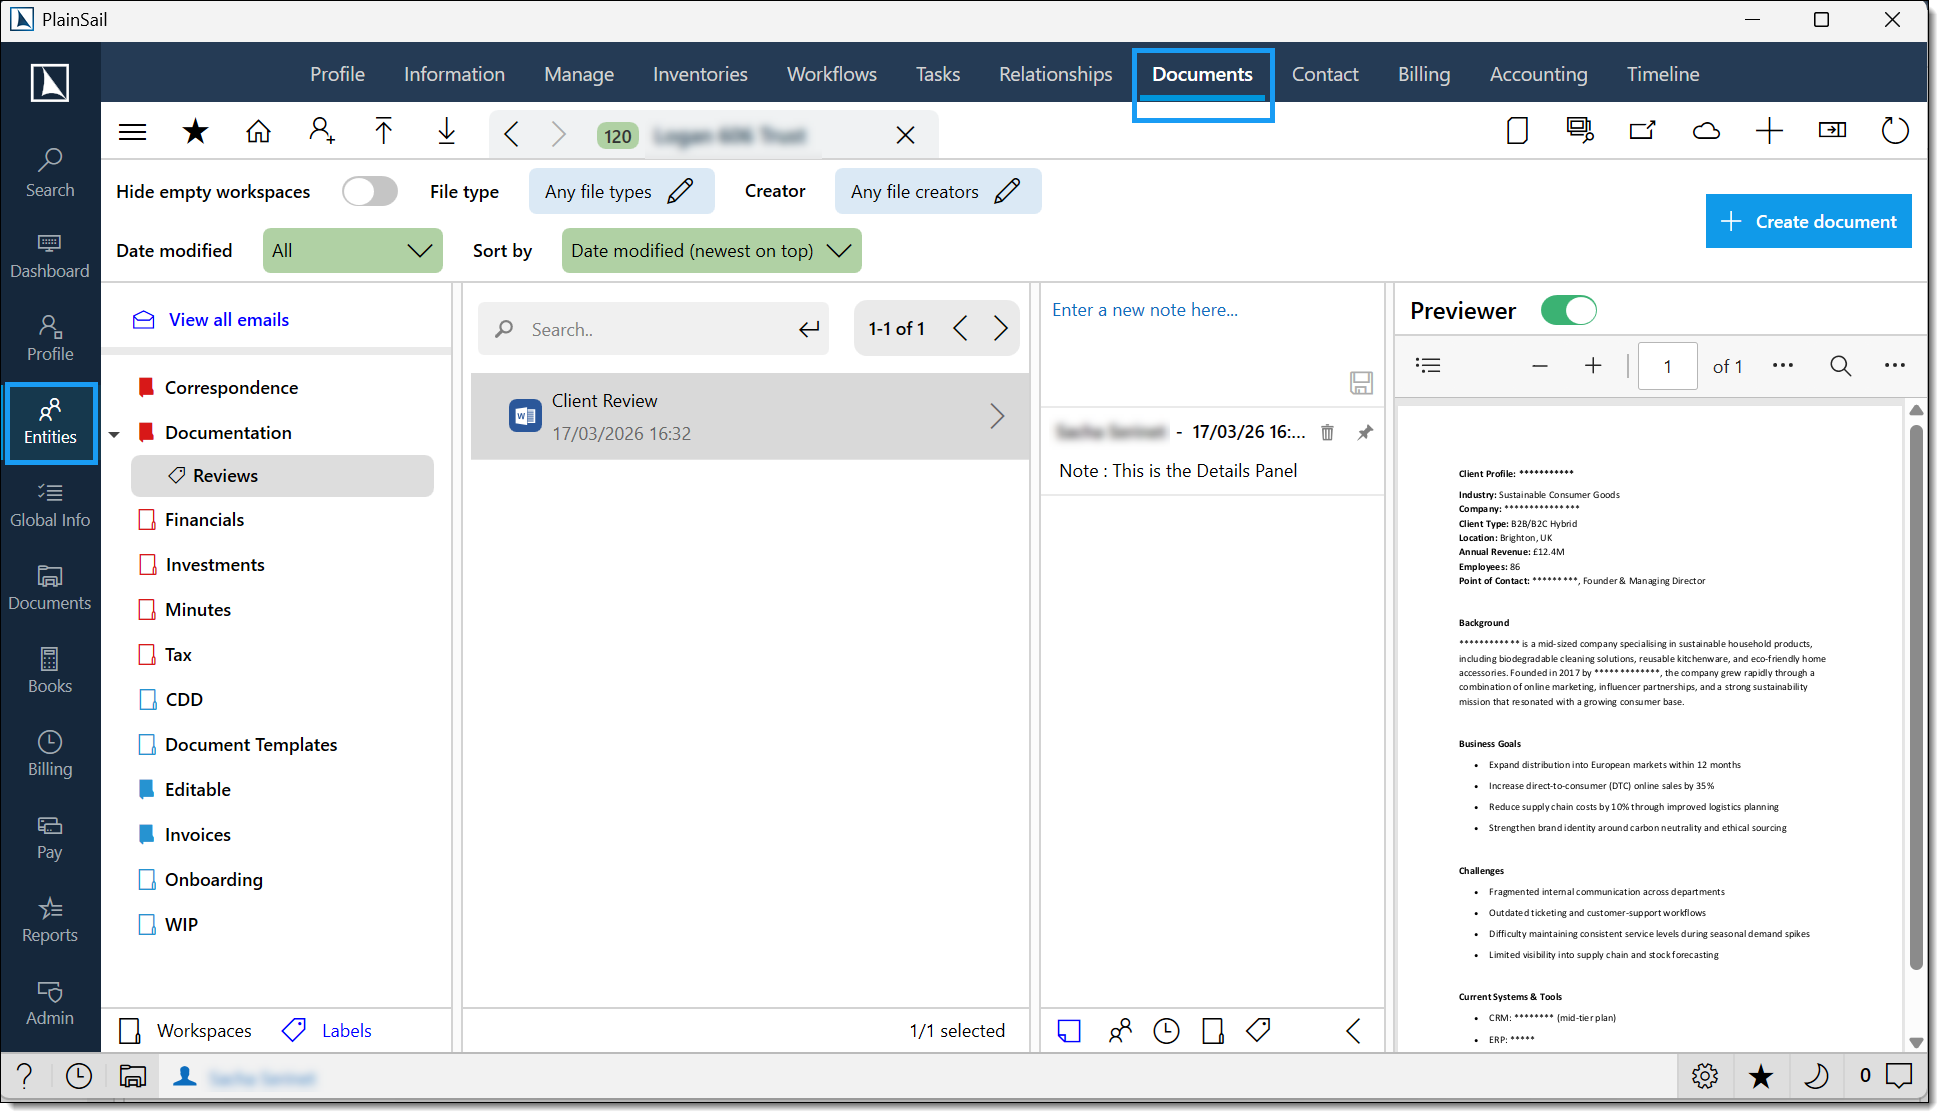
Navigating Documents
There are two primary routes to the document library:
- Entity-level – navigate to any entity and select the Documents tab from the top menu. This displays only documents linked to the selected entity.
- Global view – click the Documents button on the left sidebar. This provides access to all documents across all entities you have permissions for.
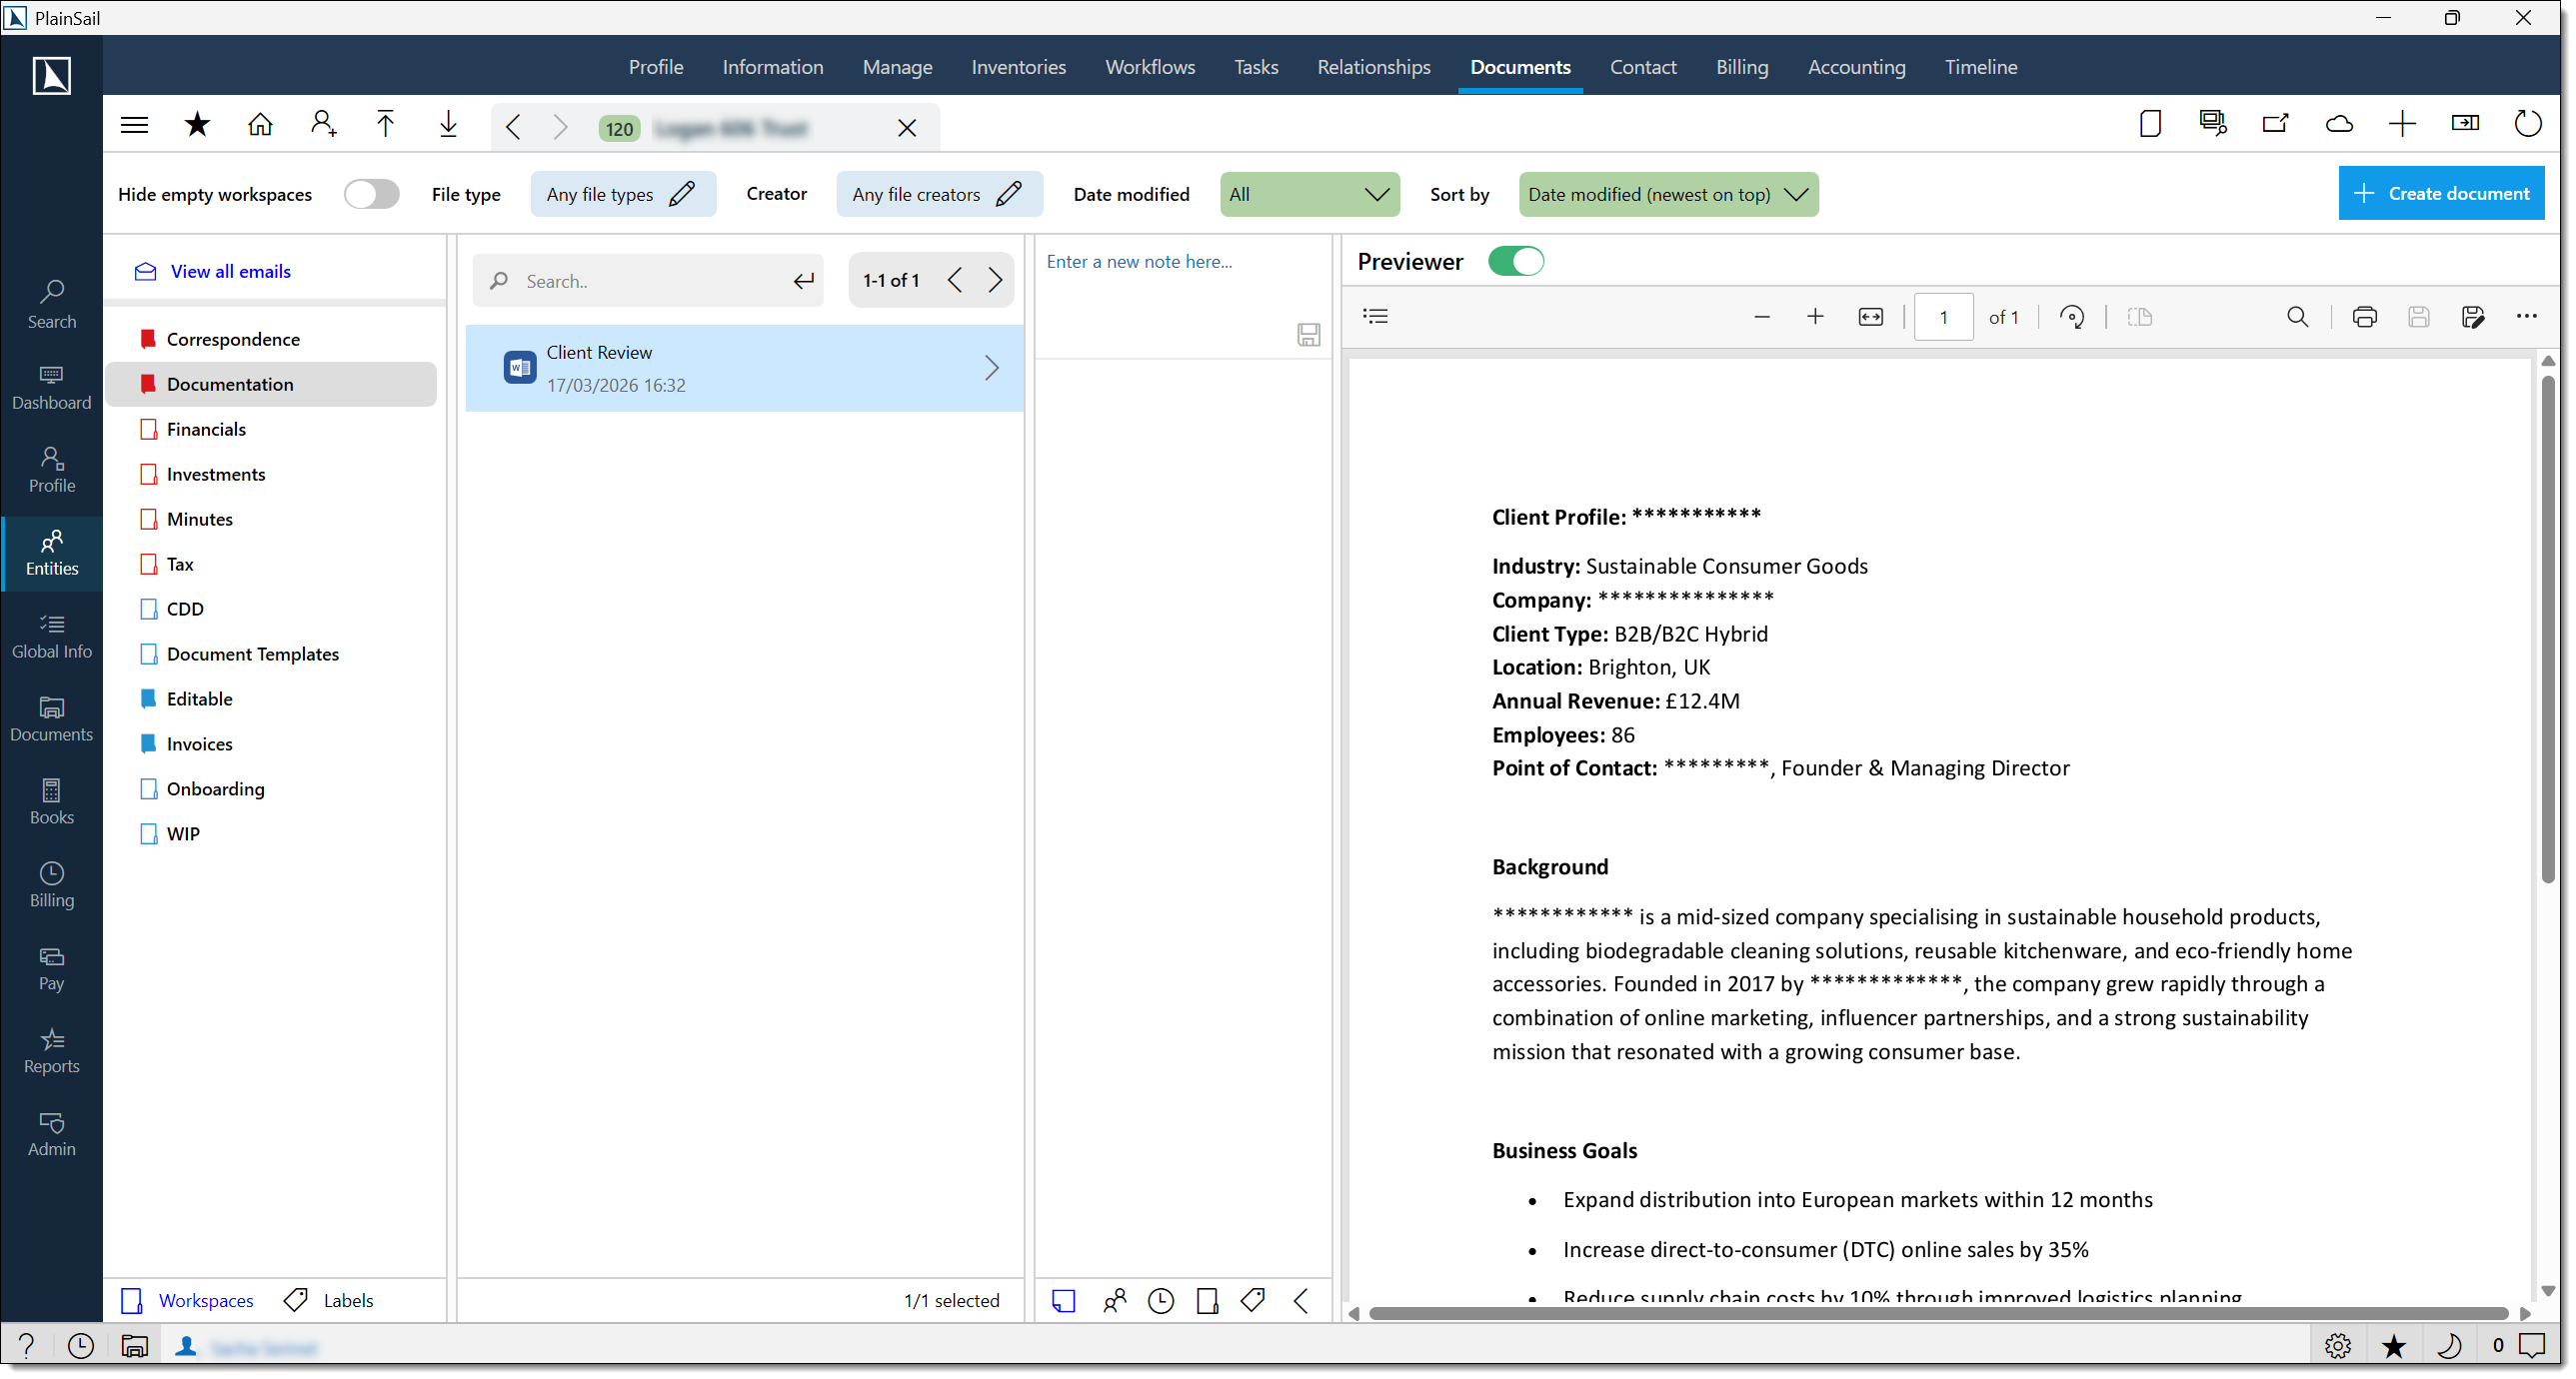
Screen layout
The documents screen is divided into four panels:
- Workspace panel (left) – browse workspaces or switch to the Labels view. Includes a search field and a toggle to show/hide inactive workspaces.
- Documents panel (centre) – lists all documents in the selected workspace. Supports search and right-click context menus.
- Details panel (right) – displays metadata tabs: Notes, Entities, Versions, Workspaces, and Labels.
- Preview panel – inline preview of the selected document. Can be collapsed via the ribbon to maximise working space.
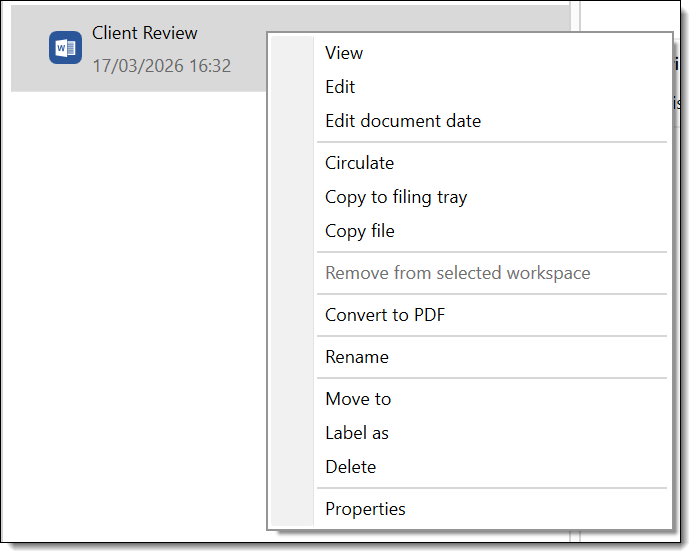
Right-click actions
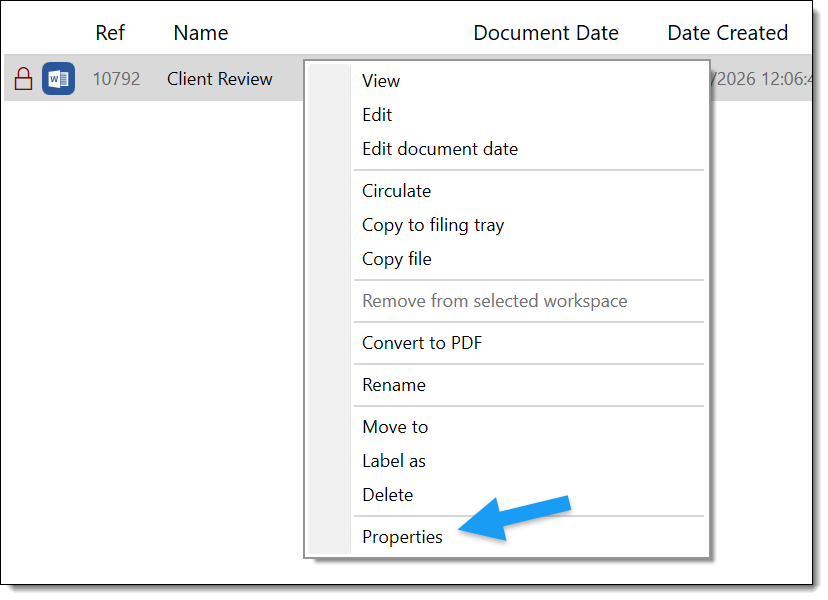
Right-clicking any document in the documents panel provides the following options:
- View document (read-only)
- Edit document
- Copy file to local machine
- Convert to PDF
- Rename, Move to another workspace, Label as
- Delete
- Properties
Uploading Documents
Documents can be added to PlainSail through three methods:
Drag and drop
Open the target entity's Documents tab, navigate to the desired workspace, and drag files directly from Windows Explorer into the documents pane. PlainSail will upload the files and assign them to the current workspace.
Upload button
Click the Upload Document icon in the ribbon toolbar to browse for files on your local machine. Select one or more files and confirm.
Filing tray
The filing tray acts as a temporary holding area. Navigate to Documents → Filing Tray to view items awaiting assignment. From here, link each document to the appropriate entity and workspace, then upload.
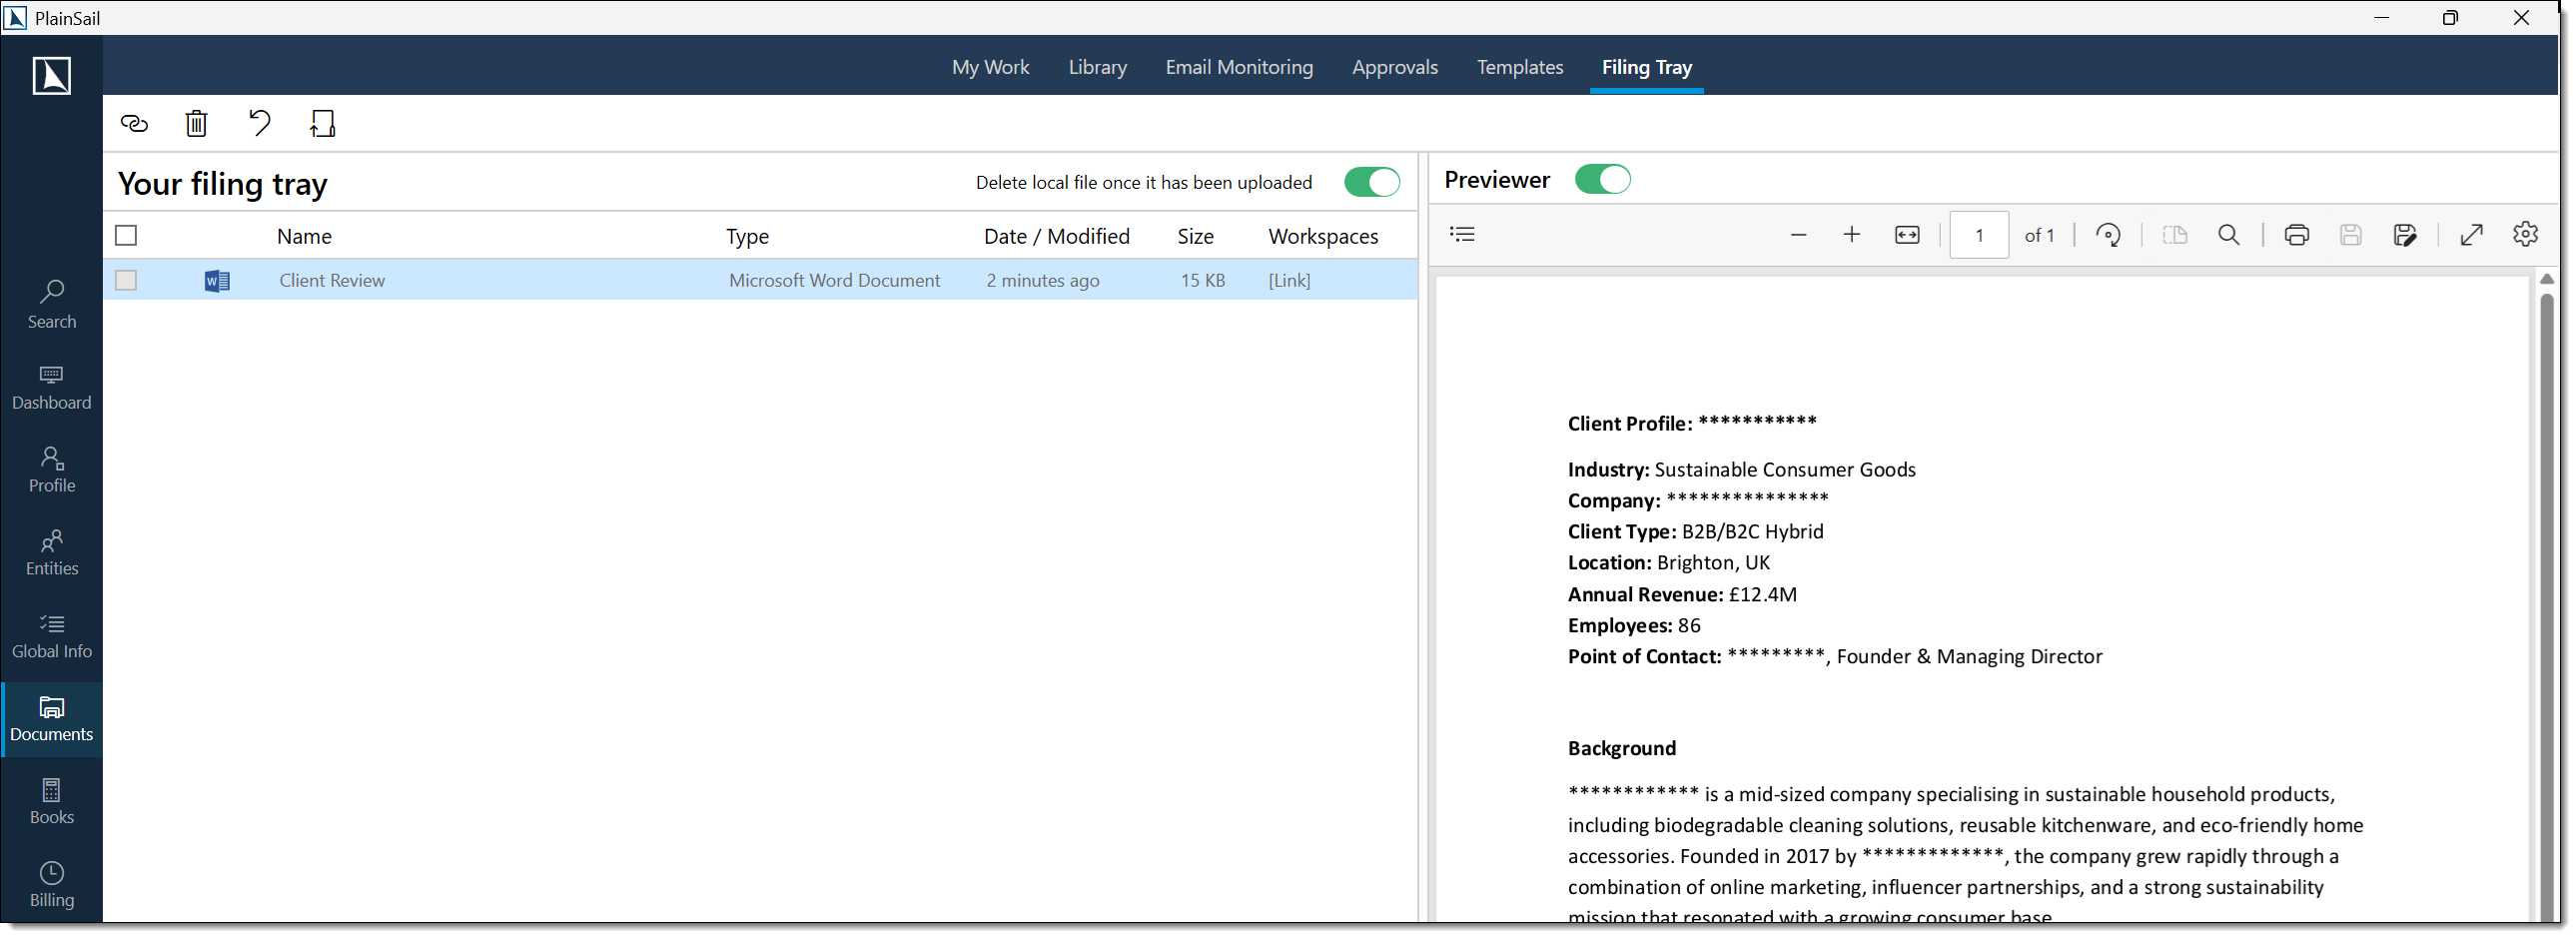
Accessing the filing tray
The filing tray is a local folder on your machine used to stage documents before filing them to entities. Access it from Documents > Filing Tray on the ribbon.
The filing tray folder location is configured per-user (stored in Application Settings as ScanInbox > pstLocation).
Adding files to the filing tray
- From the Document Library – select documents and press Ctrl+Y (Copy to Filing Tray).
- From Windows Explorer – copy files to your local filing tray folder.
- From Outlook – use the PlainSail Outlook Add-in to save emails – they may be routed to the filing tray depending on configuration.
Filing documents from the tray
Navigate to Documents > Filing Tray.
Select one or more files.
Click File.
Select the target entity and workspace.
Optionally select a label within the workspace.
Click Confirm to upload the files to PlainSail.
Editing & Check-in / Check-out
Opening a document for editing
Navigate to the document within its workspace.
Double-click the document or right-click and select Edit Document. The document is now checked out to you.
Make your changes in the associated application (e.g. Microsoft Word, Excel).
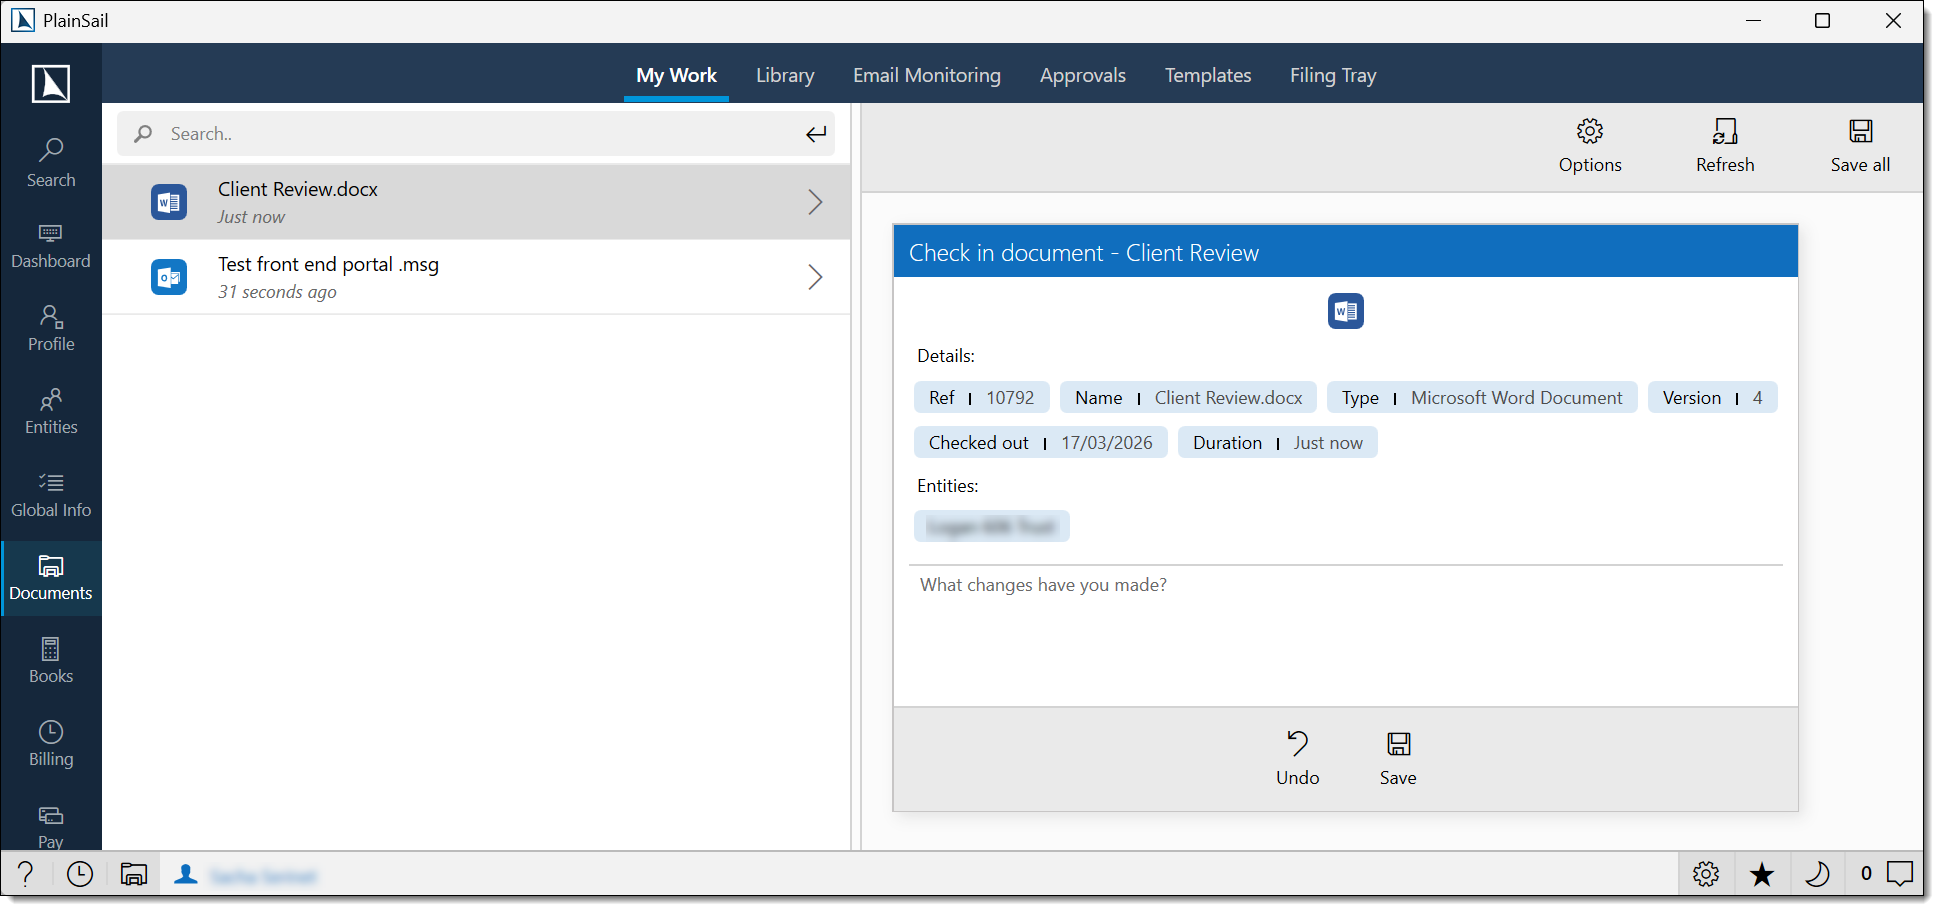
Save and close the application. Check the document back into PlainSail using the bottom application bar or via Documents → My Work → Save.
Edit a copy
If you need to experiment with changes without affecting the original, double-click and choose Edit a Copy. This creates a separate working copy that is not linked to the original version history.
Document Templates
PlainSail supports Word-based document templates with dynamic markers. When a template is launched, markers are automatically replaced with live data from the entity record – eliminating manual data entry and ensuring consistency.
Creating a template
Navigate to Documents → Templates → Entity.
Create a new Word document template and insert markers using the format {{ MarkerName }} – for example, {{ ClientReference }}, {{ EntityName }}.
Save and check the template back in. It is now available for use across all applicable entities.
Launching a template
Open the entity's Documents tab and click the Launch Template icon in the ribbon.
Select the target workspace, provide a document name, and choose the template.
Click Start. PlainSail generates the document with all markers replaced by live entity data.
Template Markers
When creating a document from a template, PlainSail replaces template markers (merge fields) with real entity data. Markers use double-brace syntax: {{MarkerName}}.
| Marker | Description |
|---|---|
{{EntityName}} | The full name of the entity. |
{{EntityRef}} | The entity reference number. |
{{EntityType}} | The entity type (Person, Corporate Entity, Trust, etc.). |
{{Date}} | The current date (formatted as dd/MM/yyyy). |
{{Address}} | The entity’s primary registered address. |
{{Jurisdiction}} | The entity’s jurisdiction of incorporation/domicile. |
{{Currency}} | The entity’s base currency code. |
{{UserName}} | The name of the currently logged-in user. |
{{CompanyName}} | The owning company name (configured in system settings). |
Reserved Template Files
The system uses certain reserved template filenames internally:
| Filename | Purpose |
|---|---|
_MasterTemplate.docx | The master Word template applied to new documents. |
_Remittance.docx | Template for payment remittance advices. |
_ClientInvoice.docx | Template for client invoices. |
_ClientInvoiceEmail.txt | Template for invoice email body text. |
_ShareCertificate.docx | Template for share certificates. |
_MasterPowerPointTemplate.pptx | Master PowerPoint template. |
Workspaces & Labels
Managing workspaces
Workspaces can be created, renamed, or deactivated by administrators. Each workspace defines a logical grouping and controls access permissions. A document can belong to multiple workspaces simultaneously.
Using labels
Labels provide sub-categorisation within workspaces. To apply a label:
- Right-click the document and select Label as.
- Choose from available labels or create a new one.
- To view by label, click the Labels toggle in the sidebar.
Default labels with date variables
PlainSail supports automatic label rotation using date variables. To configure default labels:
- Create an entity of type Group named
PlainSailTemplateGroup. - Add standard labels using variables:
@@CurrentYear,@@NextYear,@@PreviousYear,@@LastYear. - To vary labels by entity type, add member entities of different types to the group.
Version Control
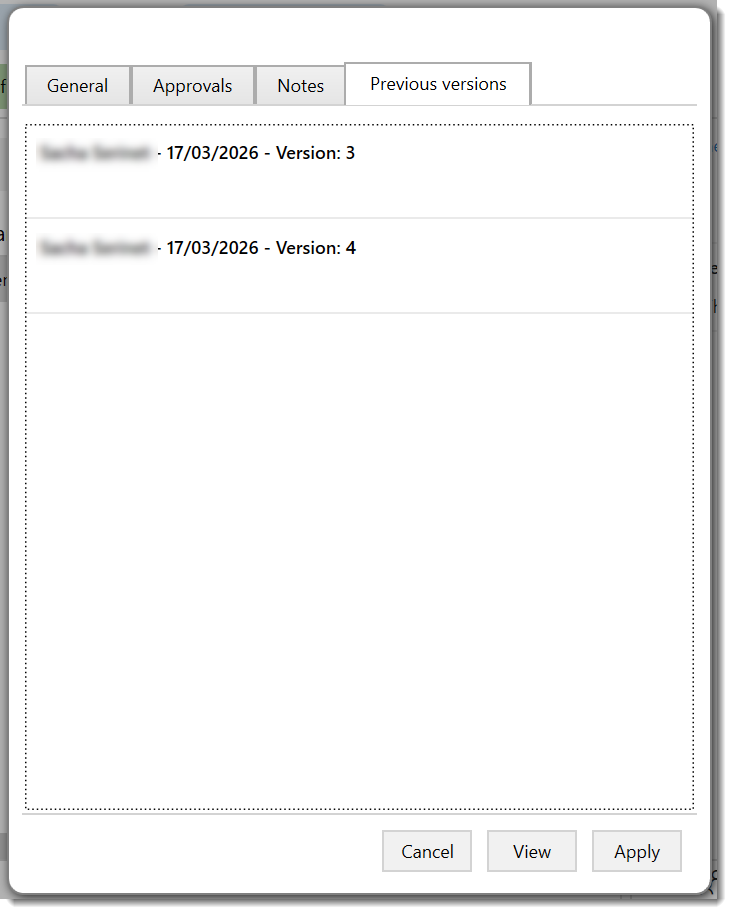
Every time a document is checked back in, PlainSail creates a new version in the version history. The details panel's Versions tab shows the complete audit trail.
From the Versions tab you can:
- View any previous version in read-only mode
- Rollback to a previous version, replacing the current version
- Manage retention – optionally configure PlainSail to retain only the last two versions to conserve storage
Circulation & Approval
Documents can be routed to one or more users for review and approval within PlainSail.
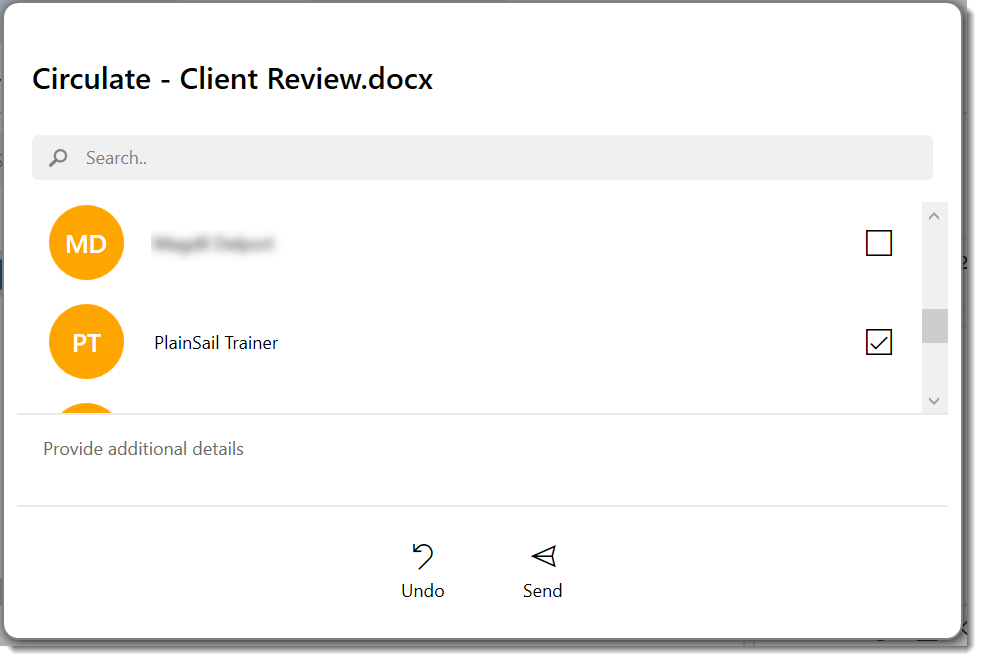
Initiating a Circulation
Select a document in the library.
Click Circulate for Approval or use the right-click context menu.
A circulation form opens where you select the approvers (one or more users) and add an optional message explaining what needs reviewing.
Click Send.
Each selected approver receives a notification in their Notification Centre and the document appears in their Dashboard Documents > Signing tab.
Approver Actions
| Action | Description |
|---|---|
| Approve | The approver confirms the document is acceptable. The circulator is notified. |
| Reject | The approver rejects the document with an optional reason. The circulator is notified. |
| Add Comment | The approver adds a comment without approving or rejecting. |
Workflow States
| State | Description |
|---|---|
| Pending | The document has been sent for approval but the approver has not yet acted. |
| Approved | The approver has approved the document. |
| Rejected | The approver has rejected the document. |
| Completed | All approvers have responded and the circulation is finished. |
Outlook Integration
PlainSail includes a Microsoft Outlook ribbon plugin that enables documents to be saved directly from your inbox.
- Manual save – select an email and click the PlainSail Save button in the Outlook ribbon to file it against an entity.
- Automatic prompt – when configured, PlainSail automatically prompts you to save outgoing emails to the relevant entity's document store.

Importing Documents
For entities migrating from an external file store, PlainSail provides a bulk import facility.
Navigate to the entity's Documents screen. If the entity has not yet been migrated, a link to the legacy folder will be displayed.
Click the Import icon. The import screen displays the source folders and the proposed workspace mappings.
Review the mappings, click Confirm, then Save to begin the upload. A confirmation dialogue will ask whether the entity is now fully using PlainSail documents.
Click Yes to confirm. The legacy file-share link is removed and the external folder should be locked down by your IT administrator.
Recovering Deleted Items
Deleted documents are retained in the recycle bin and can be recovered by administrators.
- Navigate to Admin → Documents → Recycle Bin.
- Use the date filters and Ctrl+F to locate the deleted item.
- Click Recover to restore the document to its original workspace.
Keyboard Shortcuts
The following shortcuts are available throughout the document management module:
- Ctrl+S – Circulate – opens the circulation dialogue for the selected document
- F2 – Rename selected document
- Ctrl+Enter – View / open selected document
- Ctrl+E – Email selected document
- Ctrl+C – Copy document to clipboard
- Ctrl+Y – Copy to filing tray
- Ctrl+Delete – Delete selected document
- Alt+Double-click – Open document in read-only mode
- F5 – Refresh the current view
Document Search
When searching in the Document Library:
| Feature | Description |
|---|---|
| Name search | The search bar filters documents by filename (partial match, case-insensitive). |
| Full-text search | When Azure Content Search is configured, the search also looks inside document content (Word, PDF, Excel, etc.). |
| Operators | No advanced operators (AND, OR, NOT) are supported in the UI search bar. |
| Minimum characters | At least 2 characters are required. |
Bulk Operations
| Operation | How | Notes |
|---|---|---|
| Bulk download | Select multiple documents, then use Copy to Clipboard (Ctrl+C) or Export workspace as folder. | Downloads to Windows clipboard or a local folder. |
| Bulk move | Select multiple documents, then click Move. Choose the target workspace/entity. | Moves all selected documents in one operation. |
| Bulk delete | Select multiple documents, then press Ctrl+Delete. | A confirmation prompt appears listing all selected documents. |
| Bulk label | Select multiple documents, then click Add Label. | Applies the selected label to all chosen documents. |
Audit Trail
Every document action is recorded in the entity’s timeline:
- Upload – who uploaded, when, filename, workspace.
- Check-out – who checked out, when.
- Check-in – who checked in, when, new version number.
- View – who viewed (read-only), when.
- Delete – who deleted, when.
- Move – who moved, from workspace, to workspace.
- Rename – who renamed, old name, new name.
- Circulation – who circulated, to whom, approval status.
Permissions Reference
The following permissions control access to document features:
| Permission | Description |
|---|---|
Documents_View | Access the Documents area and view documents. |
Documents_ViewPracticeManagement | View documents on practice management entities. |
DocumentTemplates_ViewCreateEdit | Access the Templates tab. Create and edit document templates. |
Documents_Delete | Delete documents. Without this permission the Ctrl+Delete shortcut and the Delete context-menu option are hidden. |
FAQ
Can a document belong to more than one entity?
Yes. Use the Entities tab in the details panel to link a document to additional entities. The document is not duplicated – all entities reference the same file.
How do I convert a document to PDF?
Right-click the document and select Convert to PDF. PlainSail generates the PDF and stores it in the same workspace alongside the original.
What happens if I forget to check a document back in?
The document remains locked to you until it is checked in. Other users will see it as checked out and will be unable to edit it. Navigate to Documents → My Work to view and check in all outstanding items.
Can I restrict who has access to a workspace?
Yes. Workspace permissions are managed at the entity and group level. Contact your system administrator to configure access restrictions for sensitive workspaces.
How do I search across all documents?
Use the Search icon in the ribbon toolbar to perform a cross-workspace, cross-entity search. The global search supports file name and content matching.
How do I find who checked out a document?
Look at the checked-out indicator on the document in the library. It shows the user’s name and the date of checkout. Alternatively, go to Admin > Documents > Checked Out Documents for a system-wide view.
How do I recover a deleted document?
Go to Admin > Documents > Recycle Bin. Find the deleted document and click Restore. The document is returned to its original entity and workspace.
What file types are supported?
PlainSail supports any file type for storage. File types with rich previewing include:
- Office:
.docx,.doc,.xlsx,.xls,.pptx,.csv - Images:
.jpg,.jpeg,.png,.bmp,.gif - PDF:
.pdf - Email:
.msg,.eml - Text:
.txt
Read-only file types (cannot be checked out for editing): .msg, .lnk, .zip, .eml.
How do I set up e-signatures?
PlainSail’s built-in circulation system is an internal approval workflow, not a legally binding e-signature. For legally binding e-signatures, contact your system administrator about third-party provider integration.
Can I share documents externally?
PlainSail does not have a built-in external document sharing feature. To share a document externally, check it out, copy the file, and send it via email or another external mechanism.
- Entities & Client View – navigating entity records where documents are stored
- Admin & Permissions – document templates, permissions, and system configuration
Test Yourself
How well do you know PlainSail's document management? These 10 questions cover the features and shortcuts that will save you time every day.